
The new FJ400 strobe’s Mask Function is an excellent tool for creating in-camera cutout masks of foreground objects for easy photo compositing.
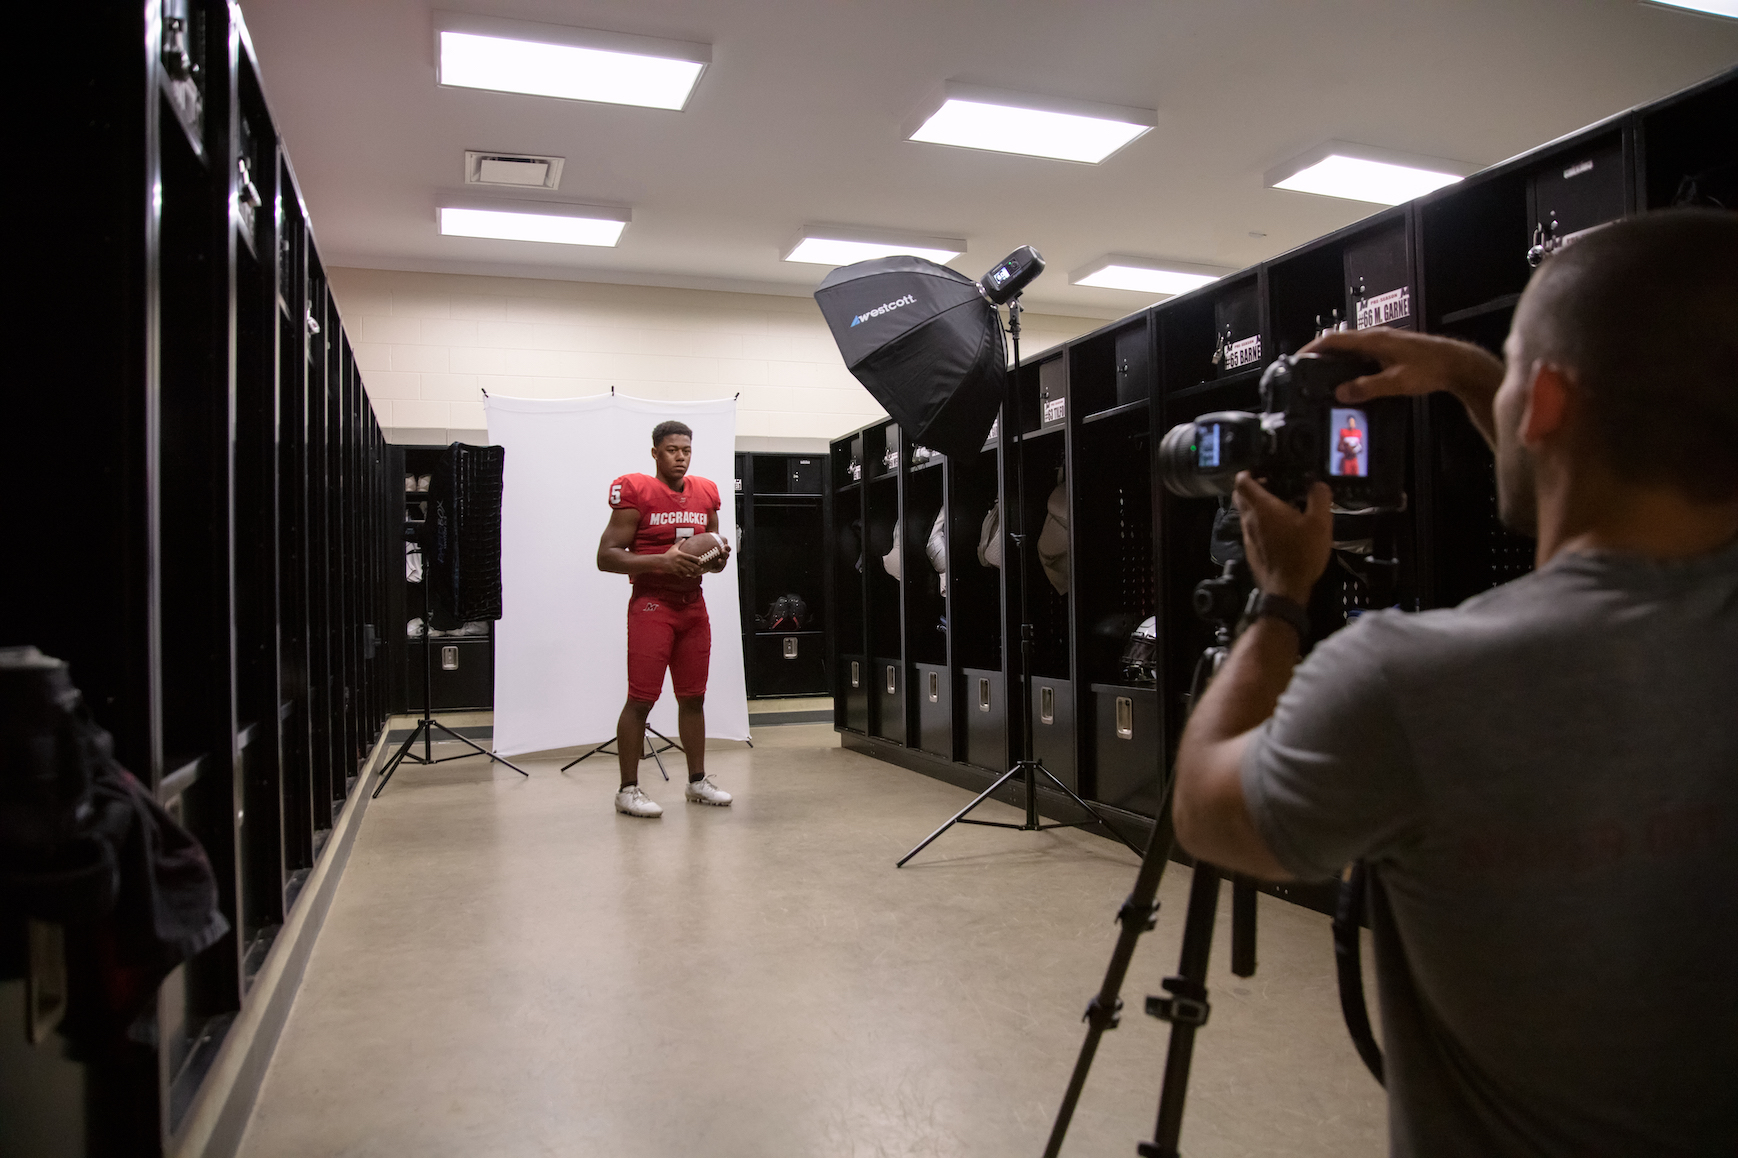
Photographer Matt Hernandez combines his background in graphic design, his love for photography, and his passion for sports to create unique and artistic athlete portraits and composites. Often times, Matt is photographing his athletic subject indoors which is where his photo compositing skills really shine. Equipped with his portable FJ400 3-light setup, Matt utilizes the strobe’s Mask Function to streamline his editing process.
When in the Mask Function on the FJ400, each strobe flashes in sequential order. The first flash exposes your background and the second flash exposes your subject. This allows you to simply open both images into your preferred photo editing program to create a perfect mask of the background. Photo compositing has never been easier!
For these images, Matt used a three-light setup. His key FJ400 is in a 36-inch Rapid Box Octa-M and his edge light is in a 1x3-foot Rapid Box Strip with an egg-crate grid. A bare FJ400 is placed behind his subject to light the white backdrop.
Mask Function Instructions
Mask Function is available in Manual Mode only and must be used with at least two FJ400 Strobes.
- After setting Manual Mode on the FJ400 in MENU 1, press Button 1 repeatedly until MENU 4 appears in the blue square at the top right of the screen.
- Press Button 2 (Mask) to activate mask functionality which will turn Button Icons 3 and 4 from disabled (gray) to enabled (black).
- Press Button 3 (All) to highlight the total number of exposures to be taken in the masking sequence (2-6). Rotate the control dial to the desired number. Press the center button and/or wait three seconds to engage your selection.
- Press Button 4 (SEQ#) to highlight where in the sequence of exposures this individual strobe will fire. Rotate the Control Dial to the desired number. Press the center button and/or wait three seconds to engage your selection.
- NOTE: Your selection choices (1-6) will be limited to the number of exposures you set in the “All” menu plus the number 1 for the first strobe(s) to fire in the exposure sequence of two or more. You can assign up to 20 individually programmed FJ400 strobes to a sequence order number (1-6).
Here’s a method to create a simple mask to isolate an image from the background:
- In Menu 4, Set Button 3 (All) to 2 on every strobe being used to create the two (2) masking images.
- Set Button 4 (SEQ#) on any strobe that’s lighting the foreground subject to the number 1 as they will light the first exposure.
- Set Button 4 (SEQ#) to number 2 on any strobe that’s lighting your white background. These strobes will fire with your second exposure. Light from the strobe(s) that is set on No. 2 should not spill onto the foreground subject to ensure a crisp mask.
Simple Post-Processing
After capturing the masked shots needed in the studio, Matt picked out a background shot from his selection of pre-shot outdoor locations and then jumped into post-processing in Photoshop. You can see his process in the video below.
Photoshop Instructions
- Open your background layer.
- Import and place your subject layer.
- Import and place your mask layer. You should now have three Photoshop layers.
- Invert your mask layer. Your subject should now appear white on a black background.
- Open the Channels panel. Hold Command (on Mac) or Ctrl (on PC) and click on any channel to select your subject.
- Click on your subject layer, and then apply the mask to that layer.
- Now, hide your mask layer.
- Gaze in admiration at your creation!


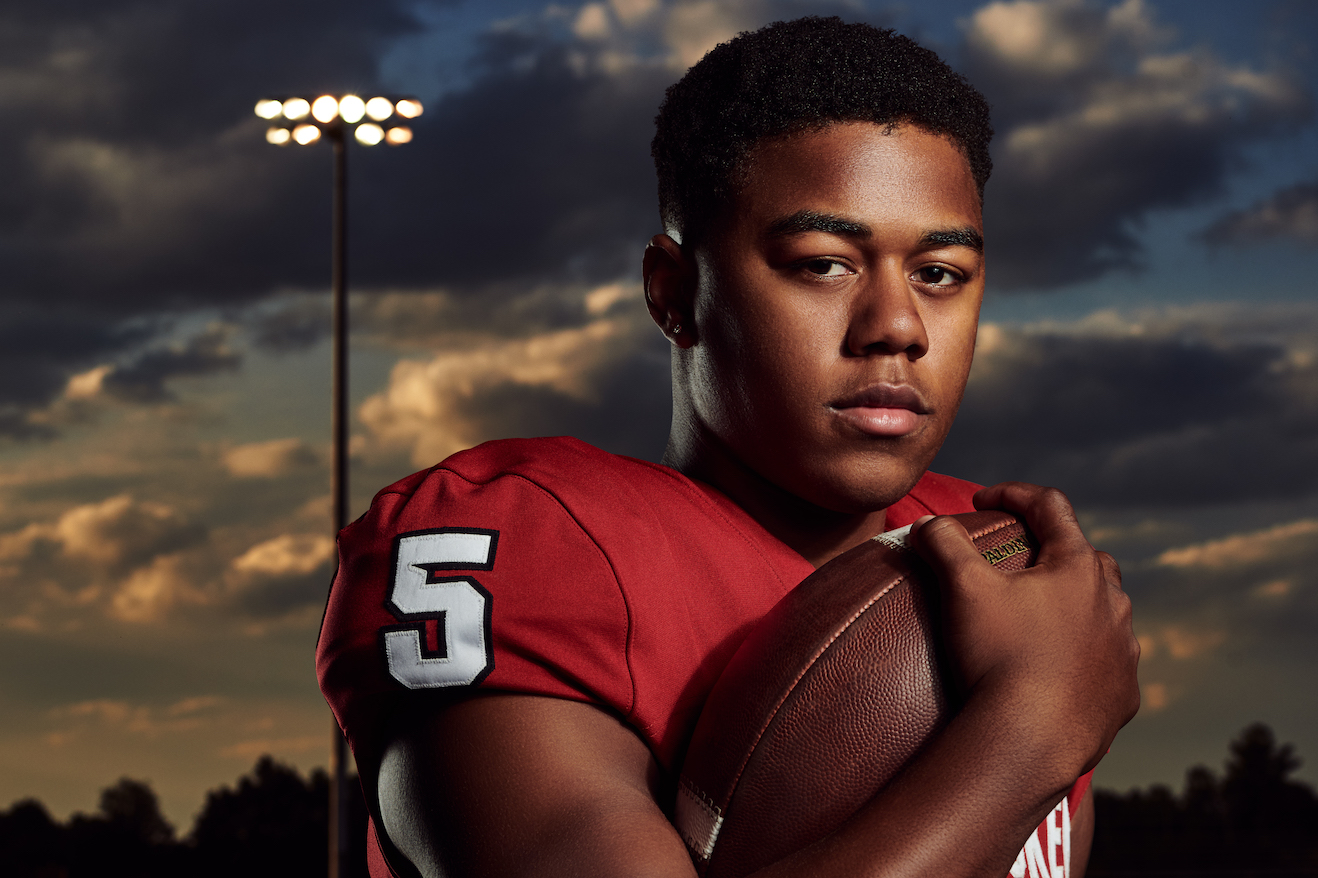
Final Composite Portrait

Final Composite Portrait
Watch more of Matt’s sports photography tutorials here.
Lighting Gear in Action


FJ-X2m Universal Wireless Flash Trigger4705

FJ-X2m Universal Wireless Flash Trigger4705


Light Stand (10')9910-N

Light Stand (10')9910-N
Leave a Reply
You must be logged in to post a comment.