
If you have ever picked up a beauty dish and wondered how to get the most out of it, this guide will show you everything you need to know. Photographer Joel Grimes walks through his full lighting approach using the Westcott Rapid Box Beauty Dish and explains how to use distance, angle, diffusion, and interior color to shape light with confidence. By the end, you will be able to create everything from soft portrait lighting to bold fashion looks with one modifier.
Gear Used in This Setup
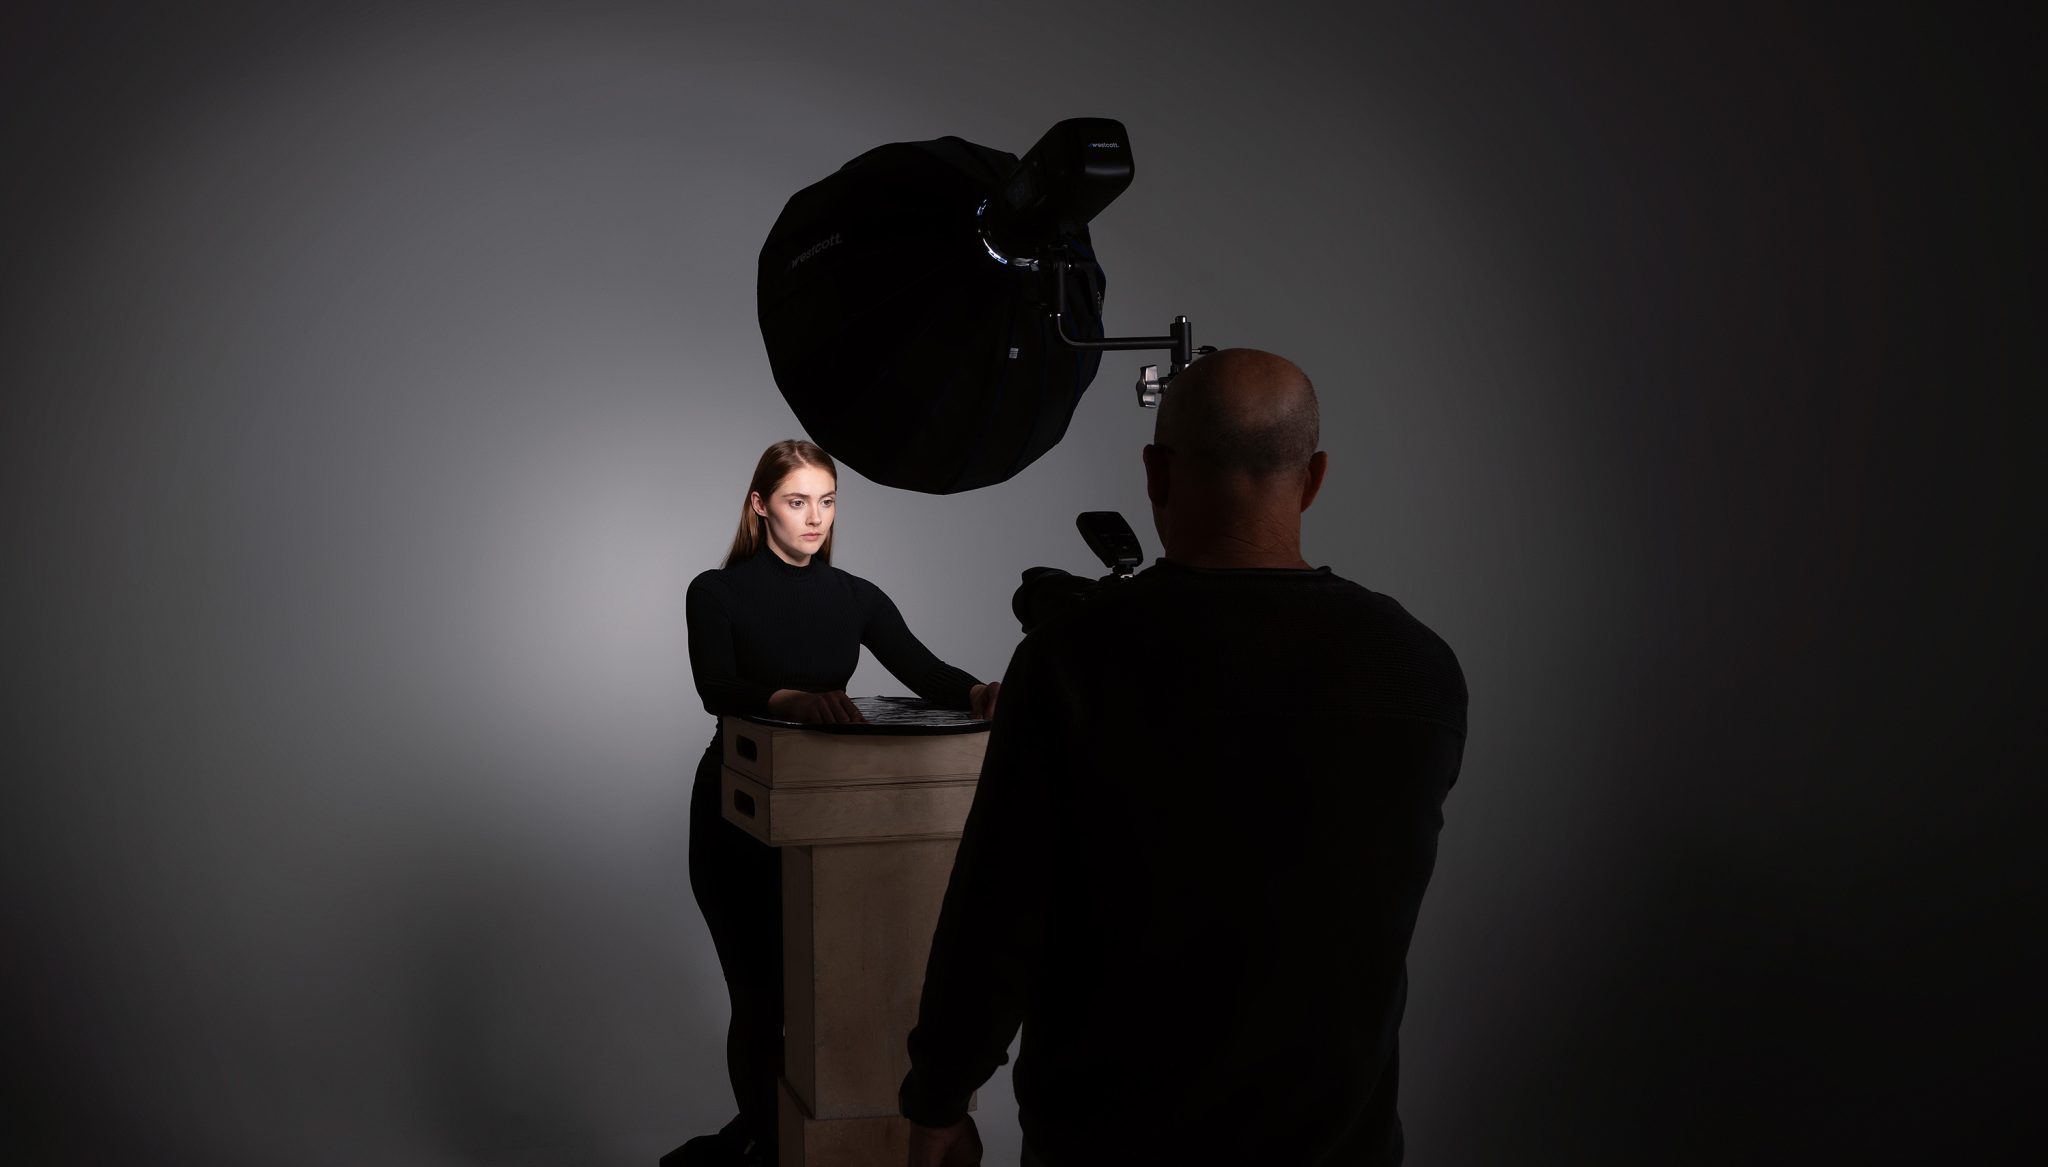
For this shoot Joel keeps his kit simple and strong. He uses the Westcott FJ400 II strobe paired with the Rapid Box Switch Beauty Dish. A Shorty Offset Arm helps him place the dish centered right over the camera, which is the ideal spot for shaping the cheeks and keeping the shadows even on both sides of the face.
He also brings in a 20-inch Illuminator Reflector to fill under the chin. The reflector is white on one side and silver on the other, which lets you control how bright that fill light becomes. White gives you a softer, gentle bounce, while silver adds more pop and lifts the shadows a bit more. For this demo Joel sticks with the silver side since it gives him the extra brightness he wants without needing a larger reflector.

Beauty Dish vs Softbox Lighting
So, what makes a beauty dish different than a softbox, and why do photographers reach for one over the other? Understanding this helps you know exactly when to use each modifier.
A softbox spreads light through a baffle, which gives you very even, gentle light from edge to edge. A beauty dish works differently. It uses a plate inside the modifier to bounce the light outward before it hits the front surface. This creates a brighter center with more shape and a little extra depth on the face.
Joel helped design this beauty dish and tested every prototype by photographing the front surface to make sure the light stayed smooth across the full 24 inches. That even spread is what makes the beauty dish such a great choice for headshots and close portraits.
Best Beauty Dish Distance for Portraits
One of the simplest ways to get better results with a beauty dish is choosing the right distance.
Joel likes to start with the dish about 24 inches from the subject, measured from the front diffusion to the tip of the nose. At this range the light stays soft and flattering, but you still get nice shaping through the cheeks and jawline.
If you bring the dish in closer, the light gets even softer. If you back it up, the light becomes harder and more dramatic.
White vs Silver Beauty Dish Interiors
The interior color of your beauty dish plays a big role in how your light looks, especially once you start changing distance and diffusion.
When the diffusion panel is on, both the white and silver interiors look fairly similar. The silver interior will give you a small boost in brightness, which can be helpful if you are using a lower power strobe or shooting in bright conditions. The overall quality of the light still stays soft and even.
Once you remove the diffusion, the difference becomes much more noticeable. The silver interior acts like a stronger reflector, creating more contrast and a tighter, more focused beam of light. This is why a lot of fashion photographers prefer silver when they want crisp shadows and a punchier style.
The white interior stays a bit smoother and more forgiving. It still has shape, but the transitions between highlights and shadows are softer. This makes white a great choice for portraits, beauty work, or anytime you want a gentle, flattering look.


Beauty Dish Diffusion vs Bare Dish
The front diffusion panel gives you quick control over how soft or hard your beauty dish light looks.
With diffusion on, the light spreads evenly and becomes smooth and forgiving. This is ideal for beauty portraits and clean headshots because it softens highlights and shadows.
With diffusion off, the light becomes stronger and more contrasty. You see more texture and sharper shadows, which adds drama. Joel also removes the diffusion outdoors to get extra power when shooting in bright sun.
Both options are helpful, and switching between them is an easy way to change the mood of your image.


How to Use a Beauty Dish Grid
A grid helps narrow the beam and reduce spill. With a beauty dish it gives a more dramatic look by tightening the shadows and keeping the light off the background.
Joel likes using the grid when he wants more contrast or when he is shaping the face. Because the grid limits bounce from the reflector, the shadows get deeper, and the portrait feels more sculpted.


How High Should a Beauty Dish Be Positioned
Shadow placement is one of the most important things to watch when using a beauty dish.
If the dish sits too high, the nose shadow drops down and touches the lip which usually is not flattering. If it sits too low, the light becomes flat and you lose the shape that makes beauty dish lighting so appealing.
Joel aims for a gentle shadow that sits just above the lip. This creates nice cheek definition, a clean jawline, and that classic beauty look. Every person is a little different, so small adjustments up or down can make a big difference.


Controlling Background Brightness with Light Distance
Your distance to the background has a big impact on how bright or dark it appears, and you can change it without adjusting your flash at all.
When your model stands closer to the background, more light spills onto it, which makes it appear brighter. When your model steps farther away, the light fades before it reaches the wall, so the background becomes darker.
Joel uses this simple trick all the time. By moving his model just a few feet forward or back, he can turn a white sweep into a medium gray or a soft light gray. It is a quick way to control your background tone and create different looks with the same setup.


Using a Beauty Dish for Hard Fashion Lighting
A beauty dish is not only for soft studio portraits. When you place it far away, it turns into a small, hard light source that creates sharp, defined shadows. This look is very popular in fashion photography because it adds drama and brings out angles in the face.
Joel often backs the dish 15 to 20 feet from the model when he wants a bold, punchy style. At that distance the beauty dish behaves almost like a spotlight. The shadows under the chin and nose become crisp, the highlights look stronger, and the whole image takes on a clean editorial feel.
Another bonus of placing the light far back is how it affects the background. Because the light falloff becomes more even at long distances, the background stays brighter and more consistent. This is great for fashion or commercial shoots where you want a sharp subject with a simple, polished backdrop.
This setup shows how versatile a beauty dish can be. With one quick change in distance, you can shift from soft portrait lighting to a striking fashion look that feels ready for a magazine cover.


Unlock the Full Potential of Beauty Dish Lighting
The more time you spend with a beauty dish, the more you realize how versatile it really is. One modifier can give you soft beauty portraits, crisp fashion images, and everything in between. Joel’s process shows that lighting does not have to be complicated to be effective. Small adjustments create big results. Use these ideas as a foundation and keep experimenting. The more you explore, the more creative possibilities you uncover.
Want to See More of Joel Grimes’ Work?
Check out How to Simulate Sunlight in Studio Photography, where Joel shows how to use two lights to recreate the look of natural sunlight in the studio.


You must be logged in to post a comment.