
Photo umbrellas are a portable and inexpensive way to modify a light source. But because there are so many sizes and color options, choosing one can be a bit intimidating.
Photo umbrellas are a portable and inexpensive option for modifying a light source to a desired result. An umbrella can be used with virtually any style of light, including sunlight, off-camera speedlites, strobes, monolights, and continuous light sources.
The portraits below compare the “hard light” created by a bare speedlite with a softer light created by a modified speedlite.


Umbrella Style Options
When purchasing an umbrella, the first thing a photographer should determine is whether they want a shoot-through umbrella, a reflective umbrella, or both.
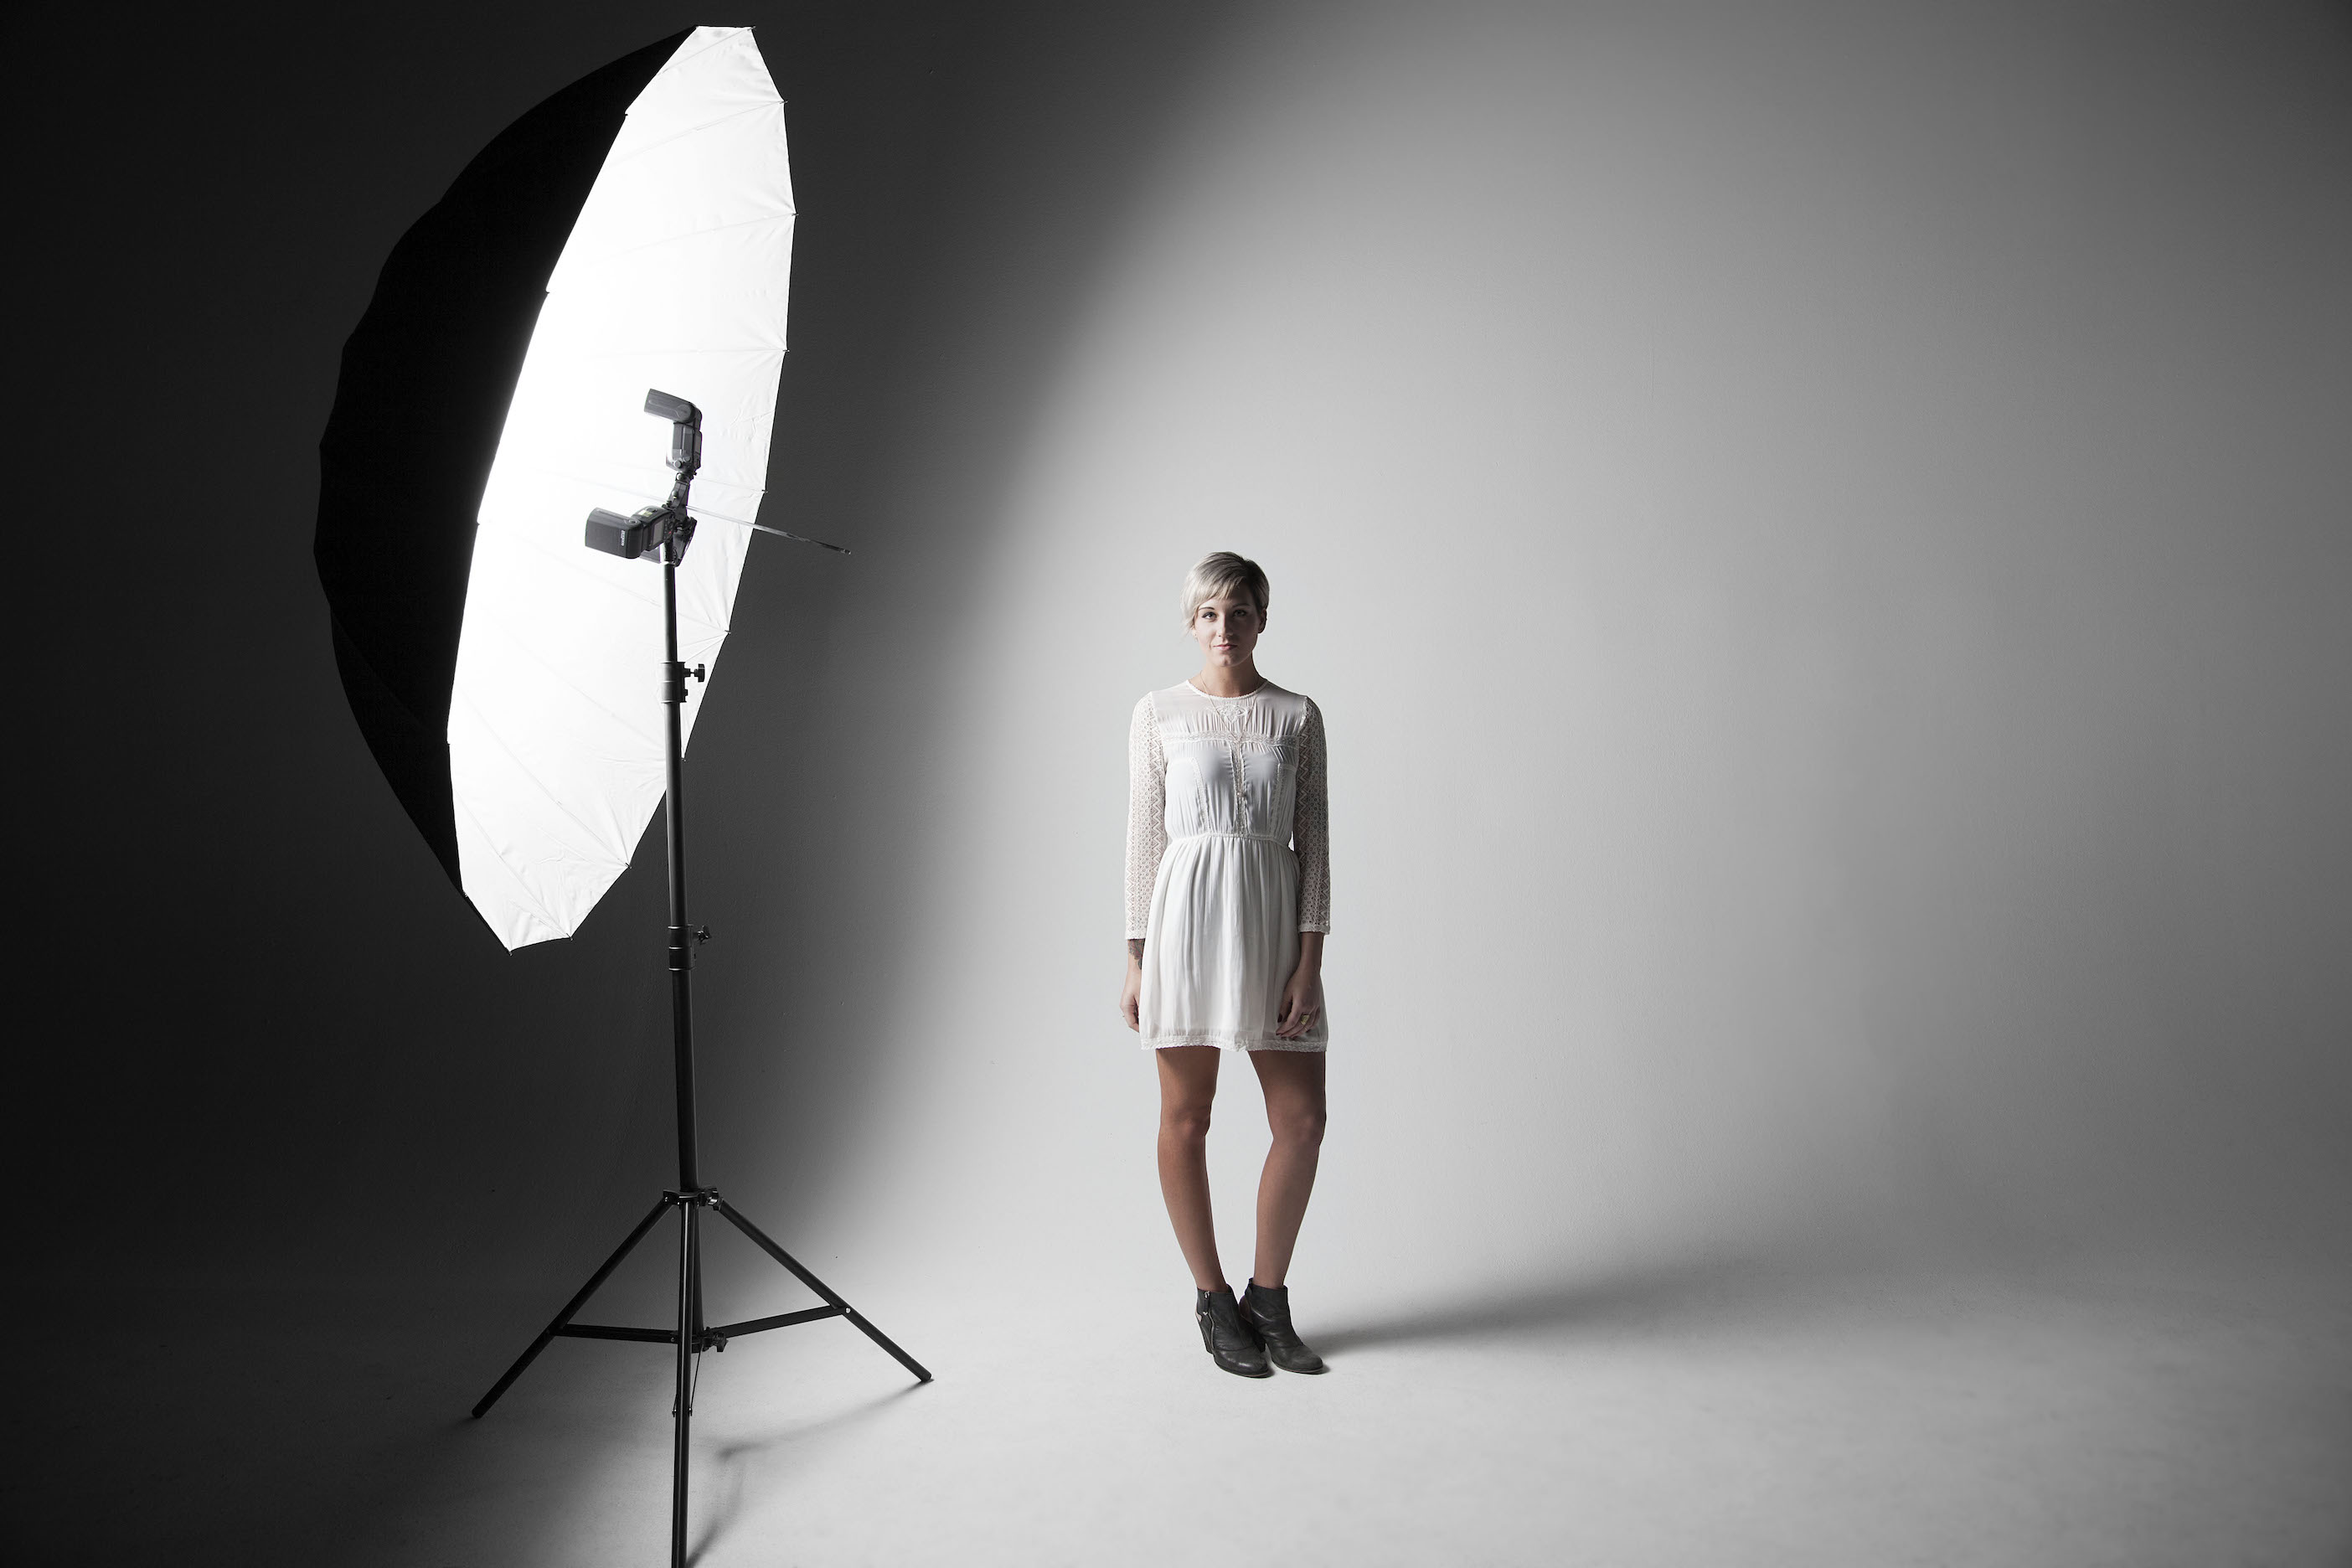
Shining a light source through a shoot-through umbrella results in a broader and softer light. This light placed very close to a subject, since the shaft of the umbrella is pointed in the opposite direction. As demonstrated below, the light source is pointed directly at the subject and the umbrella placed between them.


Shoot-through umbrellas are very versatile. Since these umbrellas spread the light’s output to about 180 degrees, they can be placed close to a single subject or pulled back to illuminate a group. However, because these umbrellas are designed to spread light and not maximize it, many photographers will utilize 2 or 3 lights to maintain power when photographing a large group or product.


When using reflective umbrellas, photographers point their light source away from their subject into the umbrella to reflect light back onto the subject. This is typically referred to as “bouncing light”.


Reflective umbrellas are designed to maximize output and direct light, unlike shoot-through umbrellas. These umbrellas give photographers the ability to move the light source further away from their subject while effectively maintaining output.


Photographers who commonly switch between bouncing and diffusing light (or new photographers who aren’t sure which they’ll do most often) can purchase a convertible umbrella. A convertible umbrella is a white diffusion umbrella with a removable black cover.

Convertible Umbrella
The black cover on this umbrella blocks light from escaping and effectively bounces the light back like a reflective umbrella. This cover can be removed easily to convert the umbrella into a standard shoot-through.
What surface color of umbrella should I buy?
A white shoot-through umbrella creates a broad and extremely soft light source. These umbrellas are ideal for photographers lighting large areas or groups of people. These umbrellas aren’t as efficient with light output and many photographer’s find themselves increasing their light’s power settings when using them.
A silver reflective umbrella maximizes light output and creates a crisp, edgy look. Silver umbrellas are ideal for photographers who want to harness as much of their light’s power as possible. These umbrellas are perfect for creating dramatic portraits with cooler tones.
A white reflective umbrella is efficient at maximizing light output creating a softer look. White umbrellas are ideal for photographers who want to maintain their output while creating a light that is less dramatic and neutral.
As state previously, a convertible umbrella gives photographers the best of both worlds and is an ideal choice for new photographers or photographers that shoot a variety of subjects.


What size of umbrella should I buy?
Westcott offers umbrellas in sizes ranging from 32” to 7’. When choosing size, the general rule of thumb is that the larger the light source in relation to your subject, the softer the light will appear.


However, you need to consider travel. What size of umbrella will fit in your gear bag or case? If you’re looking for a larger light modifier but need a compact form, our telescoping collapsible umbrellas are a great choice. These collapsible umbrellas open up to 43” but collapse down to only 15”.
We often hear shooters say that they can’t use a large umbrella because their speedlite or flash isn’t powerful enough. Considering the recent advancements in technology (especially if your flash is under 4 years old), speedlites available today pack a serious punch and should work great with all umbrellas.
If you have an older or less powerful flash, then we recommend using a Triple Threat adaptor, which allows photographers to mount up to three speedlites within their umbrella to increase overall output.
How should I light my umbrella?
You need to make sure that the light produced by your preferred light source is filling up your umbrella without spilling over the edges. The best way to determine the position of your light is to take an underexposed test shot of the face of the umbrella. If you notice a hot spot or unevenly bright area of the umbrella, adjust your light source further back on the umbrella shaft until the light coverage is even.


Many newer speedlites allow photographers to change the zoom or focus on their flash. can be helpful in filling the entire umbrella. Hot spots aren’t always a bad thing, though. You may also choose to place your light source closer to the umbrella. When you move it closer, you get a tighter circle and it will produce deeper shadows on your subject and more noticeable light fall-off.


How should I mount my umbrella?
Most studio-style lights and strobes have a simple umbrella receptacle that the umbrella shaft can slide into. They are commonly located at the bottom of the light, built into the light’s tilter bracket. Sometimes they are actually located within the light head.


If you are using a speedlite, you’ll need to use a common shoe-mount bracket with a built-in umbrella receptacle that will mount your speedlite to a light stand. Our versatile Adjustable Shoe Mount Speedlight Bracket is the perfect solution for speedlite photographers. This bracket features a built-in umbrella receptacle, tilting knob, and can mount virtually any speedlite. When purchasing a shoe-mount bracket, be sure that the shoe mount is adjustable. Speedlite mounts can vary and may not be compatible with every bracket.
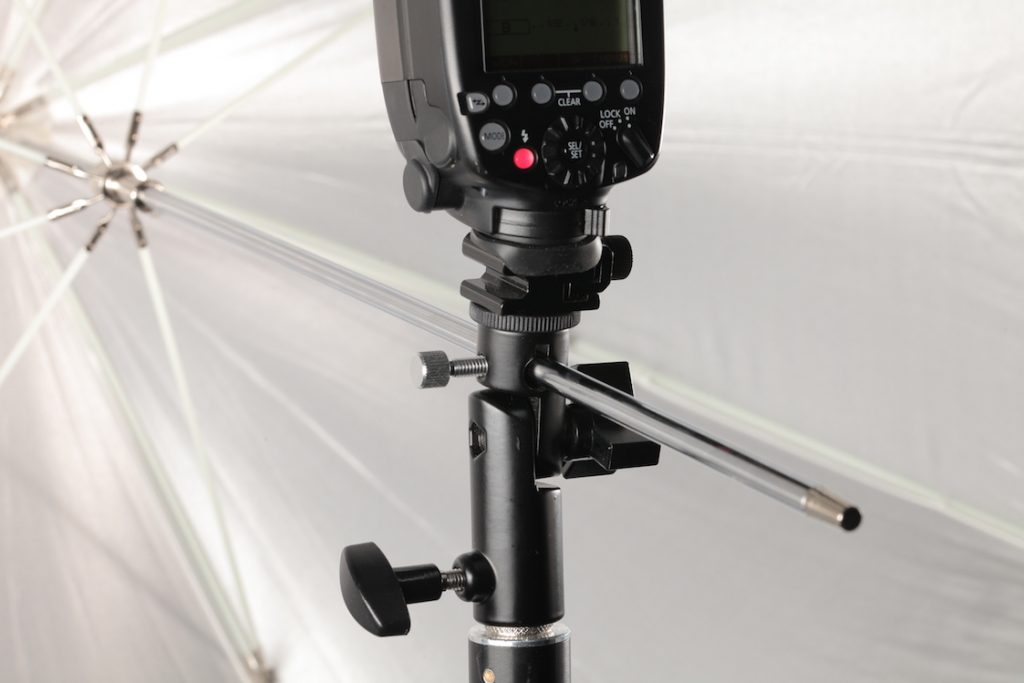
Umbrella Receptacle on a Shoe Mount Bracket
If your studio-style light does not have an umbrella receptacle, you can utilize a Tilter Bracket. These brackets are easy to use and allow for exact positioning of your umbrella and light. The Westcott Tilter Bracket is designed with two stand receptacles, one for your light and one for your stand. When mounting, be sure to place the end with the umbrella receptacle toward the top as this will allow you to tilt your umbrella and light simultaneously.
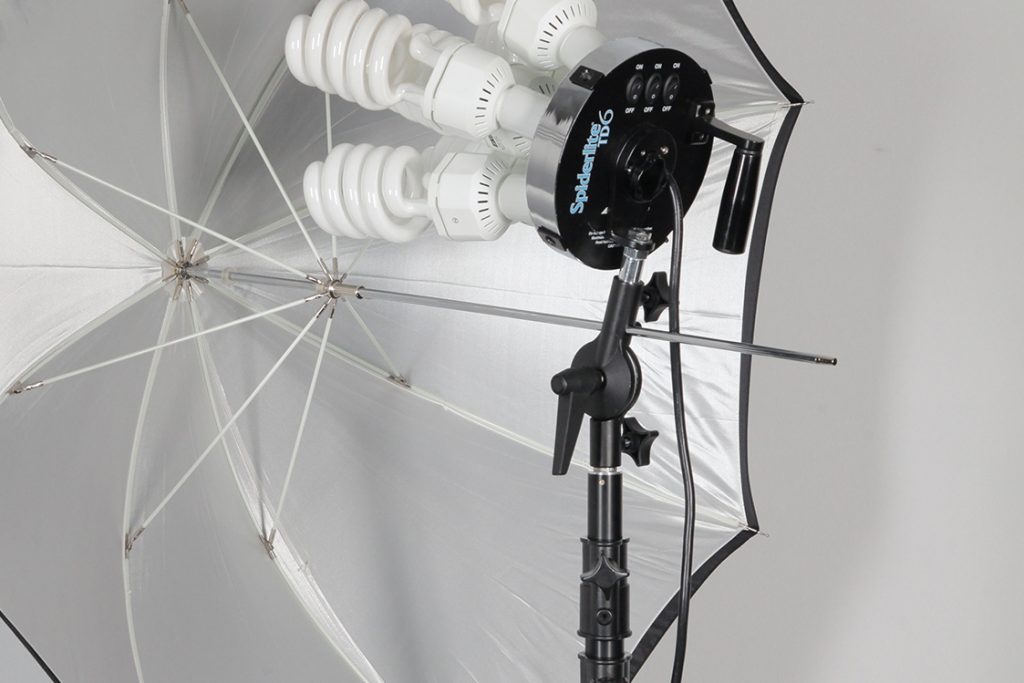
Umbrella Receptacle on a Tilter Bracket Mounted on a Spiderlite
And, if you’re looking for more power, check out the popular Triple Threat Speedlite Bracket. This bracket perfectly centers onto the shaft of any umbrella and allows mounting of up to 3 speedlites. Mount this bracket quickly to a stand with its built-in light stand threads or combine this with the Adjustable Shoe Mount Swivel Bracket for tiltable mounting.
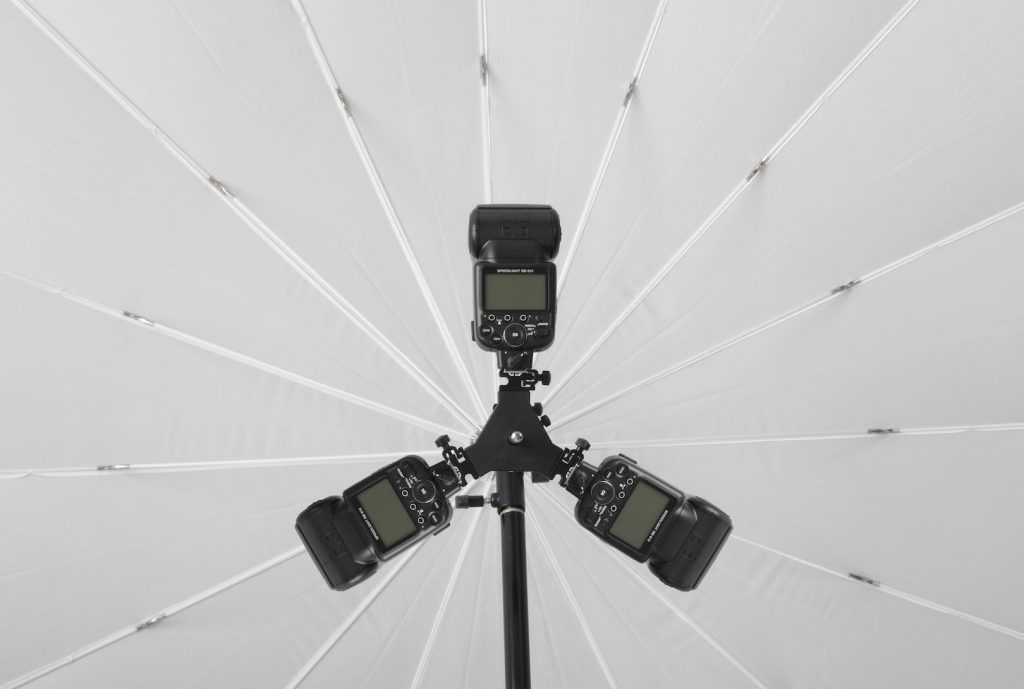
Umbrella Receptacle on a Triple Threat Bracket
Available Umbrella Options
Shoot-Through Umbrellas
Standard Umbrella - Optical White Satin Diffusion (32") • Compact Collapsible Umbrella - Optical White Satin Diffusion (43") • Standard Umbrella - Optical White Satin Diffusion (45") • Standard Umbrella - White Diffusion (7')
Silver Reflective Umbrellas
Standard Umbrella - Soft Silver Bounce (32") • Compact Collapsible Umbrella - Soft Silver Bounce (43") • Standard Umbrella - Soft Silver Bounce (45") • Standard Umbrella - Silver Bounce (7')
White Reflective Umbrella
Standard Umbrella - White/Black Bounce (7')
Convertible Umbrellas
Convertible Umbrella - Optical White Satin with Removable Black Cover (32") • Compact Collapsible Umbrella - Optical White Satin with Removable Black Cover (43") • Convertible Umbrella - Optical White Satin with Removable Black Cover (45") • Convertible Umbrella - Optical White Satin with Removable Black Cover (60")
Umbrella Kits
Compact Collapsible Umbrella Flash Kit - Optical White Satin with Removable Black Cover (43") • 7-Foot Umbrella Bundle
[…] چترهای عکاسی یکی از ارزان ترین اصلاح کننده های نور است. آنها اغلب یکی از اولین اصلاح کنندگان نور هستند که برای خرید نور خارج از دوربین عکاسان تازه وارد هستند. چترها ممکن است برای مبتدیان مناسب باشند ، اما هنوز هم نکاتی وجود دارد که باید قبل از خرید اولین چمدان بدانید. اول ، دو نوع اصلی از چترهای عکاسی وجود دارد و سومی که شامل هر دو نوع در یک نوع است. شلیک از طریق چتر یک چتر سفید است. پارچه سفید چتر نور را روی سطح وسیع تری پخش می کند. این نوع برای روشنایی یک منطقه بزرگتر ، مانند گروهی از افراد ، بهترین است. چترهای سفید نور و همچنین چترهای سیاه را کنترل نمی کنند. از آنجا که آنها نور را در سطح وسیع تری پخش می کنند ، باعث کاهش درخشش آن نور بیش از انواع اصلاح کننده دیگر می شوند. چتر سیاه چتر بازتابی است. قسمت بیرونی چتر مشکی است ، در حالی که داخل آن سفید یا نقره ای است. این چترهای بازتابنده نور را به جای نرم شدن هنگام عبور از چتر ، به عقب برمی گردانند. چترهای انعکاسی میزان بیشتری از نور را حفظ می کنند ، اما نور را تا حد زیادی پخش نمی کنند ، که همچنین می تواند کنترل آن را آسان تر کند. چتر مشکی با آستر سفید نور ملایم تری نسبت به همان نوع چتر با پوشش نقره ای ایجاد می کند. چترهای کانورتیبل چترهای سفید با روکش مشکی هستند. با برداشتن پوشش ، این چترها از طریق چترها شلیک می شوند. پوشش را اضافه کنید ، و چتر به یک چتر بازتابنده تبدیل می شود ، و از سطح سفید می پرد. اگر مطمئن نیستید که چتر بازتابنده یا شلیک از چتر را انتخاب کنید ، چتر قابل تبدیل گزینه عالی است. همچنین هزینه چندانی هم ندارد. چترهای کانورتیبل امکان یک روش روشنایی پیشرفته تر به نام پرچم گذاری را دارند. علاوه بر انتخاب نوع چتر ، اندازه نیز هنگام انتخاب چتر عکاسی اهمیت دارد. هرچه چتر بزرگتر باشد ، نور آن نرمتر می شود. بیش از حد بزرگ ، و کنترل چتر دشوار خواهد بود. اگر تا به حال از چتر بارانی منظم در طوفان استفاده کرده اید و برای کنترل آن در مقابل باد تلاش کرده اید ، قبلاً پیش نمایشی از کار در فضای باز و در شرایط باد با چتر عکاسی دارید. برای یک چتر بزرگ یا یک روز باد ، باید پایه سبک خود را در کیسه های شن قرار دهید. این باعث می شود چتر از پشت آن را برعکس نکند. گزینه دیگر این است که کیف دوربین خود را به پایه سبک قلاب کنید تا وزن آن کم شود. من از چتر قابل تبدیل 45 اینچی استفاده می کنم. به اندازه کافی بزرگ برای گروه های کوچک و به اندازه کافی نرم برای پرتره های فردی ، اما به اندازه کافی کوچک است که می تواند برای عکاسی در محل استفاده شود. اگر قصد دارید فقط در استودیویی با استروب های قدرتمند کار کنید ، احتمالاً می توانید با یک چتر بزرگتر هم کنار بیایید. مارک های مختلف چتر با قیمت های مختلف می نشینند. به طور معمول ، مزیت خرید با مارک گران تر ، ماندگاری و طول عمر است. در برخی موارد ، به ویژه با چترهای نقره ای ، نام تجاری می تواند کمی بر کیفیت نور تأثیر بگذارد. […]