
Great outdoor portraits start with seeing the light, not fighting it. In this video, portrait photographer Eli Infante shows how a small, portable flash setup can help you work faster and get better portraits on location. He walks through how he creates clean, natural looking portraits using simple light placement and easy adjustments, all without heavy stands or complicated gear.
Start by Looking Around Your Location
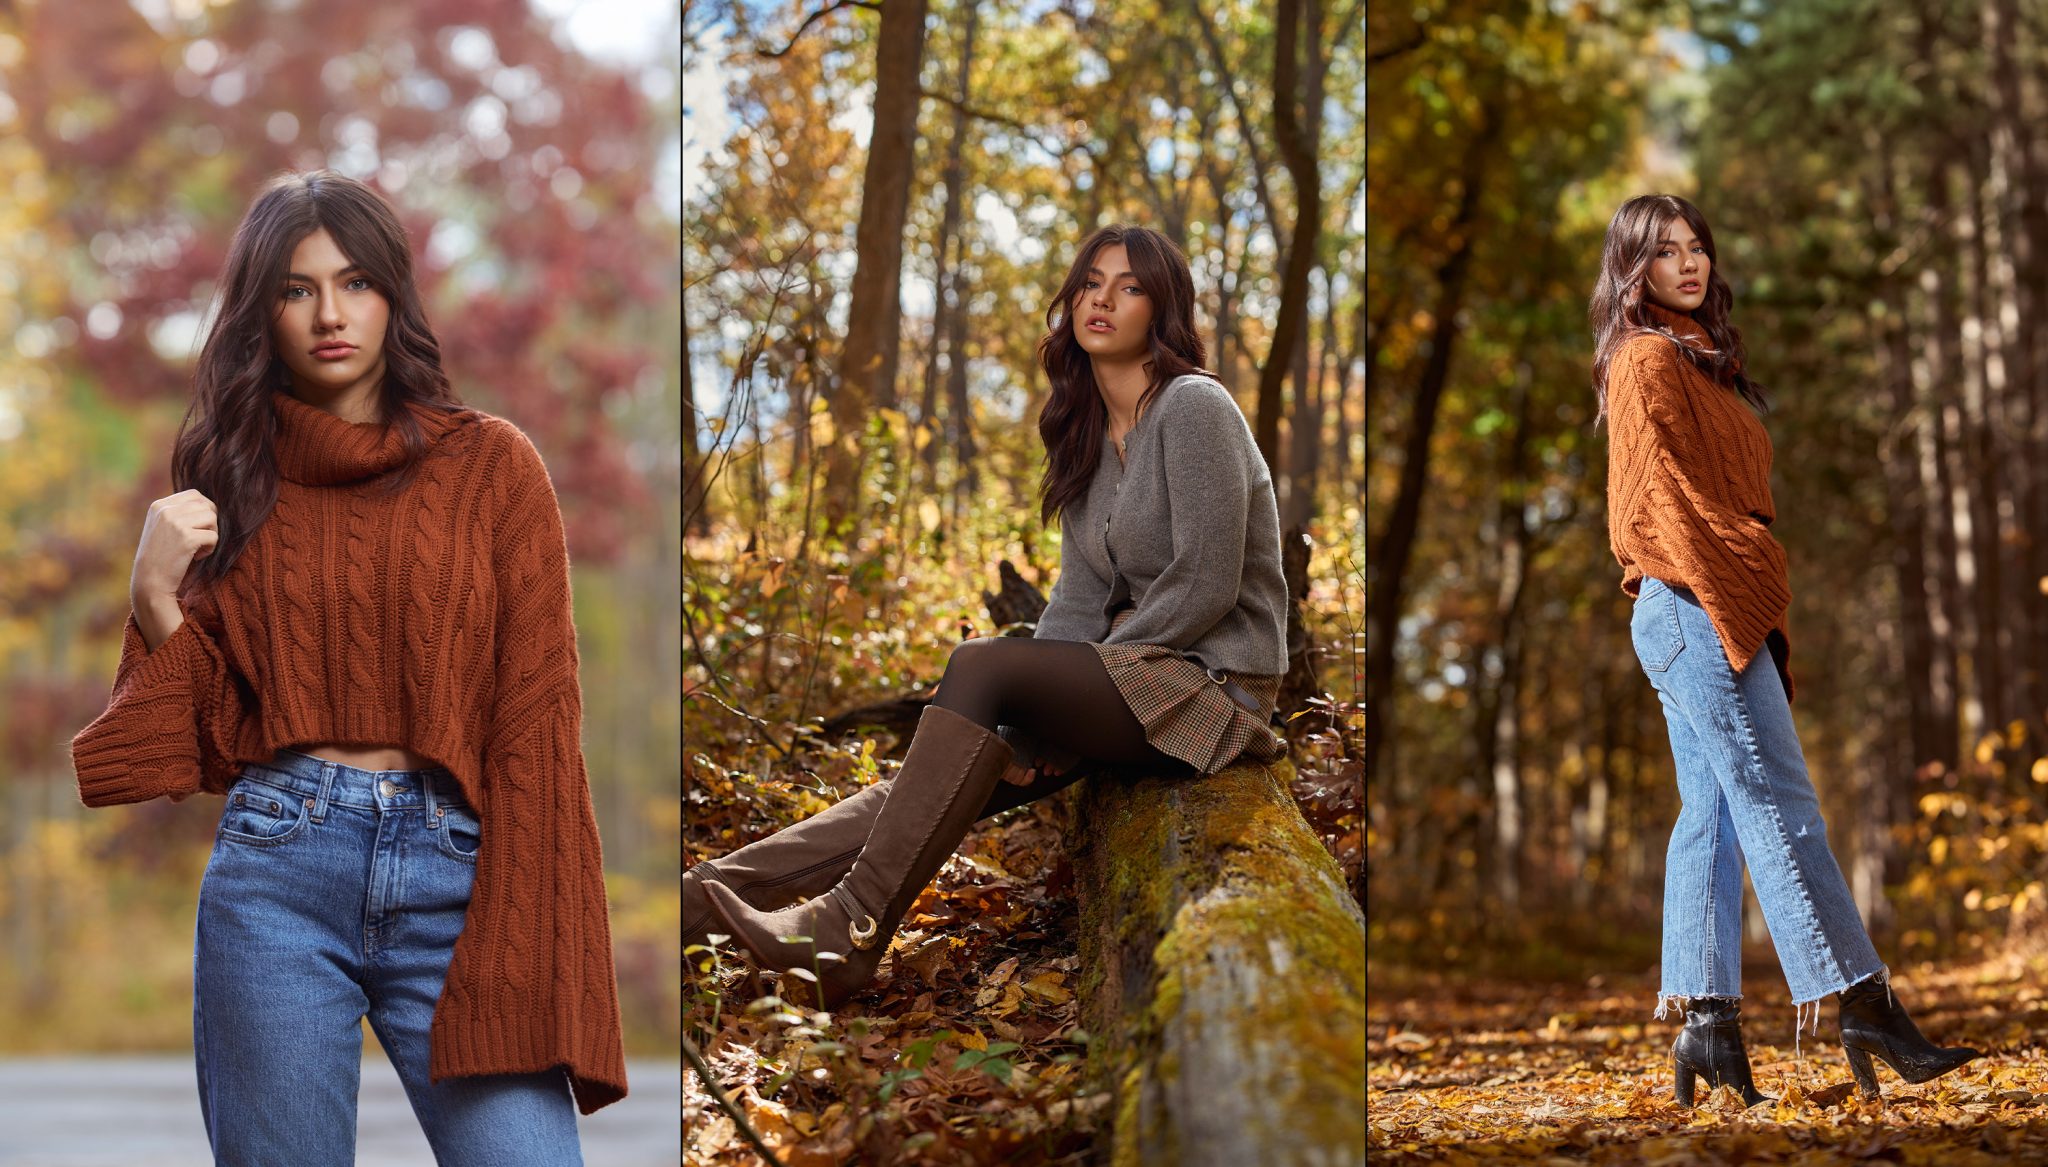
Before setting up any light, Eli takes time to walk the area. This is one of the most important habits you can build as a photographer. He looks at where the sun is coming from and how it hits the background. Some areas are brighter and more colorful because the sun is hitting the leaves. Other areas feel softer because they’re shaded.
By simply turning around, the background changes from bright greens to warm yellow tones. Both can work. The key is noticing what the light is doing and choosing the look you want instead of standing in one spot the whole time.
Eli also pays attention to what is on the ground. Dirt and mud can easily end up in the frame. By moving the subject a few steps toward fallen leaves, the scene instantly feels cleaner and more intentional.
Fast and Portable Lighting Gear
One of the reasons this shoot moves so smoothly is the gear choice. Eli keeps everything lightweight and easy to carry, starting with the . It is small enough to stay mobile and powerful enough to balance outdoor light. Paired with the collapsible 24-inch Rapid Box Beauty Dish Switch with a white interior, the light stays soft, clean, and flattering without adding bulk.
Eli uses the FJ-T1 Trigger to adjust power on the fly as the light changes. The light is mounted using a Paint Pole Adapter, turning a simple painter’s pole into a handheld light stand. This setup removes the need for traditional stands and makes it easy to move quickly, shift angles, and grab multiple looks without slowing down.
Match Your Flash Direction to the Sun
To keep the lighting looking natural, Eli places his flash on the same side as the sun. When your artificial light follows the direction of natural light, the final image feels more believable and less forced. He checks the light on the face and watches how shadows fall. This helps the flash blend in instead of fighting the sun. Small changes in where you stand or where the light is placed can make a big difference.


Choose Camera Settings That Keep the Color
Eli loves shooting wide open, with maximum aperture, but he explains why that is not always the best choice outdoors. If the background is blurred too much, all the color disappears. In a location full of trees and leaves, that color matters.
He starts around f2 to f2.8 to keep some depth while still getting separation. ISO stays low, and shutter speed is adjusted to control the brightness of the background. He always takes a natural light photo first so he can see what the scene looks like before adding flash. When the flash is added, it is used as gentle fill light. The goal is not to overpower the sun, but to clean up the light on the face.
Watch Catchlights and Small Details
One thing Eli always checks is the catchlights in the eyes. If they are missing, the light is either too high or in the wrong spot. In this setup, the catchlights sit high in the eye, similar to butterfly lighting, which gives a clean and flattering look. Because the subject is standing in an open area, the sun also creates a soft rim light from behind.
That little edge of light adds depth and helps the subject stand out from the background without extra gear.
Adjust as the Light Changes
Outdoor light changes fast. When clouds move or the sun comes out, your settings need to change too. Eli explains that you cannot lock in one exposure and expect it to work all day. As the sun gets brighter, he raises shutter speed and slightly increases flash power to keep the background from blowing out.
This is a big learning moment for photographers new to off-camera flash. You are always balancing ambient light and flash together. Sometimes a simple step forward or backward removes unwanted sunlight on the face. Those small movements can save a shot without touching your camera settings.
Use Distance to Control Light Spread
When the light is moved farther from the subject, it spreads more evenly. Eli has his assistant step back so the light spreads across the subject instead of falling off too quickly. When that happens, he increases power just a bit to make up for the distance.
Understanding how distance affects light is huge. You do not always need more power. Sometimes you just need better placement.
Change Angles for More Variety
Once Eli locks in a look he likes, he does not stop there. He moves left, right, closer, and farther away. He also looks for foreground elements like leaves or logs to add depth.
At one point, he uses two trees to frame the subject, creating structure without adding anything artificial. He also asks the model which side she prefers. This saves time and helps make sure the final images are the ones the subject will love.


Using the Sun as a Back Light
When the sun lines up perfectly behind the subject, Eli uses it as a natural back light. He switches to high-speed sync so he can control the bright background while still shooting wide open.
The sun creates the glow from behind, and the flash fills the face from the front. This back light effect adds drama while still feeling natural. A small change in head position keeps sunlight from creating harsh spots on the nose or cheek.


Wide Shots and Leading Lines
Toward the end of the shoot, Eli switches to a wider lens and uses a log as a leading line. He places the subject carefully, so the frame feels clean and intentional. Greenery, sunlight, and fill flash all come together in one balanced image.
This is a great example of why off camera flash outdoors is so powerful. You can expose for bright highlights, keep rich color, and still make sure your subject looks great.


Final Takeaway
The biggest lesson from this shoot is how much you can do with a small, portable setup. Using a lightweight strobe and a simple handheld support allowed Eli to move less than 50 yards and still create many different looks.
If you want more freedom when shooting outdoors, start simple. Learn to read the light, make small adjustments, and let your flash support the scene instead of taking it over.
Looking for More Outdoor Portrait Lighting Tips?
Check out Mastering Golden Hour Portraits with Off-Camera Flash where Julie Gayler shows how to take full control of golden hour with off-camera flash.


You must be logged in to post a comment.