
For many photographers, the setting sun signals the end of a shoot, but for Ray Alvarez, it’s when the real magic begins. Nighttime offers a unique canvas of glowing streetlights and deep shadows that you just can’t find during the day. In his latest session, Ray shows us how to embrace the night using the Westcott Ice Light 3 to create high-end portraits with minimal gear. By focusing on a less is more approach, he demonstrates how to turn a simple city street into a professional set, making the process feel easy and accessible for any creator.
Scouting Your Scene for the Best Night Portraits
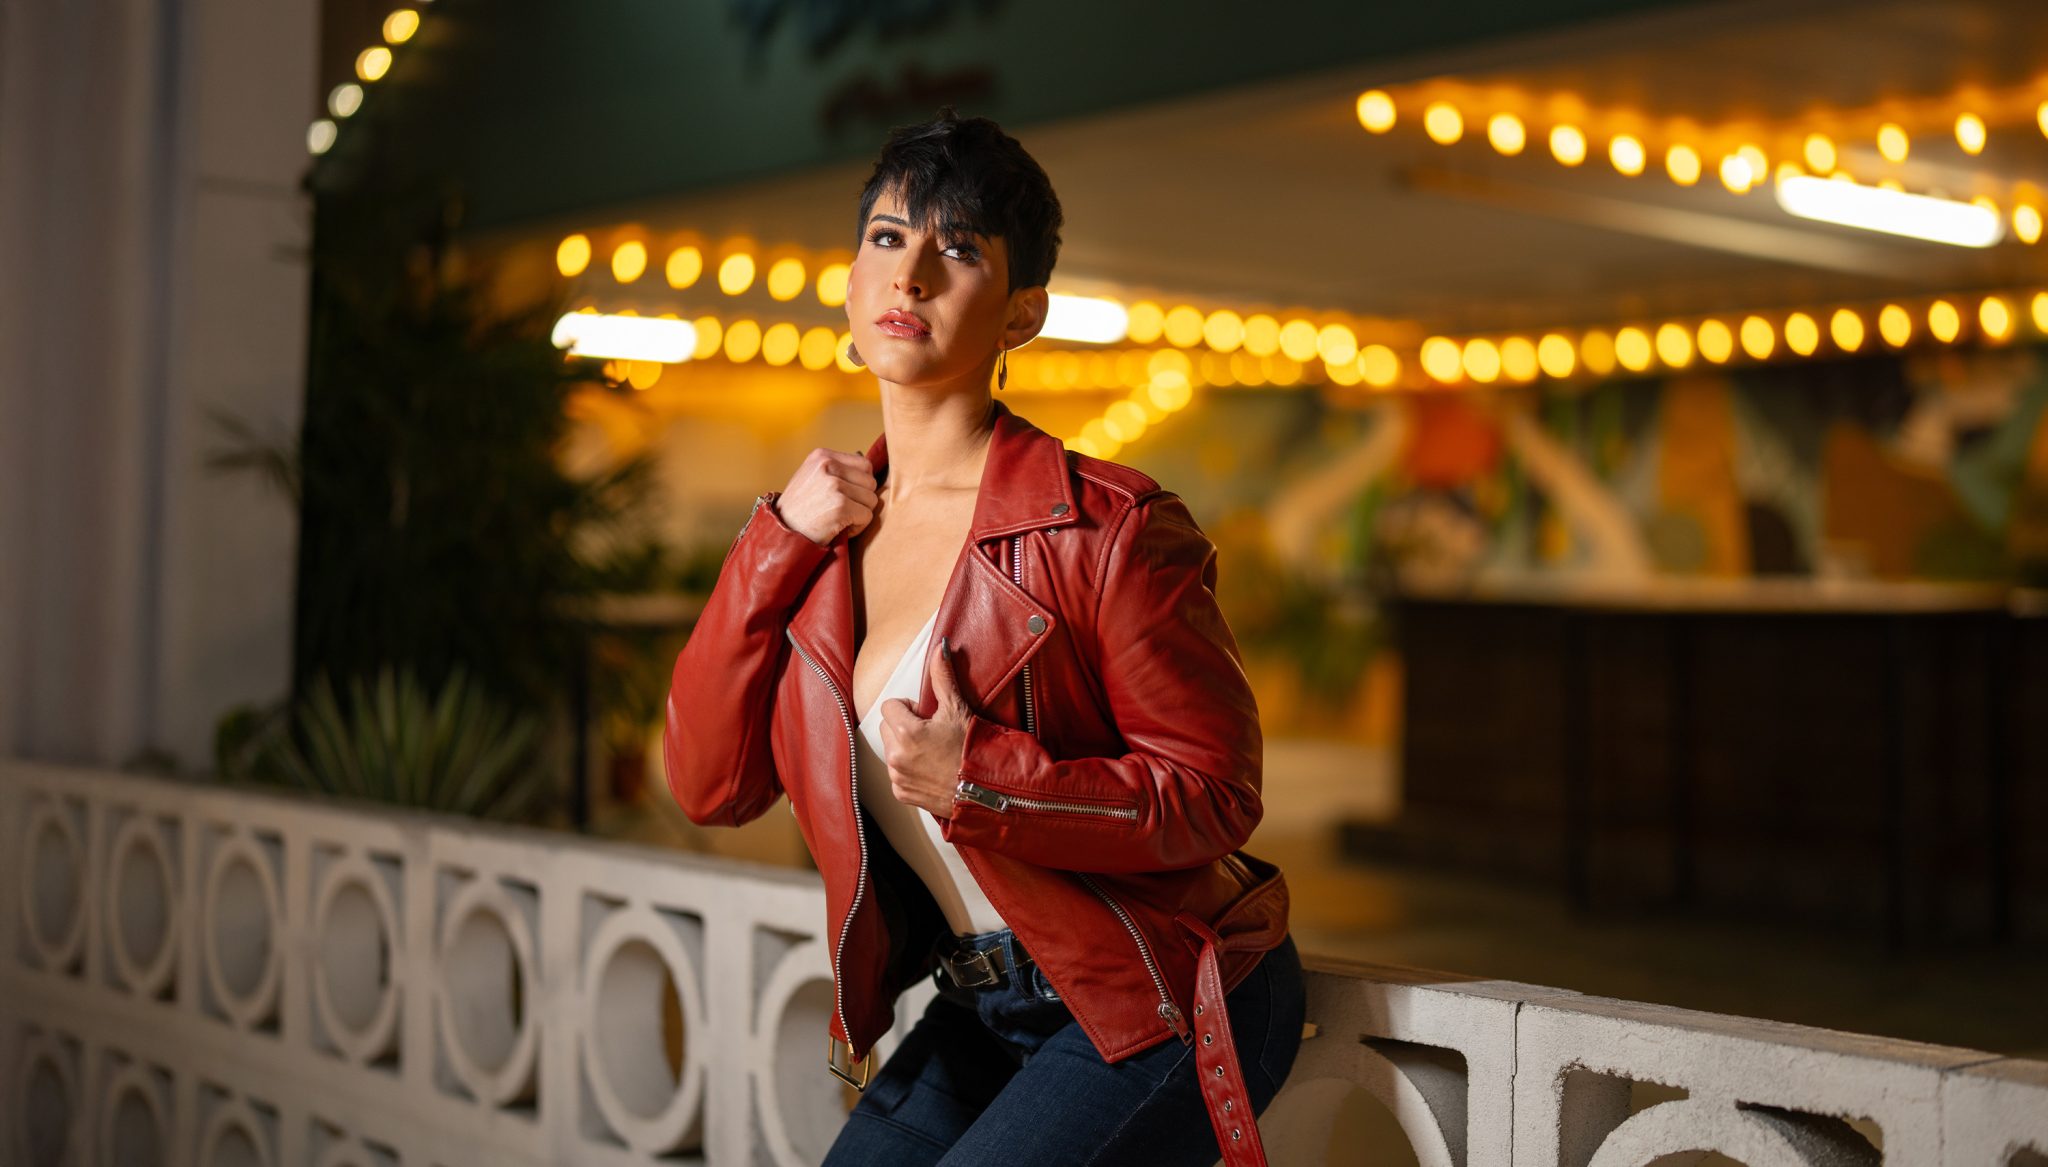
Before Ray even turns on a light, he does a thorough walk-through of the location to understand the space. He looks at what’s behind the model, what’s in front of her, and most importantly, what ambient light is already there. During this shoot, Ray noticed a nearby streetlight was casting light on the left side of Nicole’s face. Instead of fighting that light or trying to overpower it, he decided to use it as a starting point. By taking a moment to analyze the environment first, you can figure out exactly where the holes are that your gear needs to fill rather than guessing in the dark.


Lighting Positioning Tips for Natural Night Portraits
Once you know where the natural light is coming from, it’s time to introduce the Ice Light. Ray started by placing the light on the opposite side of the streetlight to fill in the shadows and balance the exposure. He recommends paying close attention to the spill of the light. Moving the light closer to your subject makes it brighter and more focused, while moving it away makes it less powerful, but you get a wider spread of light.
A key technique Ray uses is avoiding flat lighting. If you place the light directly in front of the model’s face, you lose the natural contours and depth that make a portrait interesting. Instead, keep the light slightly to the side to maintain dimension and shape. To make things even easier, Ray uses the Westcott Studio Link app to toggle the light on and off and adjust settings remotely, which is a lifesaver when you’re working solo.


Creating Multiple Looks with Portable Lighting
One of the best features of the Ice Light 3 is its incredible portability. During the session, Ray moved quickly between locations, from streetlamps to white pillars to pergolas, and the light followed him effortlessly. Because the light is so lightweight and easy to handle, you don’t need a team of assistants to get the job done. Ray even utilized MagThread Magnetic Mounts to quickly mount the light to different steel surfaces, allowing him to experiment with leading lines and different backgrounds in just a few minutes. This speed gives you the freedom to provide a huge variety of looks in a single session.


Balance Your Light Without Losing the Night
It’s often tempting to crank your light up to 100%, but Ray warns that this is usually a mistake for nighttime work. At full power, the Ice Light can easily blow out the model and make the background look unnaturally dark. Ray prefers a more balanced style where artificial light complements the environment rather than replacing it. He usually starts his intensity at a very low 10% and gradually brings it up, often settling around 50%, until there is a perfect harmony between the Ice Light and the glowing city lights behind the model.


Pro Tips for Your Next Nighttime Photo Shoot
Shooting at night is all about the balance of the light you bring and the light that’s already there. Ray’s session teaches us that the best approach is to dial in your camera settings for the background first, then add your Ice Light to finish the look. By embracing shadows rather than trying to hide them, you create drama and dimensions that you just can’t get during the day. Most importantly, staying mobile with portable gear allows you to chase the best spots without being weighed down by heavy equipment.
Looking for More Nighttime Portrait Lighting Tips?
Check out Creating Cinematic Night Portraits, where renowned photographer Jerry Ghionis demonstrates how to use the Ice Light 3 to transform everyday locations into stunning cinematic nighttime scenes.
Westcott Gear in Action:


MagThread Small Magnetic Mounts (1.2”)4958
MagThread Small Magnetic Mounts (1.2”)4958
You must be logged in to post a comment.