
Capturing the perfect portrait of a four-legged friend is about more than just a fast shutter speed. It’s about mastering your light. In this pet photography video, professional photographer Adam Goldberg takes you behind the scenes to show you how he uses Westcott lighting to create stunning, professional animal portraits. With over 12 years of experience, Adam’s goal is to demystify pet photography for animal lovers. Whether you are working with shelter dogs or high-end clients, this guide breaks down everything you need to know to get started, proving that with the right gear and a little patience, anyone can take “paws-itively” amazing photos.
Essential Prep: What Every Pet Photographer Needs
Before you ever turn on a light, you need to prepare your space. Adam emphasizes that a pet-friendly studio is a successful one. Because you are working with animals, safety and comfort are your top priorities.
The Non-Photography Essentials:
- Treats: Small, meat-based treats that are easy to break apart are best.
- Sounds: Squeakers, whistles, or even a harmonica can help grab a dog’s attention.
- Cleanup Kit: Always have enzyme cleaner and paper towels ready for accidents.
- Safety: Use gaff tape to secure all cables to the floor so dogs don’t trip or pull down your lights.
Adam also recommends using a white paper backdrop. Most importantly, always use gaff tape to secure all cables, and the edges of the backdrop to the floor. This prevents dogs from tripping or accidentally pulling down your lights during the excitement of the shoot.
Beginner Setup: FJ400-SE Strobe with an Octabox
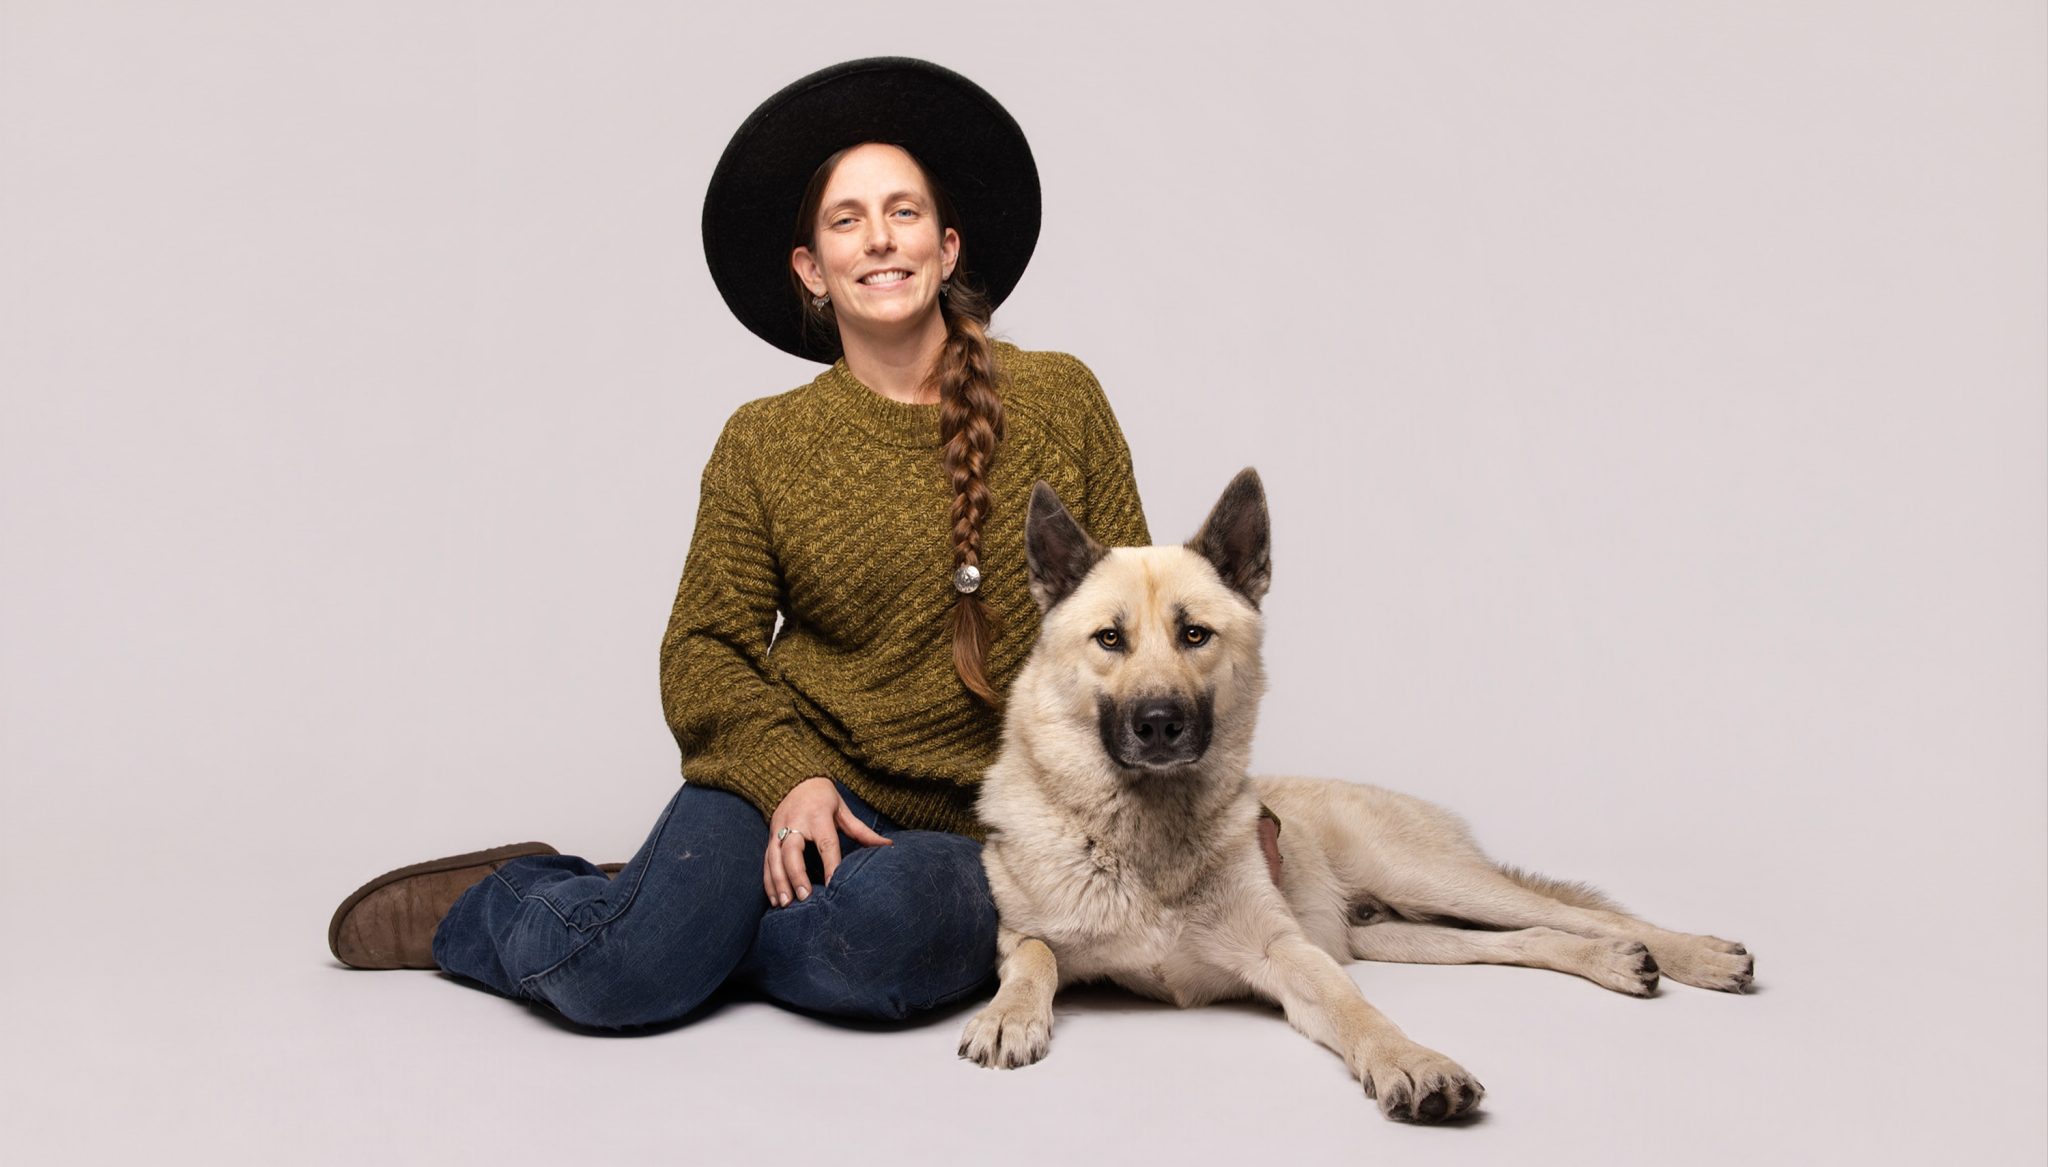
If you’re just starting out, Adam recommends the Westcott FJ400-SE strobe paired with a 42-inch ClickBox Octa. This setup is affordable and simple to manage while you learn to handle a dog. The FJ400-SE is a “plug-in” strobe, meaning you never have to worry about batteries dying mid-shoot. It provides a consistent, powerful light source that is much more effective than constant lights for freezing a dog’s quick movements.
To get a natural look, Adam suggests placing the light on a C-stand so you can boom it overhead. This keeps the stand out of your way and creates beautiful catchlights, the little reflections in the eyes, that mimic the sun. If you don’t have a C-stand, you can move your light to the side at about a 45-degree angle. This introduces more dimension and creates a soft shadow on the backdrop, giving your subject a more three-dimensional feel.


Advanced Setup: Multiple Light Configuration
For a truly commercial, high-end look, Adam introduces a 3-light configuration designed to create depth and separation. For this, Adam switches to the battery-powered Westcott FJ400 II strobe. The battery-powered strobe is a game-changer because it removes the tripping hazard of cords entirely, which is a huge relief when working with high-energy dogs.
Adam pairs the strobes with a 36-inch Rapid Box Switch Octa-M as the main key light to illuminate the dog’s face, while two ClickBox 1x3 strip lights with grids are placed on either side of the dog. These are known as rim or kicker lights, and they are essential for making a subject pop off the background by creating a glowing outline around their fur.
The grids on the stripbanks are the secret to this look because they narrow the beam of light, ensuring it only hits the edges of the dog rather than spilling onto the backdrop. This setup adds a professional, 3D feel to the portrait that is especially effective on darker-furred dogs. By building the lights one at a time, you can see exactly how each source contributes to the final, polished image.


Creative Edge: Dramatic Lighting with a Strip Softbox
One of Adam’s most popular setups with clients is also the simplest. By turning off the key light and using just one ClickBox softbox with a grid from the side, you create a dramatic lighting look. This is a more directional and moody approach that highlights the texture of the dog’s coat and creates a sense of mystery and elegance in the portrait.
Because the grid prevents light from hitting the backdrop, the background falls to total black, leaving only the dog’s profile and expression illuminated. This technique is fantastic for adding variety to a gallery while using the gear you are already using. It shows how minor adjustments to your gear can lead to vastly different, eye-catching results that clients will buy every time.


How to Master Studio Lighting for Pets
Mastering pet photography lighting is a mix of technical skill and animal intuition. As Adam demonstrates throughout this video, the key is to stay calm, be intentional with your frames, and always put the dog’s well-being first. Whether you are using a single light or a complex three-light setup, understanding what each light is doing allows you to guide the experience and capture the true personality of every pet that walks through your door.
This article only scratches the surface of what goes into a professional shoot. To see these techniques in action and learn more about flash training, freezing motion with flash duration, and managing owner expectations, be sure to watch the full video. Adam’s hands-on tips will give you the confidence to start experimenting in your own studio and take your pet photography to the next level.
Want to see more pet photography from Adam?
Check out The Importance of Shelter Pet Photography with Adam Goldberg, where Adam shows you how professional portraits can make a life-saving difference.


You must be logged in to post a comment.