Photographic umbrellas come in so many sizes nowadays, perhaps even more so than the common rain variety. Let’s set aside those and the Parabolic Umbrellas for a moment and discuss some key differences and techniques, when selecting and shooting with the versatile photo umbrella.
Benefits of Each
- Small Umbrella
- Easier to fit on tight sets or locations
- Travels easier (See double fold umbrella)
- Doesn’t blow over quite as easily as the larger variety
- Subtle smaller catch lights
- Large Umbrella
- The larger the light source the softer light
- Wider coverage for group photos or full body portraits
- Versatility
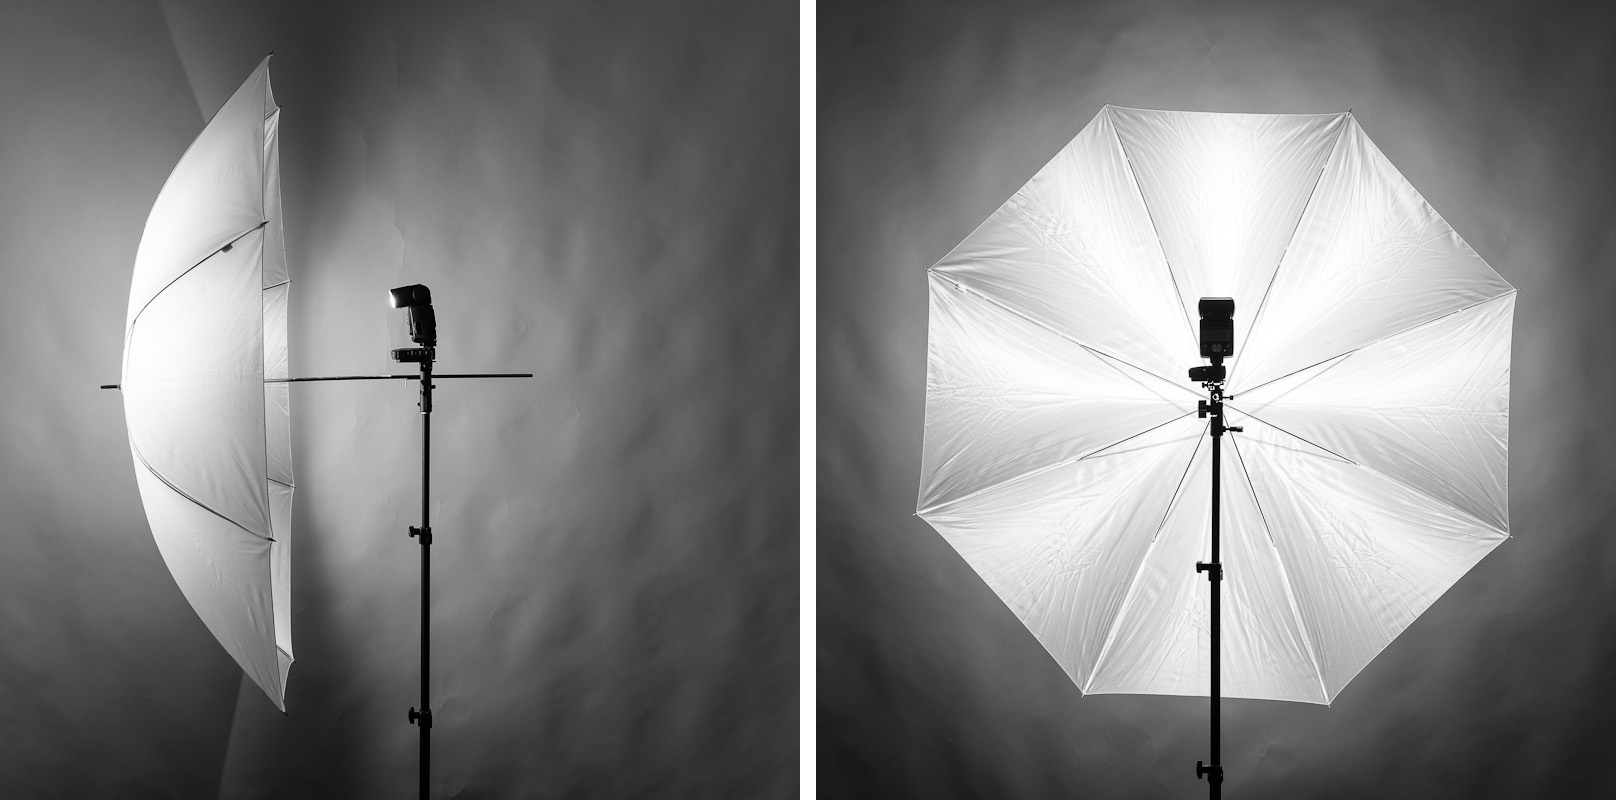
While a smaller umbrella is plenty big for tabletop photography, most products and tight places, after weighing the two options, I usually recommend a larger umbrella like the 60″ with Removable Black cover. From the viewpoint of a people photographer, I like my modifiers large and the light soft. This is a key piece of the puzzle to creating flattering portraits.
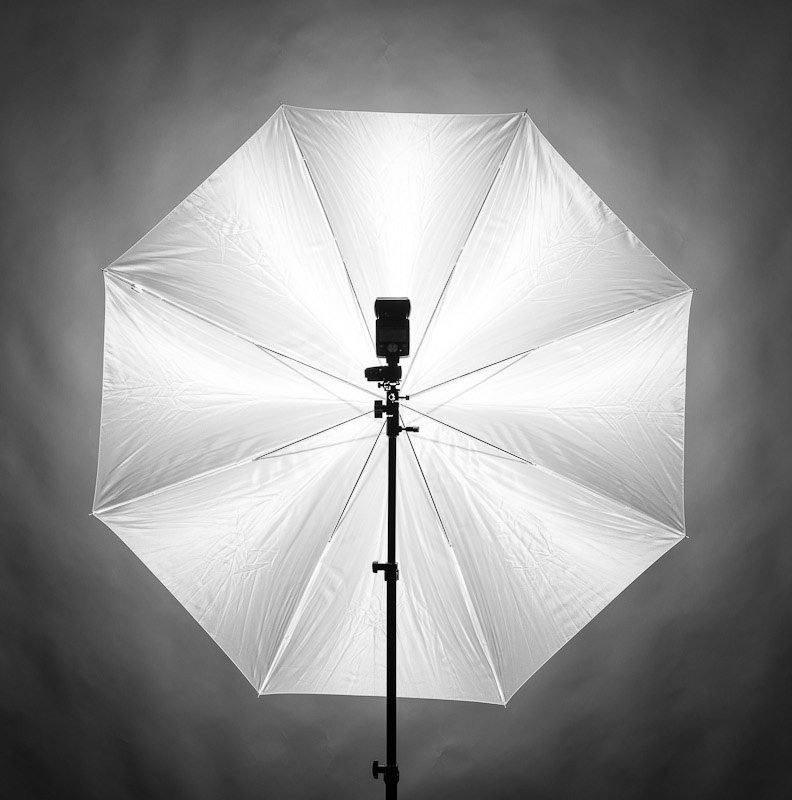
Although there are many benefits to a smaller umbrella, there is one thing it cannot do, and that is: Get larger. Lets look at the opposite now – believe it or not – you CAN make a large umbrella smaller. In this first photo we have a 60″ Umbrella and small flash setup as you would expect to utilize the full size of the umbrella. The umbrella shaft is pulled back from the flash, and the flash head is zoomed out as wide as it will go, 24mm in this case. You’ll notice the completely filled umbrella and big spread of light, which would wrap around a model?s face creating soft light.
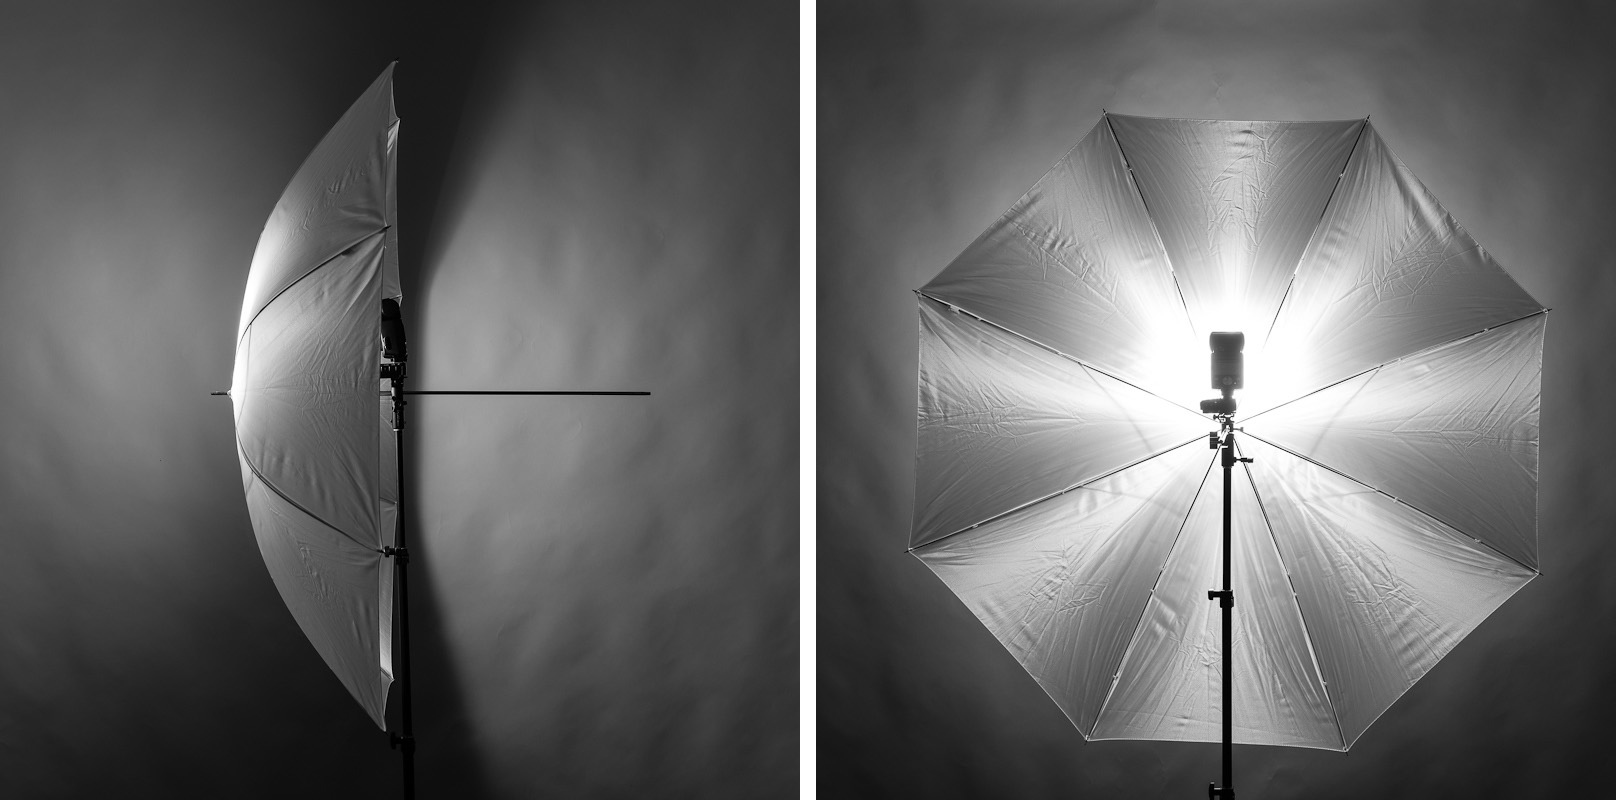
Now if I want less spread and a more contrasty light I need to shrink down my modifier. You can do this a couple ways, that when combined will dramatically “shrink” your light source, without the need to swap umbrellas. First lets return to the zoom setting on the flash. Zoom it in as far as it will go. It should be somewhere between 100mm-200mm. Just like the zoom on your camera lens this will narrow the beam of light from your flash. Secondly adjust the position of your actual umbrella, by choking up on the shaft, bring your flash closer to the inside of the umbrella. Now look at the dramatic difference in the size of the light output!
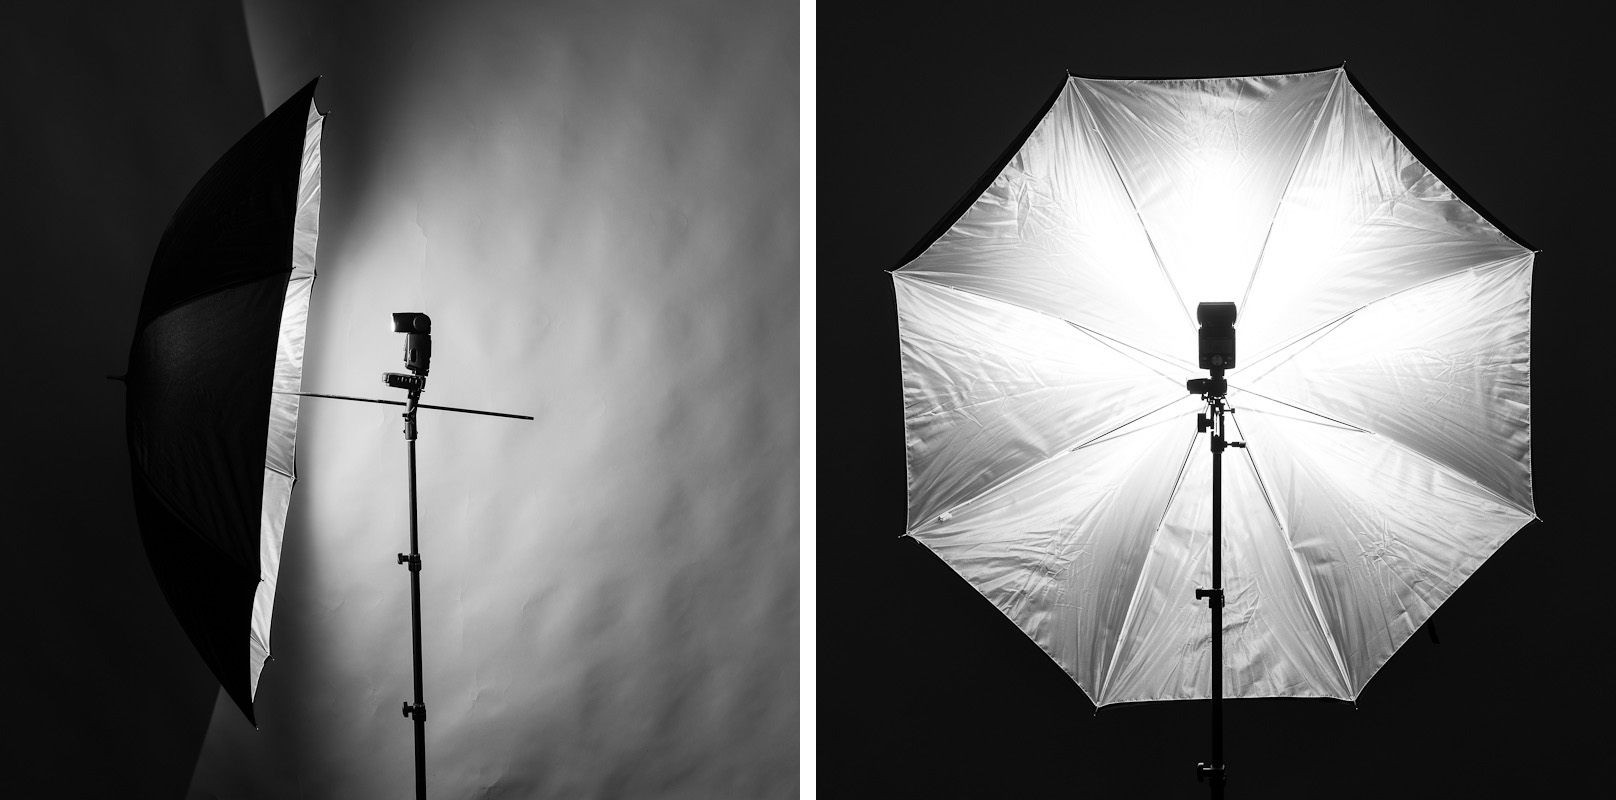
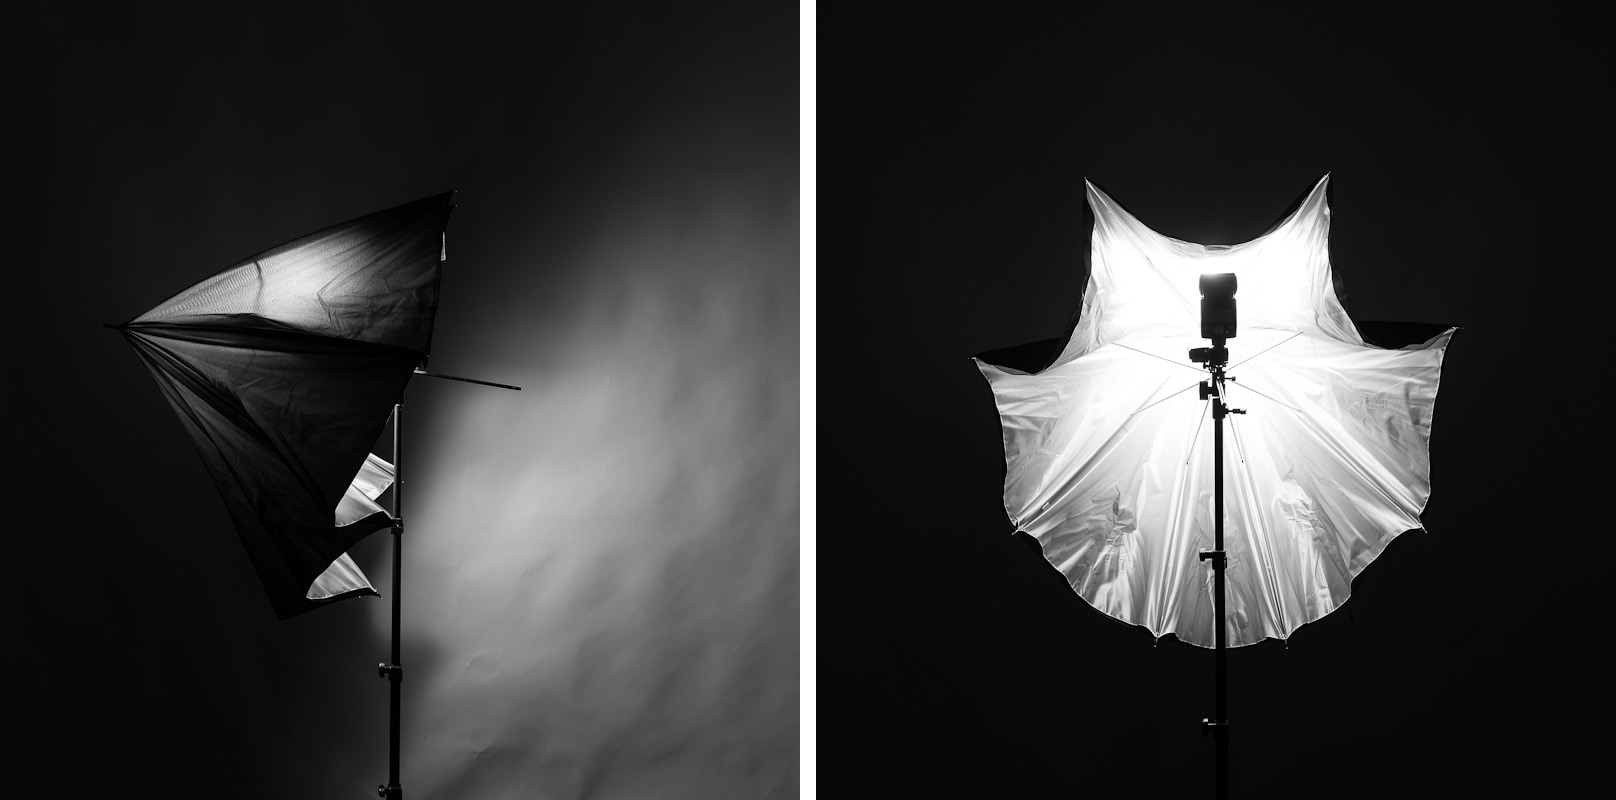
This can be done in a similar fashion while using your umbrella in the bounce orientation. Same techniques, zoom in your flash, and bring it closer to the middle of the umbrella. You can take it one step further by partially collapsing the umbrella too. This creates a more focused light with added control of lights direction, similar to that of a softbox.
Whichever route you go, with these techniques you’ll be able to get the most out of your photo umbrella, large or small!
Westcott Lighting Gear in Action

Triple Threat Speedlite Bracket2223

Triple Threat Speedlite Bracket2223


You must be logged in to post a comment.