
Natural light, while beautiful, can be unpredictable and challenging for portrait photographers. Whether you’re a professional or an enthusiast, learning to control the intensity and direction of sunlight can significantly improve your portrait photography. In this tutorial, photographer Ashley Boring demonstrates three techniques for modifying sunlight to help you capture better natural light portraits.
Diffusing Sunlight for Soft, Flattering Portrait Lighting
As many photographers know, one of the best places to shoot outside is in shaded areas, where the natural light hitting your subject is soft and even. Sometimes, however, this isn’t an option, and you must shoot in direct, harsh sunlight. This can result in harsh shadows and overly bright highlights. A quick and easy solution is to bring your own shade. By placing a diffused material between the sun and your subject, you can quickly diffuse the natural light to achieve softer, more even lighting.
For this shoot, Ashley used a 7-foot diffusion umbrella, but you can achieve similar results with any type of diffusion material, such as a diffusion panel often included with a Illuminator QuickGrip 5-in-1 Reflector (40") or a scrim. The key is to ensure the diffusion material is large enough to cover your entire subject.
By placing the 7-foot diffusion umbrella between the sun and the subject, Ashley created soft and even lighting that’s flattering for her subject. While this technique is simple, it’s very effective for combating harsh midday sunlight.


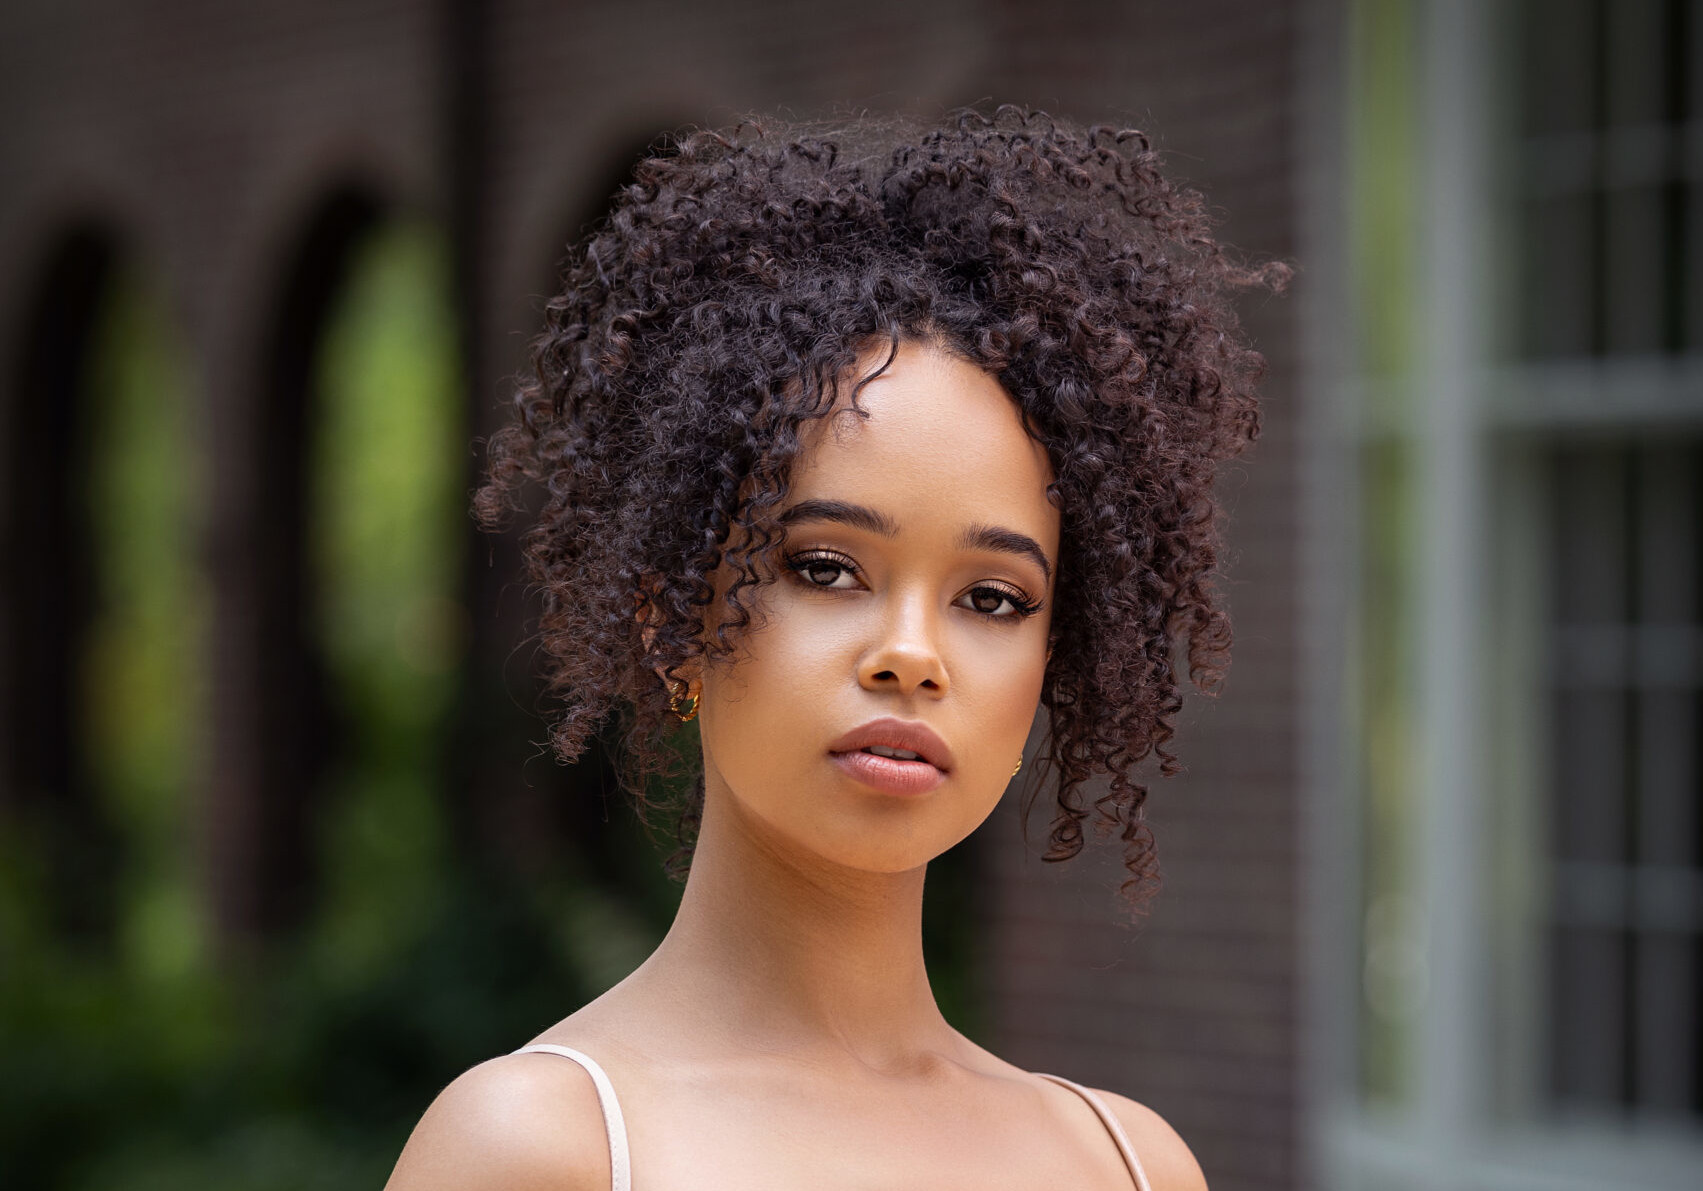
Bouncing Light with Reflectors for Better Portraits
Collapsible reflectors are incredibly useful tools for controlling natural or artificial light. By bouncing sunlight off a reflector onto your subject, you can enhance illumination and control the direction of light, which is crucial in achieving the desired effect in your portraits.
Reflectors come in many different sizes and surface materials, each affecting the quality of light they produce. The larger the reflector size, the more light coverage you will get. For photographing headshots, a smaller reflector like a 30-inch may be suitable. For full-body portraits or groups, a larger size like a 50-inch reflector is preferable.
When considering reflector surface materials, each fabric has unique properties that modify light in distinct ways:
-
- Silver Reflector: Maximizes light output but can create specular highlights, which can sometimes make your subject look oily or shiny.
- White Reflector: Offers softer, more natural lighting with slightly less output compared to silver.
- Sunlight or Gold Reflector: Adds a warm tone while maximizing light output and creating specular highlights, just like silver but warmer. Gold produces slightly warmer tones than sunlight.
- Black Block: Used to block or absorb light, enhancing shadows.
In this shoot, Ashley’s subject was in a shaded area, which creates a soft flattering light, but she wanted her subject to pop more against the background. Ashley chose Westcott’s 40-inch 5-in-1 Reflector and used the silver surface to maximize light output. By using a reflector, Ashley added a second light source that made her subject brighter than the background, creating depth and contrast.


Bonus Tip: When using a reflector in natural light, light direction is important to keep in mind. Since the reflector acts as a second light source, you’ll want to make sure it’s not positioned too low. If the reflected light is too low, you can end up with a lighting pattern called underlighting, which is traditionally considered unflattering. Take some time to ensure the light is coming from a direction that’s flattering to your subject.
Using Nets to Darken the Background in Portraits
In certain situations, you may want your subject to stand out more distinctly from the background or create a moodier atmosphere. A quick and easy way to achieve this is by adding a net, which darkens the background, alters the perception of depth, and draws more focus to your subject.
Nets are made of thin black threads that the camera doesn’t pick up, especially at wider apertures like F/4.0 or below. This blurs the pattern of the net and creates a darker scene behind the net.
By placing the net behind the background, you’re able to darken just the background by a stop or two, depending on the net you are using. Here Ashley is using a 2-stop net, so her background is 2-stops darker than her subject.
Just like reflectors, nets come in different sizes and fabric options. Nets used on scrims can range from between 4×4 up to 8×8 feet. When choosing a size, you’ll want to consider what you’re photographing and how you want your composition to appear. For this shoot, Ashley was taking close-up shots of a single subject, so she used a Westcott Scrim Jim Cine 4x4 Frame with a 2-Stop Net Fabric.


Key Takeaways and Final Thoughts
Experimentation is crucial when learning to control natural light for your portrait photography. Take the time to familiarize yourself with each technique, understanding how the light modifiers influence the mood and quality of your images.
Once you get a handle on a few techniques, you can combine them for even more control over sunlight. Whether you’re shooting portraits or still life, controlling natural light through diffusing, reflecting, and shading can elevate your photography.


You must be logged in to post a comment.