
Window light for portraits is beautiful when you have it, but that is not always the case. Maybe the room has no windows, or the light is hitting from the wrong side, or the sun has already set. In this video, portrait photographer Julie Gayler shows how to fake window light, so it still feels natural and believable.


3 Things to Think About Before You Start
Before you ever turn on a light, it helps to slow down and think through the look you are trying to create. Faking window light works best when you have a clear plan instead of guessing as you go. These three ideas act as your roadmap and will guide every lighting choice you make from start to finish:
- What type of window light do you want to create?
Decide if you are going for soft morning light, brighter midday light, or more dramatic late day light. This choice guides all your lighting decisions. - What is the direction of the light?
Window light usually comes from the side. Placing your light where a real window would be helps the scene feel natural. - How dramatic do you want the image to feel?
This is controlled by fill light. Less fill means deeper shadows and more drama. More fill light creates a softer, more natural look.
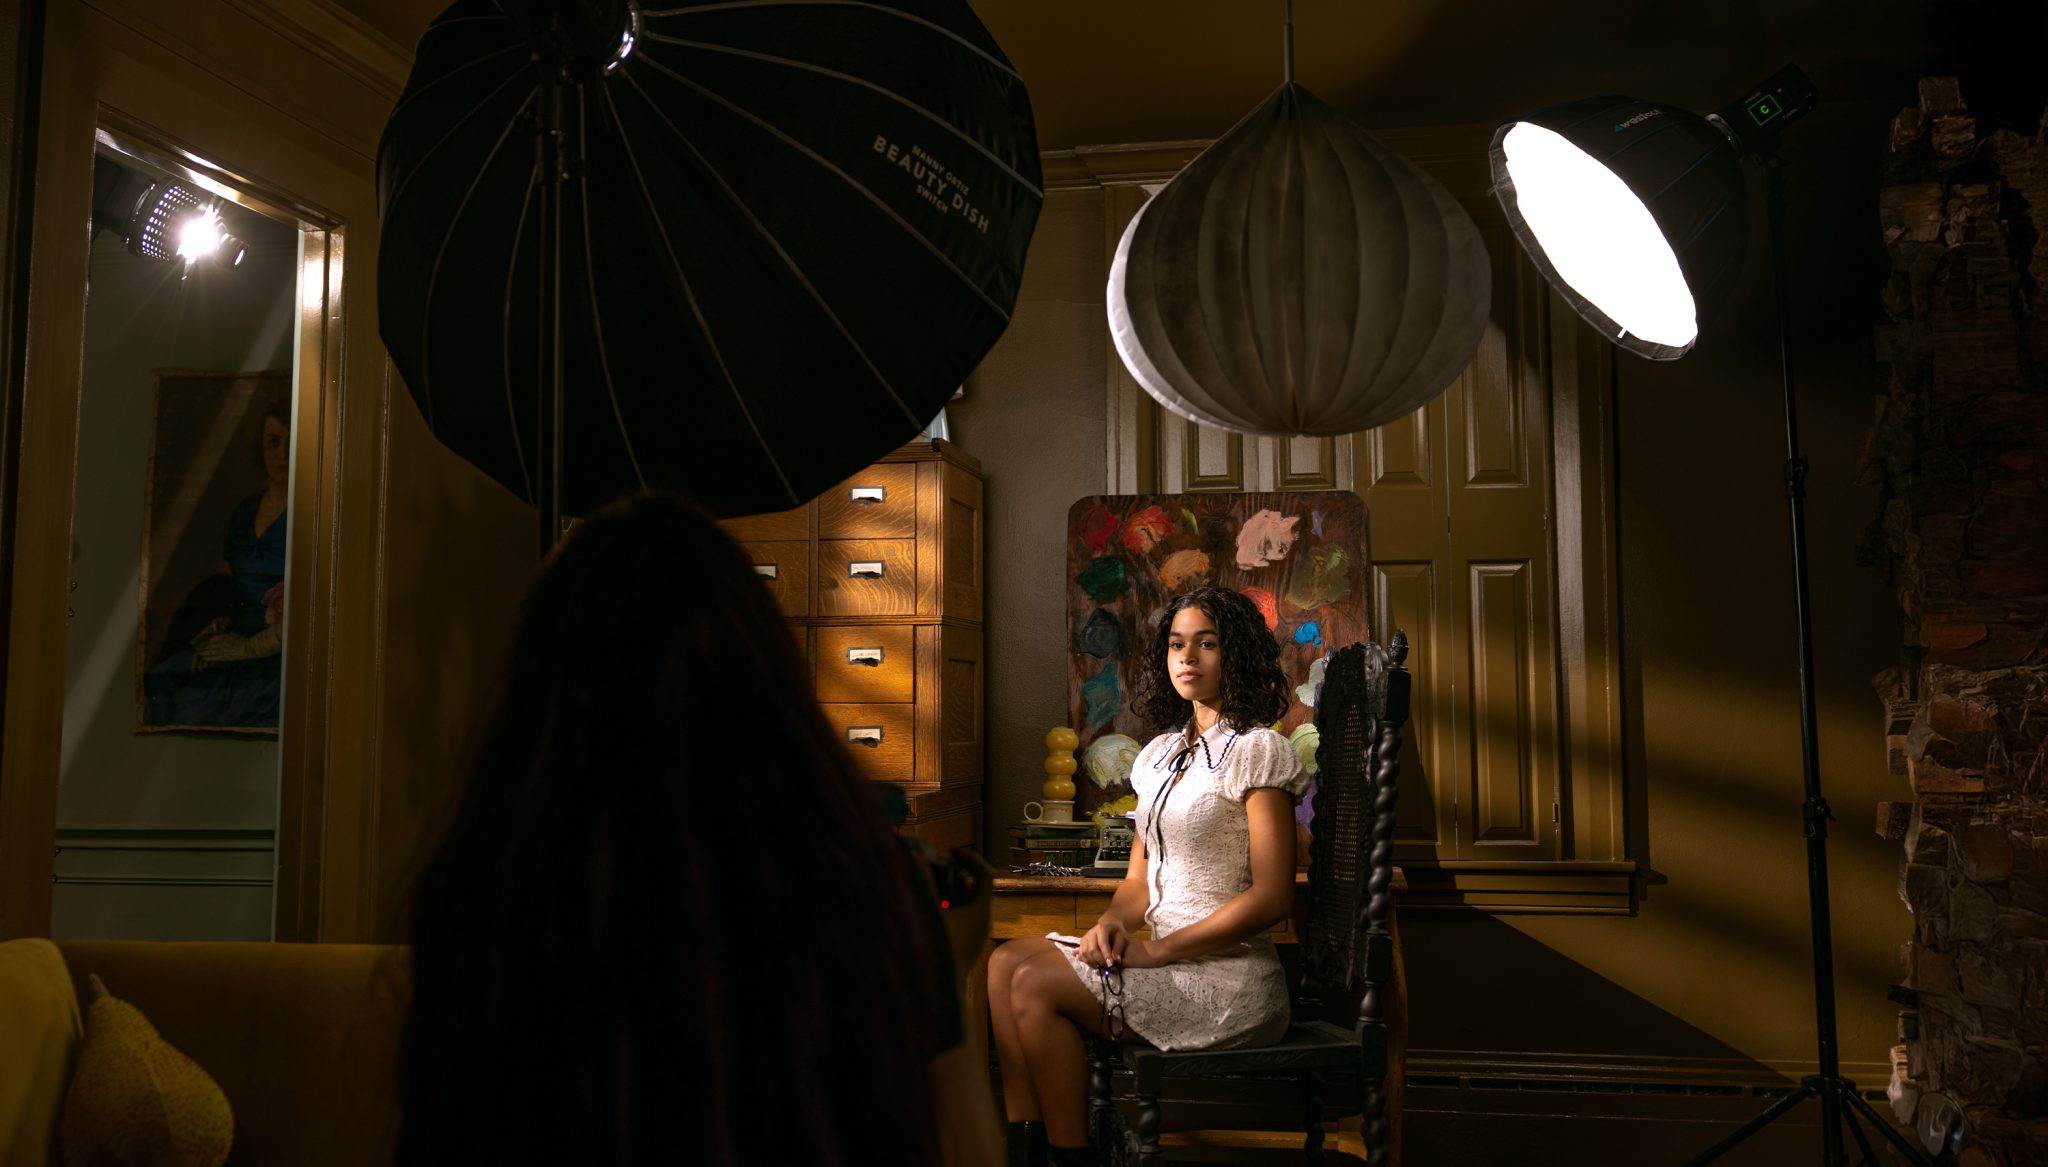
Choosing the Window Light Style
To sell the window light look, Julie starts with shape. She uses a Westcott FJ800 Strobe paired with an Optical Spot and a blinds gobo. The gobo creates the stripe pattern that looks like light coming through window blinds.
This light is about creating a believable window shape. The Optical Spot allows Julie to control how sharp or soft those lines appear, which plays a big role in how realistic the light feels.
Setting the Light Direction
A common mistake with shaping light is placing it too close to the camera. While it may be convenient to place your light straight on, that’s not where window light usually comes from. Most window light enters a room from the side, and to keep the look believable, Julie places the Optical Spot where a real window would be.
This side placement helps the highlights and shadows fall naturally across the face and body. Even with the right light quality, the wrong direction can make an image feel staged. Matching the direction of where a real window would be is what makes this setup work.
Controlling Mood with Fill Light
Fill light is the most important part of faking window light. In real life, light enters a room and bounces off walls, floors, and furniture. That bouncing of light keeps shadows from going completely black.
Using very little fill gives you deeper shadows and a more dramatic look. Adding more fill light softens those shadows and makes the image feel brighter and more natural. Neither option is right or wrong. It all depends on the feeling you want for the portrait.
Start Lighting from the Shadows
Instead of starting with the main light, Julie starts by lighting the darkest areas of the scene. This keeps the process simple and avoids constantly adjusting lights later.
When you build the scene from dark to light, each light has one clear job. This makes the setup faster and easier to manage, especially if you are still getting comfortable with studio lighting.
First Light for Separation
The first light Julie adds is behind the subject to lift deep shadows and create separation. She uses a FJ400 II Strobe with a 24-inch Joel Grimes Beauty Dish Switch with a white interior.
This light is kept at low power. Its job is to add just enough detail to the hair, shoulders, and background, so the subject does not blend into the darker tones of the scene.

Room Fill Light Sets the Mood
Next, Julie adds the main fill light that lifts shadows across the room. She uses another FJ400 II with a Manny Ortiz Beauty Dish Switch with a white interior.
This light determines how dramatic the final image feels. More power reveals more detail in the room and the subject. Less power keeps the shadows deeper and the mood stronger. Julie aims for a late afternoon feel, so she adds just enough fill to keep detail without losing contrast.

Dialing in the Blinds Pattern
The last light added is the Optical Spot using a 50mm lens and the blinds gobo. This is where the window look really comes to life.
Julie adjusts the focus on the Optical Spot to control how sharp the blinds appear. Crisp lines make it feel bold and graphic. Slightly blurred lines feel more natural. Small changes here can completely change the mood of the image.


Move Around for Different Looks
Once all the lights are set, Julie moves around her subject to change the angle of the shot. As long as the distance between the lights and the subject remains the same, the exposure stays consistent.
Shooting toward the Optical Spot creates a brighter feel. Shooting into the shadows creates a more dramatic look. This allows you to create multiple images from one setup without changing your lighting.


Full Creative Control
Faking window light gives you creative freedom. You are no longer limited by the time of day or the location of real windows. By controlling shape, direction, and fill, you can create window light that fits your vision every time.
Julie’s biggest takeaway is simple: When you fake window light the right way, you are not just copying nature. You are controlling it. With thoughtful lighting choices and the right tools, you get full creative control over how your portraits look and feel.
Want to see more lighting tips from Julie Gaylor?
Check out Enhancing Window Light Portraits with Flash, where Julie demonstrates how to shape, enhance, and even recreate natural window light using off-camera flash for consistent, beautiful portraits.


You must be logged in to post a comment.