
There are tons of ways to spice up your images with unique and eye-catching effects created in-camera. This summer, Team Westcott explored playing with sparklers, gels, and long exposure in the Westcott Soundstage to learn the best ways to mix continuous light and flash for some super festive portraits.
How It Works
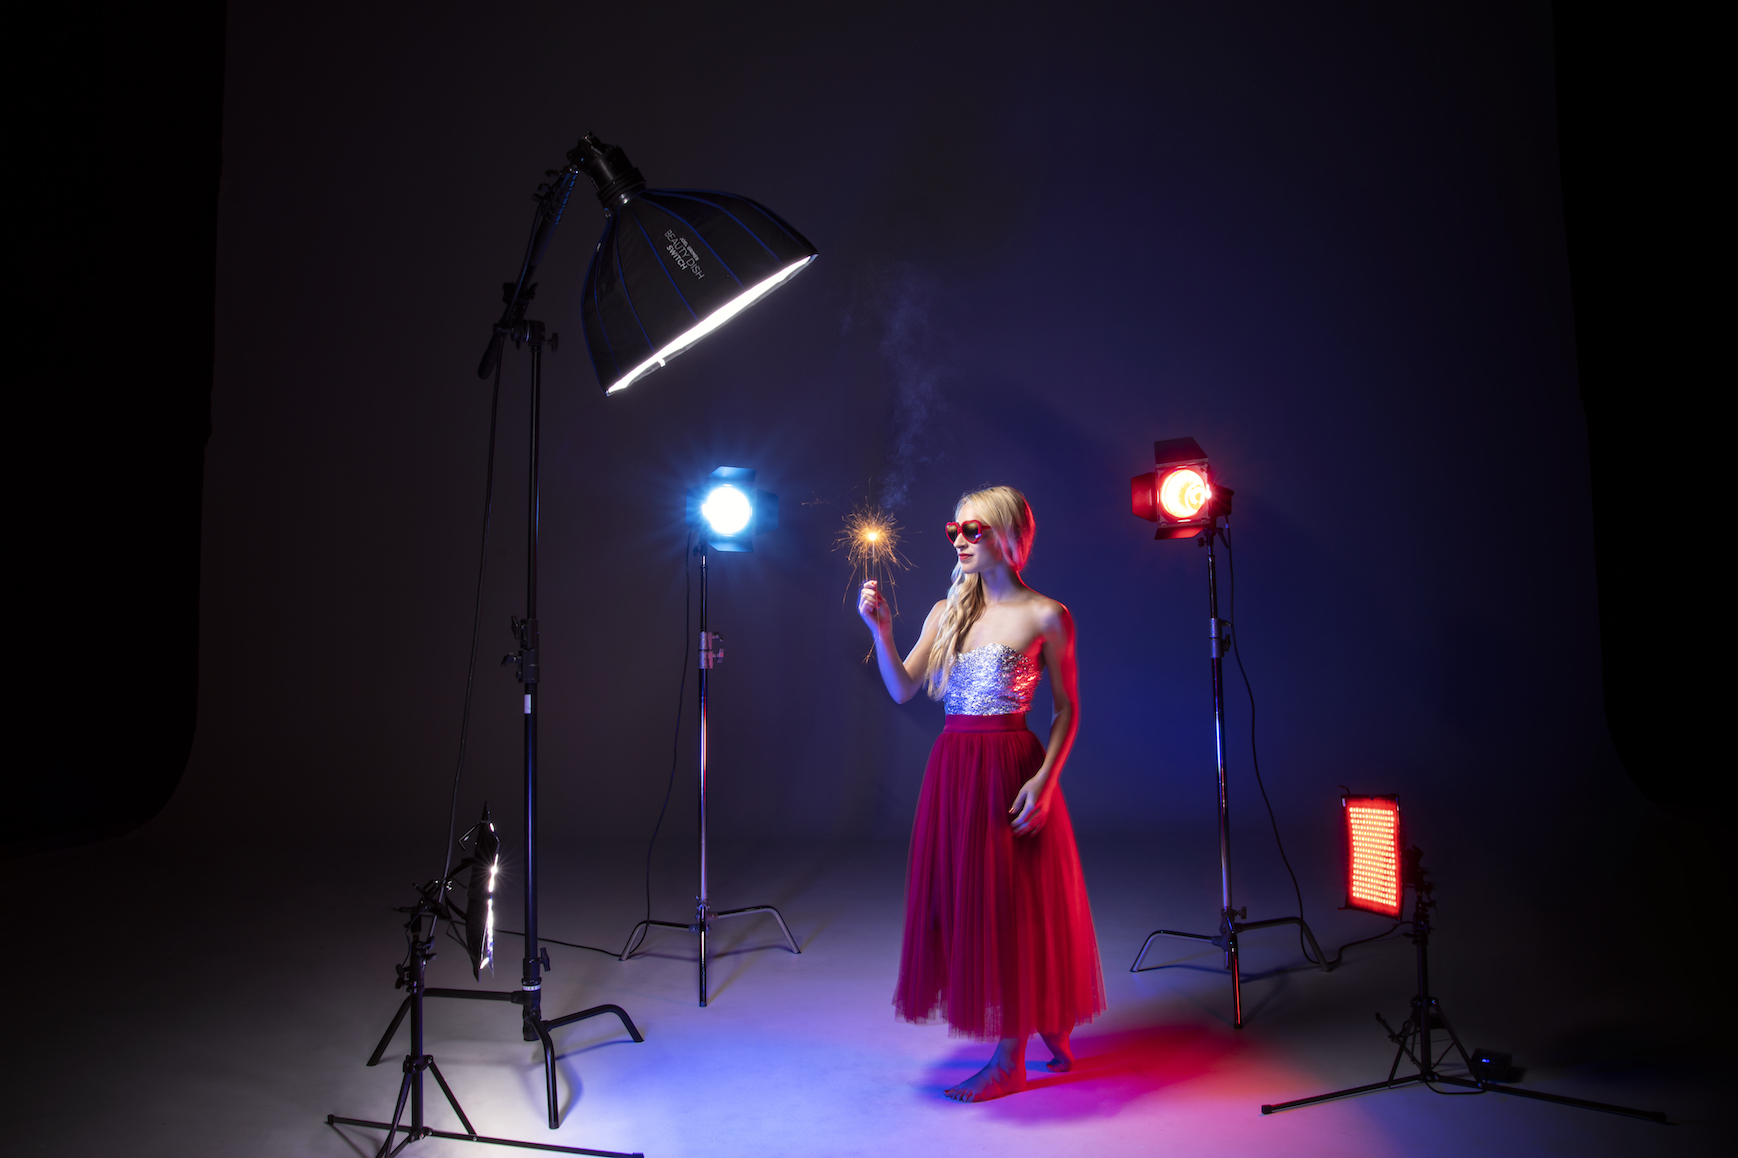
Most strobes sync at 1/250th of a second, so any shutter speed slower than that will add any ambient or continuous light in the shot. The longer the exposure, the brighter the continuous light. Here, we used a strobe modified with a and two gelled strobes (setup as back lights) to freeze our subject.
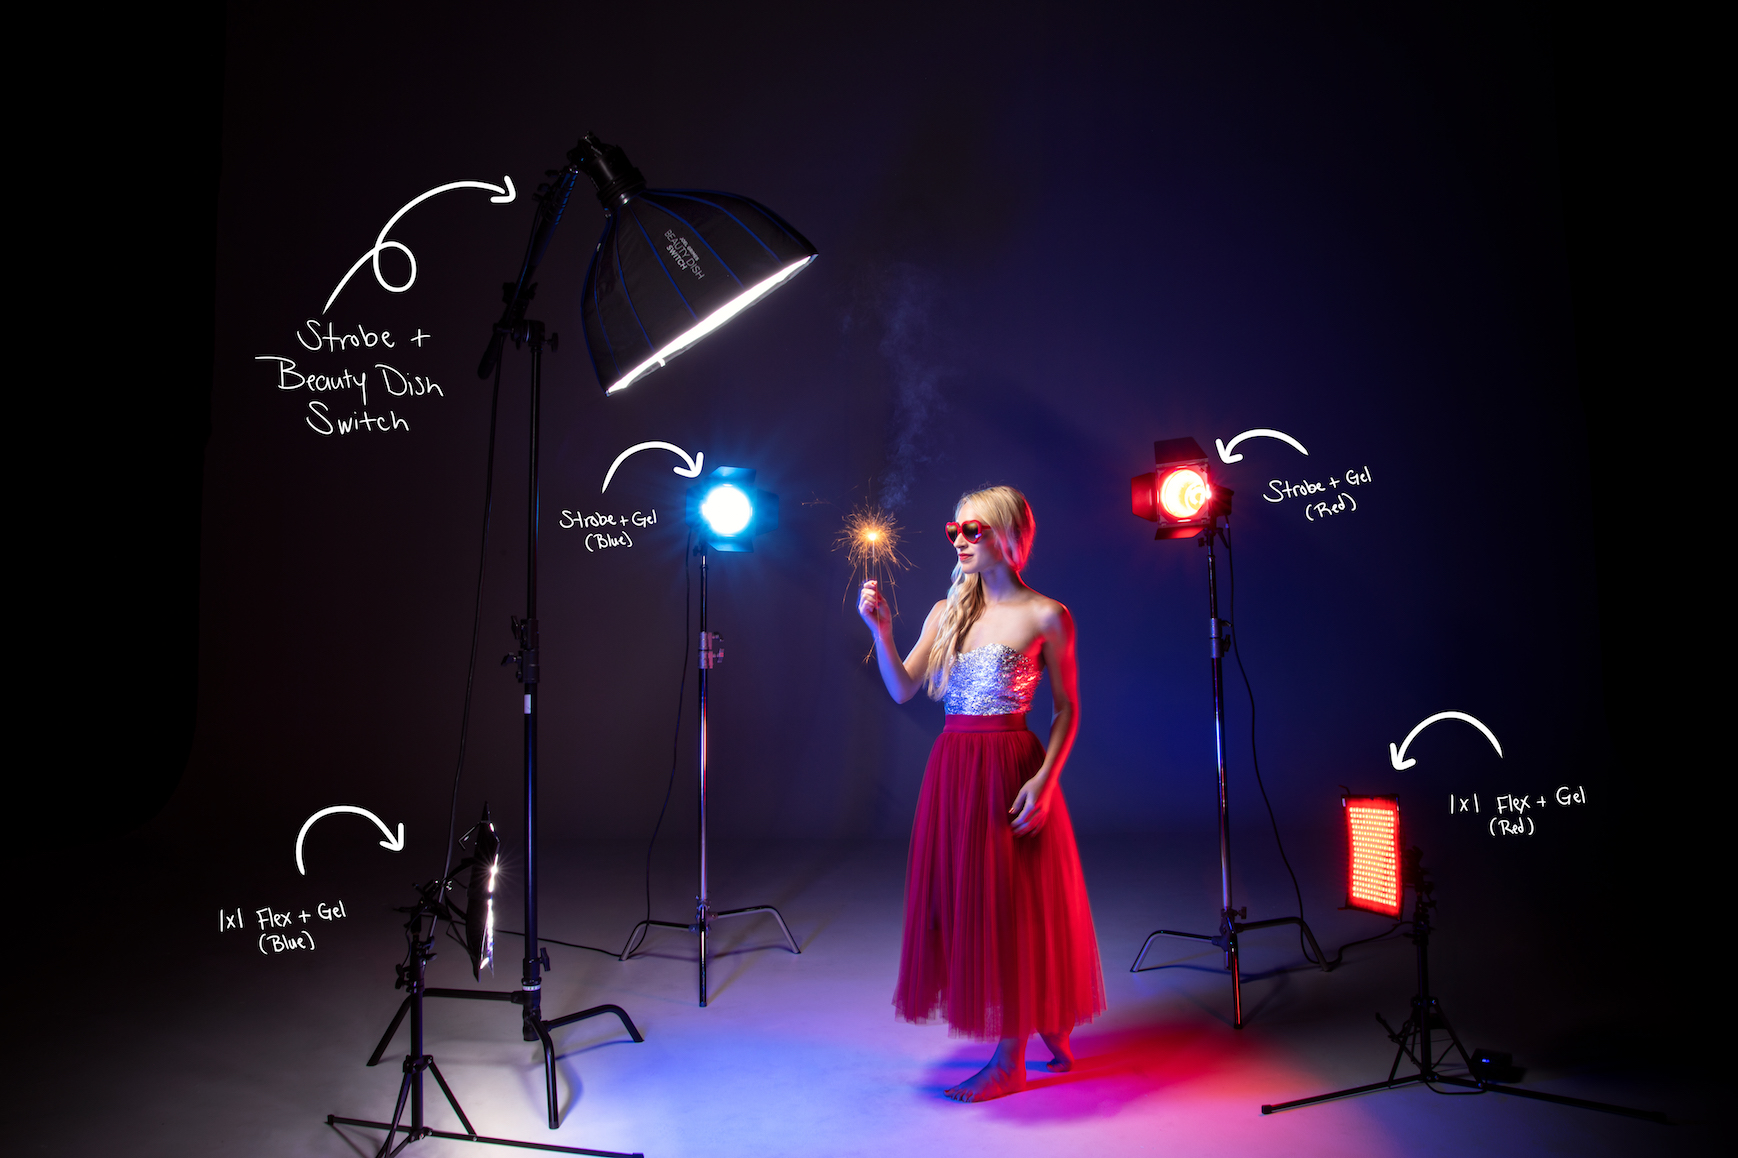
Setup
Then, we added in two gelled continuous Flex LED lights for some more pop of color and to capture some of the movement in our subject’s dress.


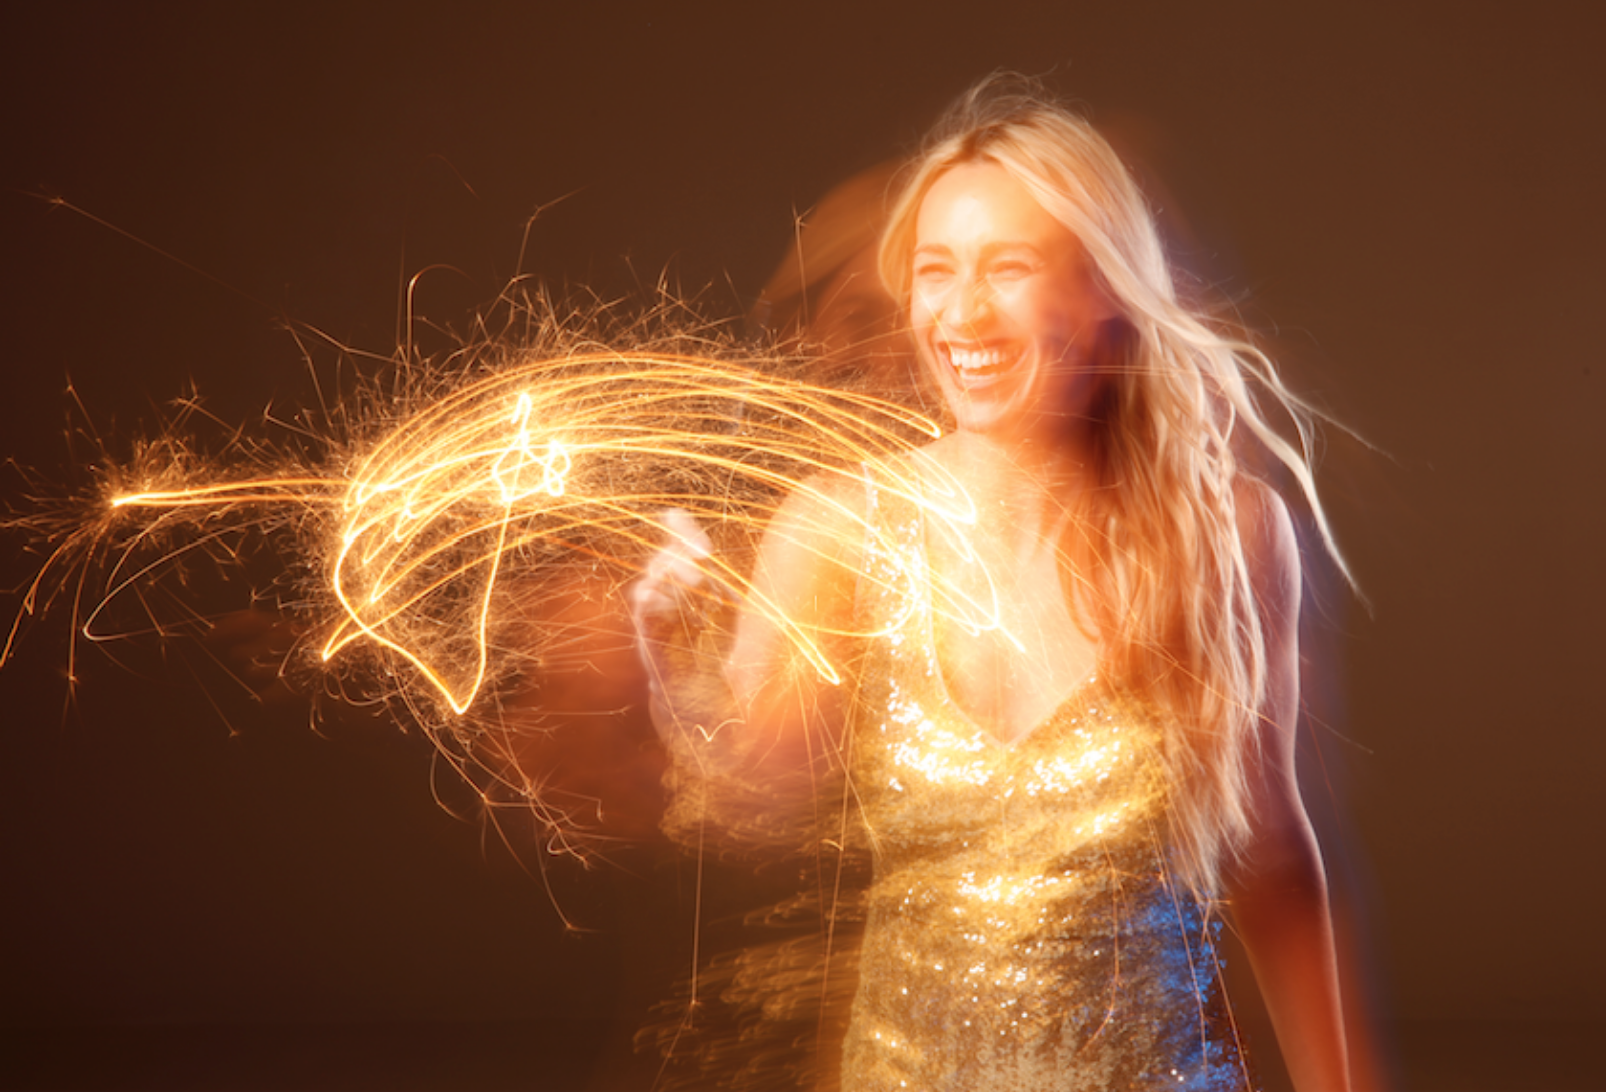
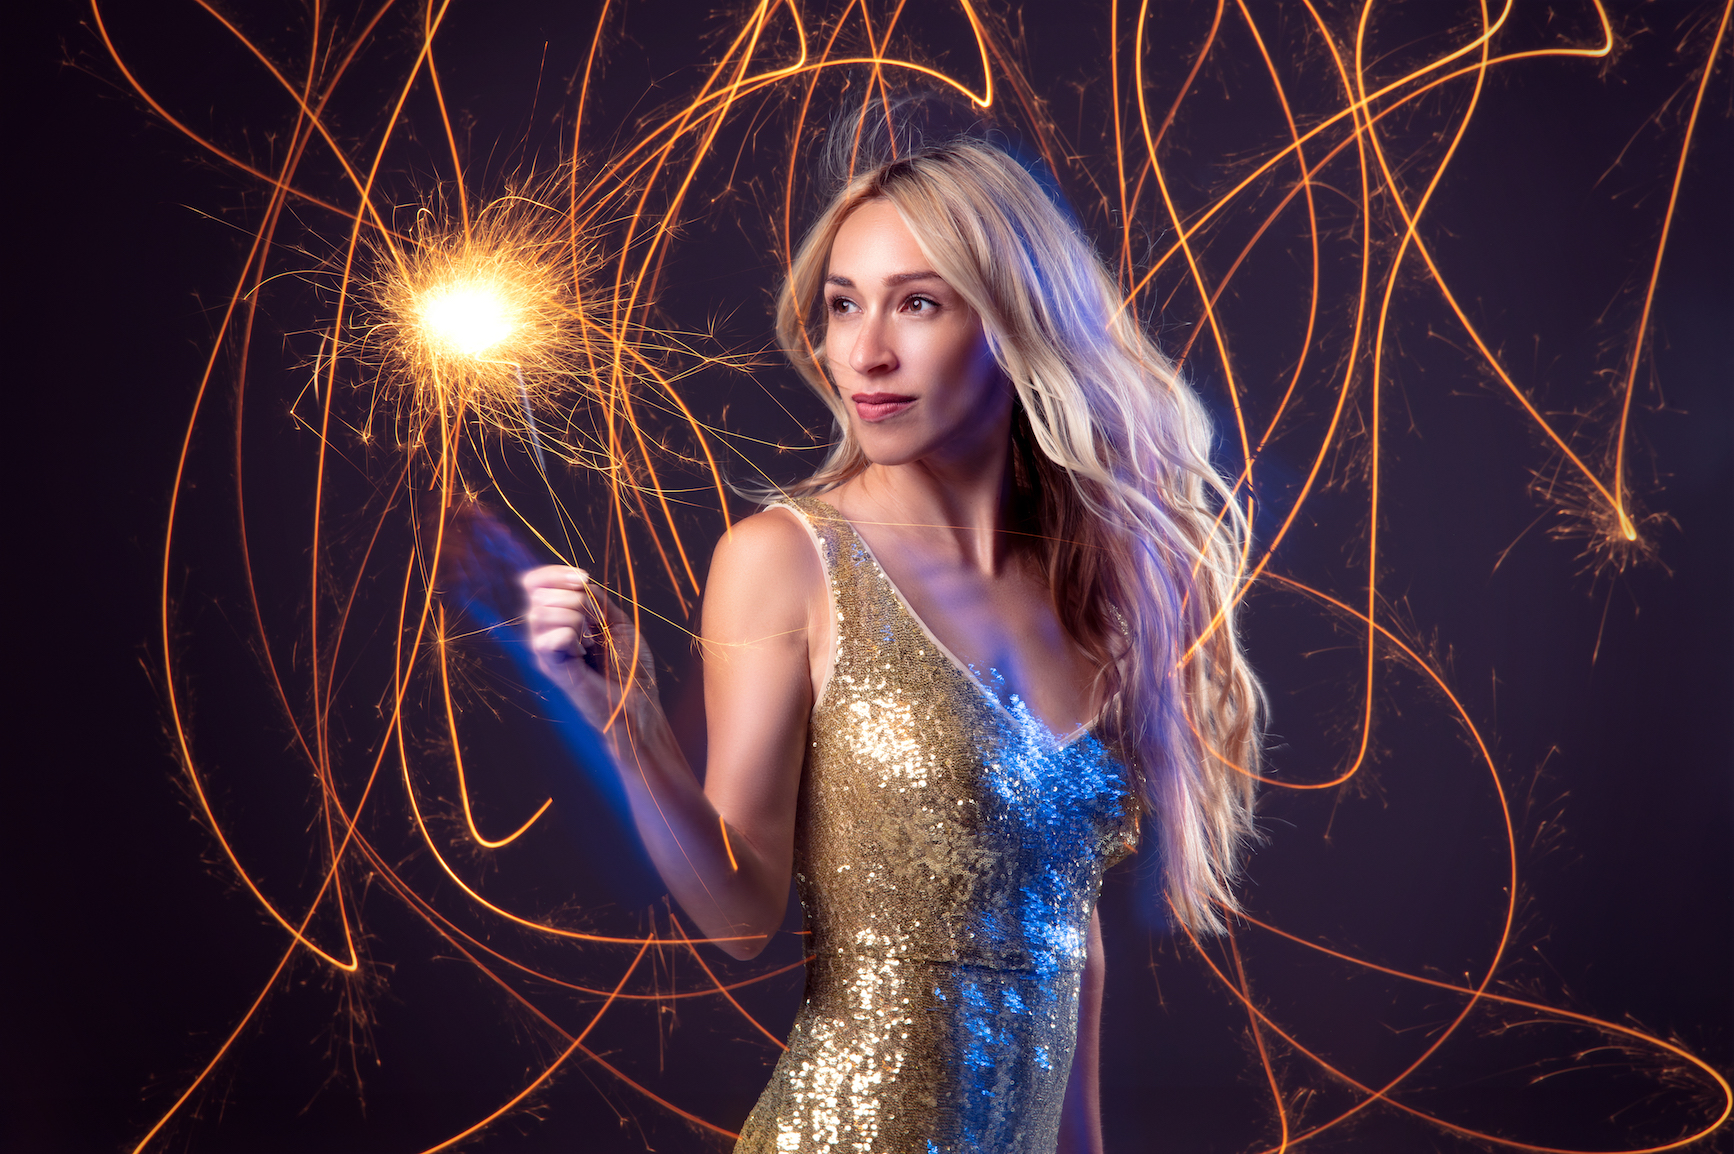
When the constant light is viewable in-camera and moving it creates light trails, which is commonly called light painting. The longer the shutter speed, the more light trails will be created. In this case, we used a sparkler.
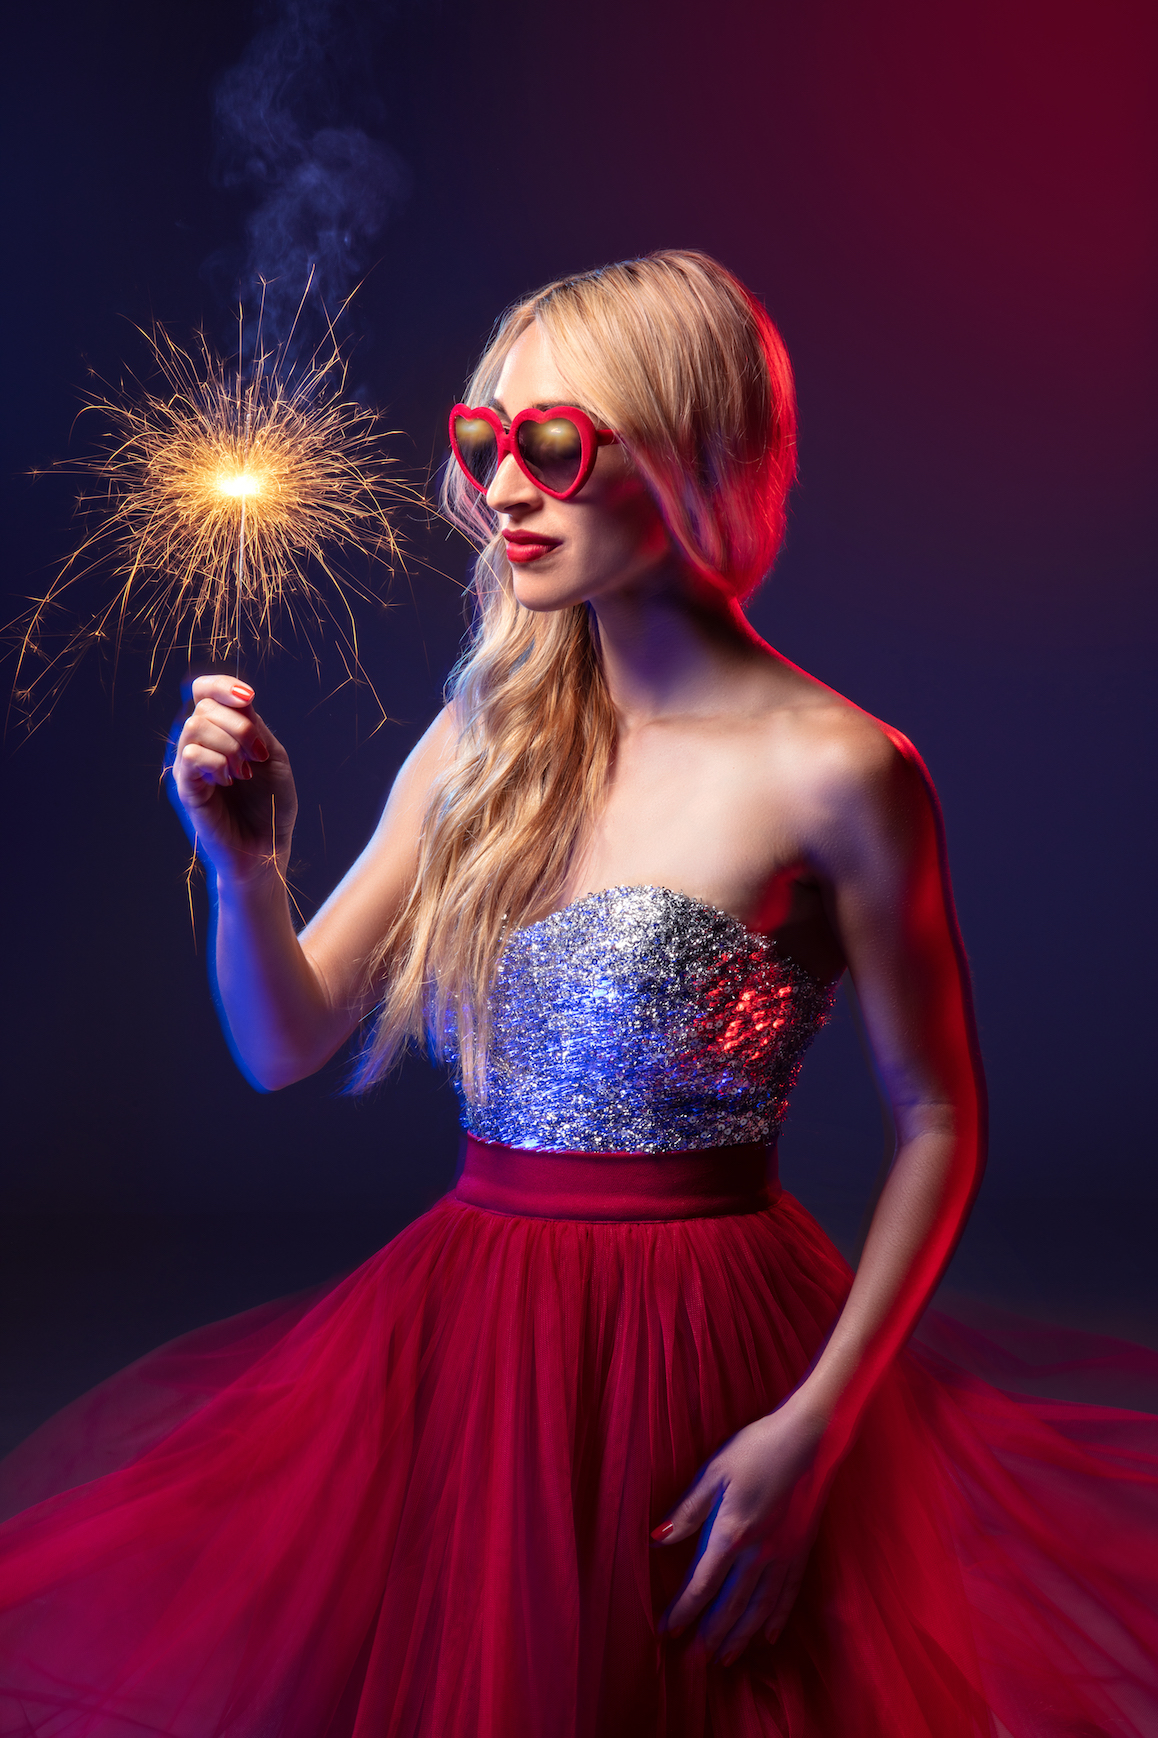
For our second setup, we “froze” our subject in-camera with a strobe modified by a Rapid Box Switch Octa-M as the key light and a strobe modified by a Rapid Box Switch Strip 1x3 as a hair light.
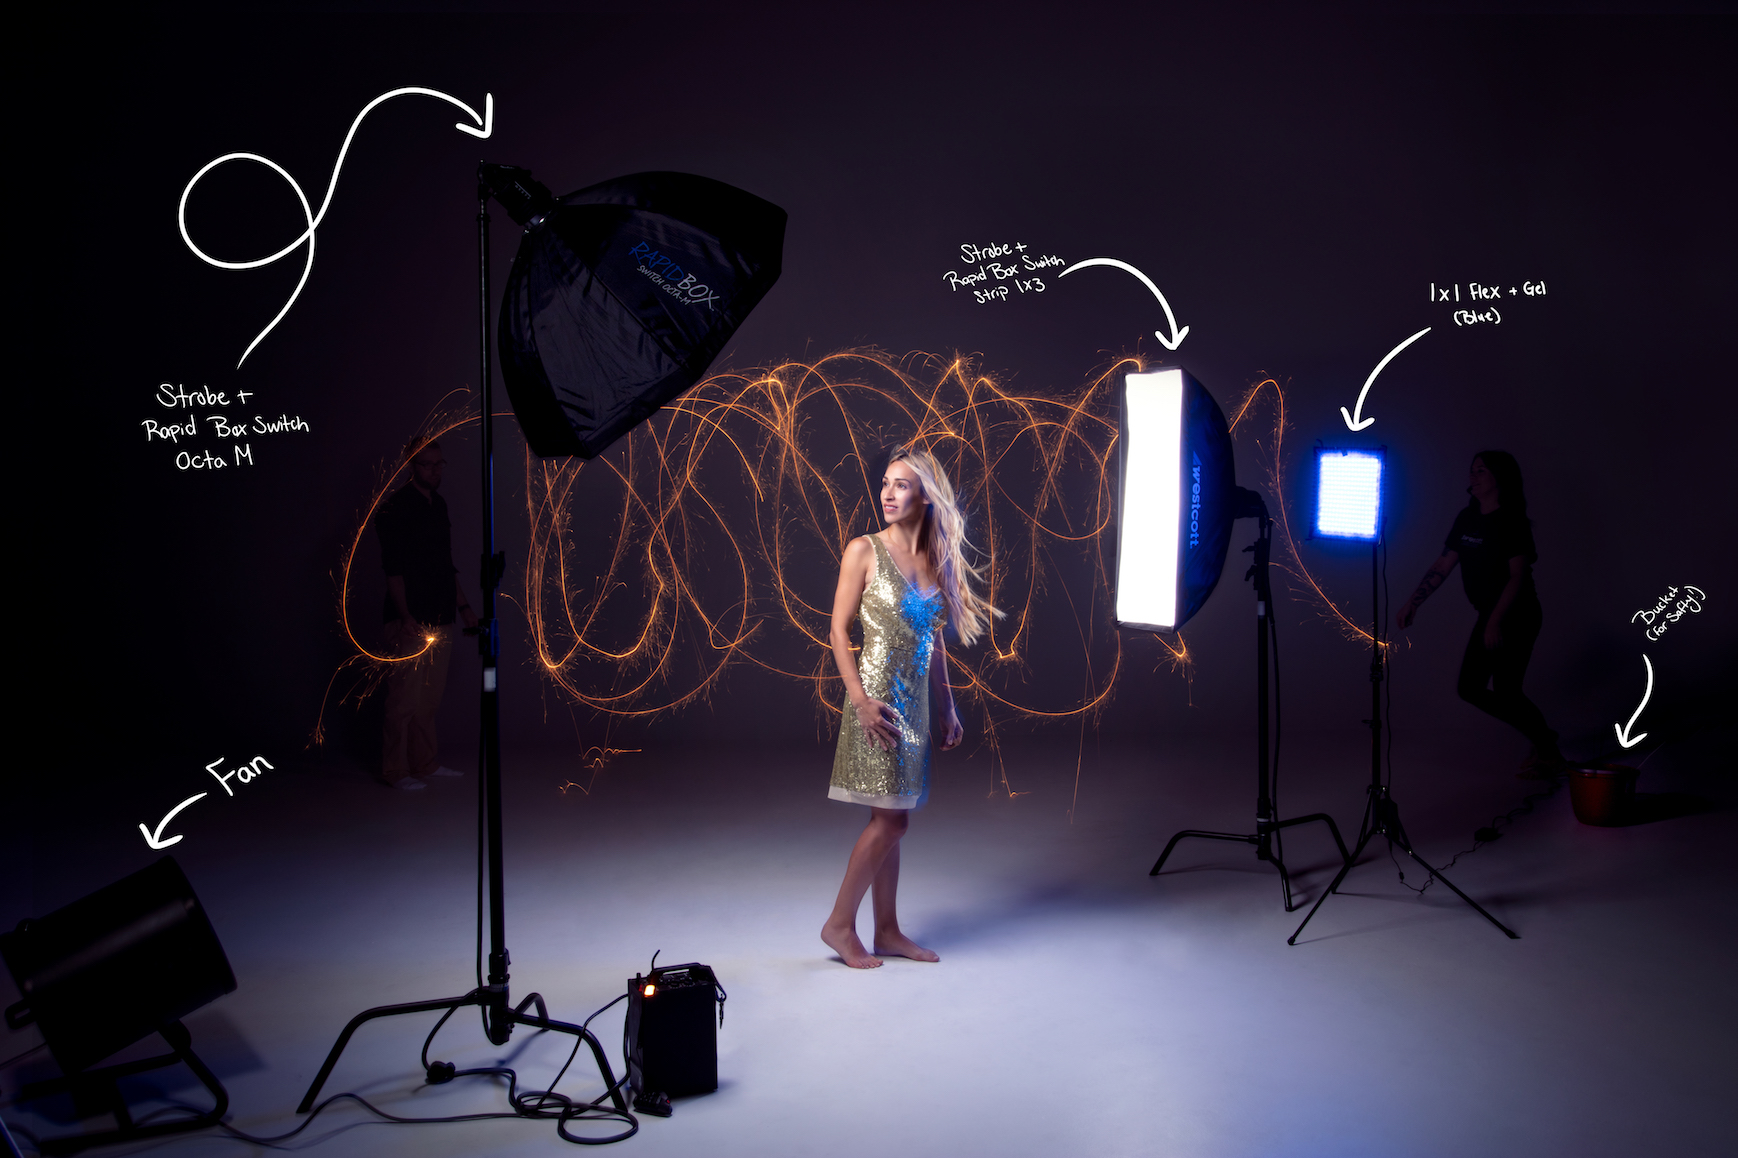
Setup
To paint light, we had some assistants dance around behind our subject with sparklers pointed toward the camera to create this dramatic background effect. Then, we added in a gelled continuous Flex LED to capture movement in our subject’s hair and dress.
What We Learned
Remember to keep your strobe’s modeling lamp turned off, otherwise you’ll create an unwanted ghosting effect as shown below. It helps to mark spots on the floor with gaff tape or something similar to show your crew exactly when they are out of frame.
With Modeling Lamp
Make sure any assistants or crew remain out of the frame during the flash, otherwise they’ll be caught in camera.
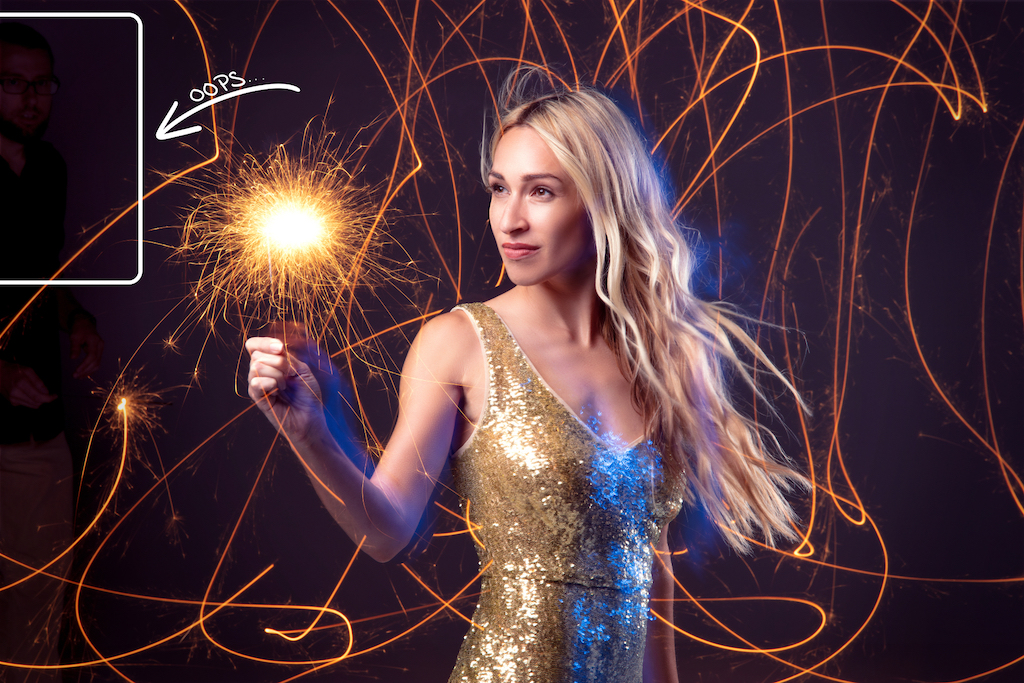
Assistant In-Frame During Flash
And finally, be patient! Experiment with different movements of your continuous lights until you discover the exact look you’re going for. As shown below, we disliked the outcome of some of the light movement in the background and when the sparkler was moved between our subject and the camera.


Safety Tips
- Make sure you have a bucket of water on-hand to quickly cool and extinguish sparklers.
- Be sure to have a fire extinguisher nearby just in case.
- Make sure your studio or whatever space your shooting in has proper ventilation.
- Be sure to check that your model is comfortable working with sparklers or any other potentially hazardous items before the shoot begins.
Light Painting Tips
- You’ll typically want your subject to stay as still as possible throughout the exposure, so pick a pose you know the model can easily hold.
- Make sure your assistants (or light painters) are wearing black or dark clothing to keep the light from exposing them. This will make it less likely that they will show up in the final shot.
- Remind your light painters to move constantly throughout the exposure. If they stand still there is a higher chance that they will appear in the final image.
- Have fun and experiment!
ISO 100 • f20 • 1.60 Second Exposure
ISO 100 • f16 • 8 Second Exposure
Lighting Gear in Action


Flex Cine DMX RGBW Mat 1-Light Set (1' x 1')7708

Flex Cine DMX RGBW Mat 1-Light Set (1' x 1')7708
You must be logged in to post a comment.