
This article is courtesy of San Fransisco-based editorial and lifestyle photographer Jay Watson.
I remember a few things from my high school photography instructor, and although he said I had the worst case of senioritis he had ever seen in 25 years, he showed me a lighting setup he called “45º/45º.” It’s a classic Rembrandt style that places the light roughly at a 45-degree angle between the camera and subject, then aims it down 45 degrees from a height above the subject’s head. This is the starting point for almost everything I shoot.
“Do what you want, work with creative people doing interesting things, and get a front-end alignment after shooting epic locations” was basically the art direction for this assignment from G-Project Gear, the makers of ruggedized Bluetooth wireless speakers. The goal for this shoot was to build a library of marketing images for the client, so even though we were shooting over several days, we still had to keep things moving quickly with simple lighting setups.
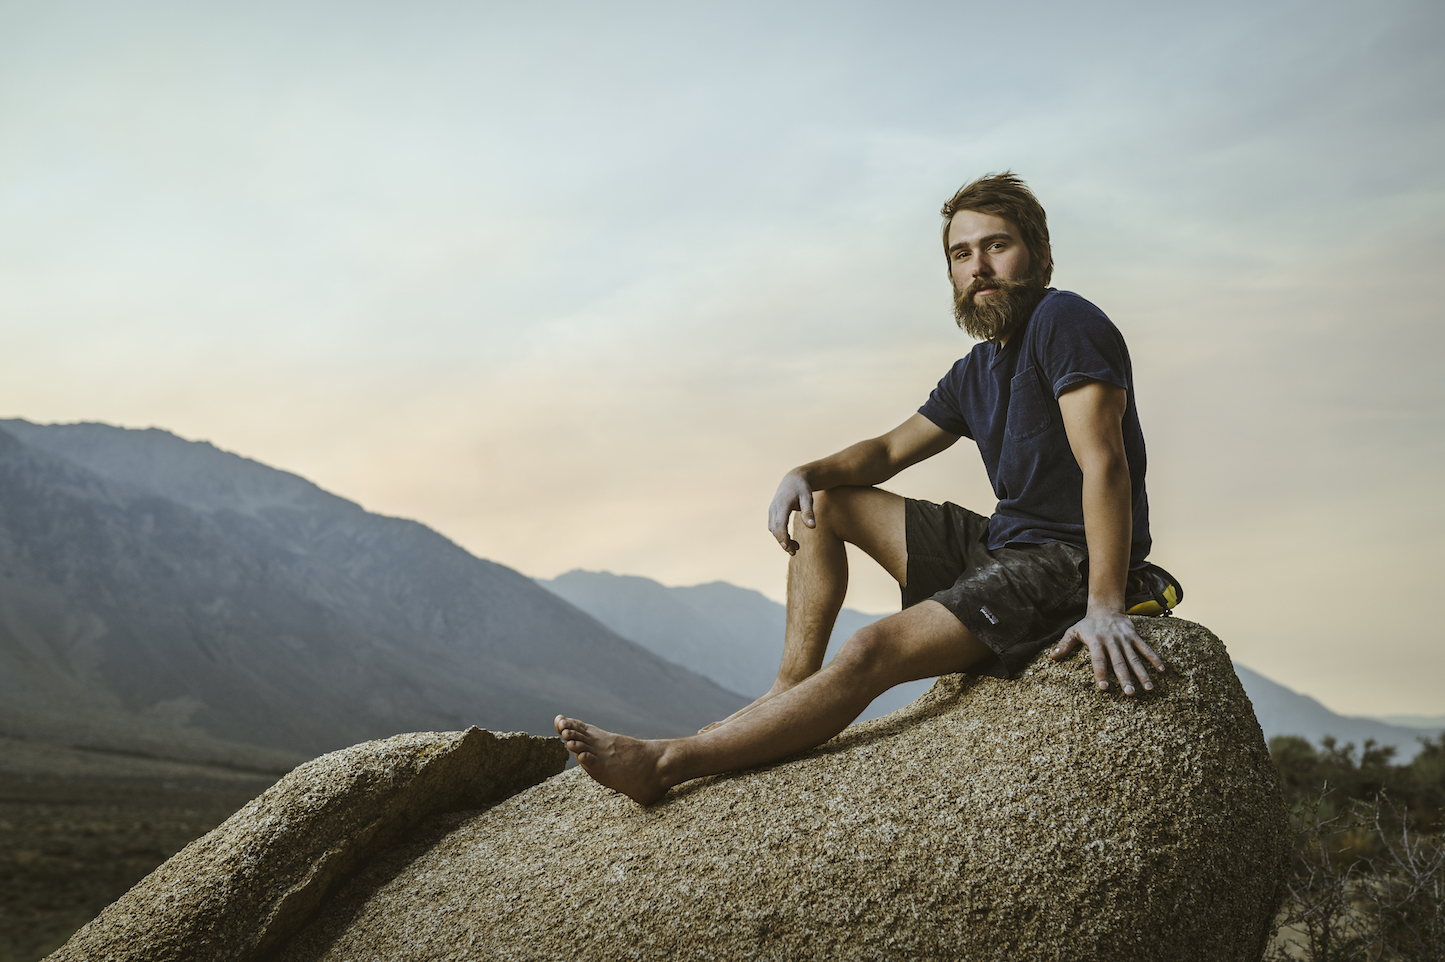
A mid-large Octa box is super versatile. It’s the Kristaps Porziņģis (a New York Knicks basketball player who’s over 7 feet tall) of lighting—that is, it’s big enough for shooting a single person full length and stunning when brought in close for a waist-up portrait. It’s the only thing I used for this 45º/45º setup of rock climber Jacob Forrer after his bouldering session at The Buttermilks in Bishop, California. Set 10 feet overhead, the light is directional enough to have fall-off and contrast, but it’s really feathered. Most of the mod is in front of Forrer. The light is very soft and it’s giving the shadow side softer edges. No reflector is needed, but a two-stop neutral density filter was placed on the lens to cut back on the ambient light and to keep a relatively shallow depth-of-field at f/4.
Curiously, there was so much haze in the atmosphere from nearby forest fires that day that I could never recreate these colors again.
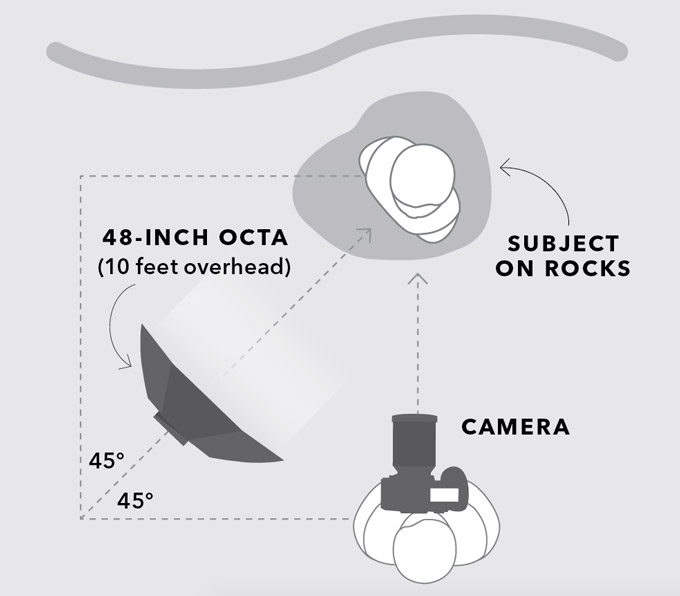
Camera: Nikon D4S Lens: Sigma Art 35mm f/1.4 Exposure: f/4 at 1/250th of a sec ISO: 125 Lighting: Westcott 48″ Rapid Box
Further Lighting Tips
-
- Experiment with different modifiers to push your lighting boundaries.Each mod has its own set of characteristics. I’m never bored with lighting because the mods in my kit seem to change every six to 12 months.
- Build your kit wisely. When I started out, I purchased light stands, grip, clamps, reflectors, light panels umbrellas, softboxes and grid spots before I owned my strobes. Your kit is you. Strobes are just light sources that can easily and affordably be rented. White sheets, shower curtains, and foam core are the world’s cheapest reflectors.
- Think about size, distance, and power. Mods are softest when they are large or moved closer to the subject. They become a point light source with more specular contrast when moved farther away or made smaller. Start with the largest practical mod based on the conditions and distance from the subject needed. Too much power can override a mod’s soft qualities.
- Shape your subject. Don’t just aim the light directly at your subject unless you want an on-camera flash look. Rake the light across your subject to give it shape, direction and fall off.
- Avoid the center. Boxes, octas, and umbrellas have hot spots and more contrast in the center. Place your subject near the back edge of your modifier to allow the majority of the surface area in front (where it’s softest) to do its magic. I file this one under “Things I Wish I Learned Sooner in Life.”
See more of Jay’s work here and follow him on Instagram here.
This is part of an article that originally appeared on Rangefinder.
Featured Lighting Gear

This softbox is available with interchangeable mount, compatible with most flash and speed lite units. Click here to find your Rapid Box.
[…] Check out another one of Jay’s effective 1-light setups here. […]
[…] Rembrandt (shooting at 45º) […]