
In part 1 of this 2 part series, Adobe Creative expert and photographer Dave Cross demonstrates how to use studio lighting for a composite image. In part 2, Dave discusses the essential Photoshop editing techniques for creating realistic composite images.
To begin, Dave brings the image of the model into Photoshop as a Camera Raw Smart Object, giving him the ability to go back and forth between Camera Raw and Photoshop. He created the image below using key light (a modified by a Rapid Box) and 2 rim lights modified by stripbanks and grids).

Photograph of Subject for Composite
Dave then converts his pre-selected background image, shown below, from a JPEG to a Smart Object by using the Camera Raw Filter in Photoshop. He evaluates the background to determine what adjustments and editing techniques he needs to use to help create a realistic composite image.
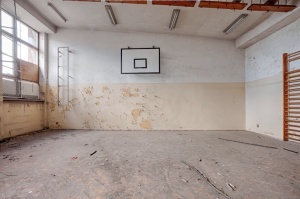
Background Image for Composite
After adjusting the image of the model to best match the background image, Dave layers the image with the edited background image in Photoshop. He uses the Quick Selection Tool to outline the model and remove him from the white background. This allows him to view the model in the context of the pre-selected background.
Dave exports the image of the model to a layer mask. He then tweaks the images of the model and the background to ensure both images match, creating a uniform look.
These simple Photoshop steps and attention to detail allow Dave to create the compelling, realistic composite image shown below.
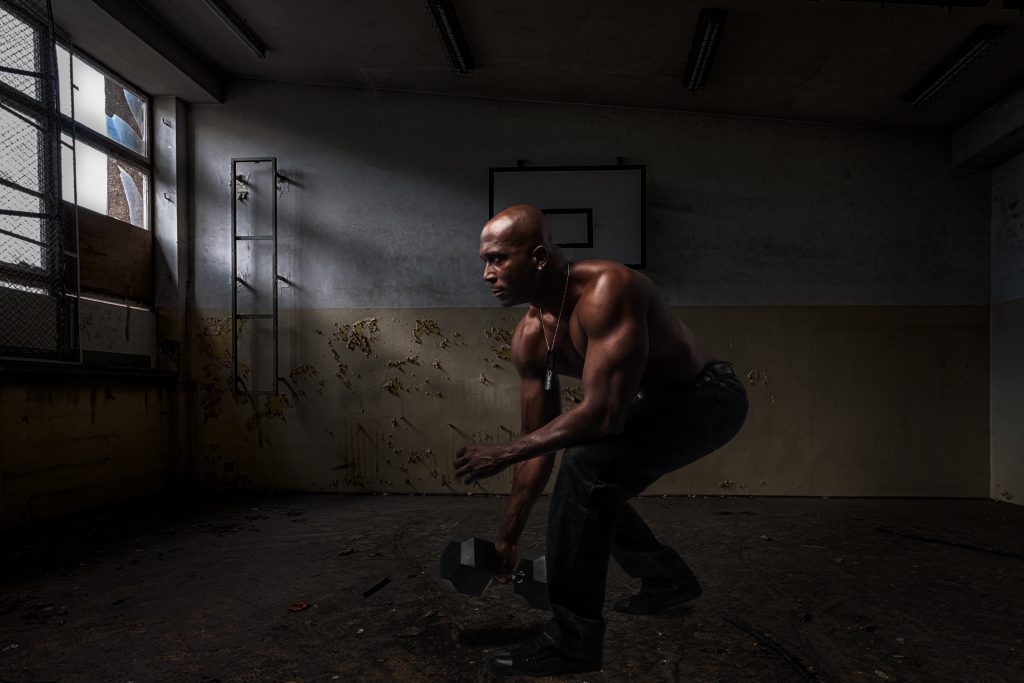
Final Composite Image
Watch part 1 of this series here.
Lighting Gear in Action

Rapid Box Octa XL/XXL for Studio Lights2040SKY
Pro Stripbank3667

Rapid Box Octa XL/XXL for Studio Lights2040SKY
Pro Stripbank3667

Pro Stripbank3667
You must be logged in to post a comment.