
Photographer Ian Spanier takes us behind the scenes for a deep dive into how he captures studio portraits using high apertures. This shoot is a revisit of a personal project photographing motorcycle riders in his living room. What started as a creative challenge became an exploration of lighting control, depth of field, and the power of reliable gear. Now, in a studio and armed with the powerful FJ800 and FJ400 II strobes, Ian shows us how he gets crisp, high-aperture portraits with consistent, controlled lighting.
Why Shoot with Higher Apertures?
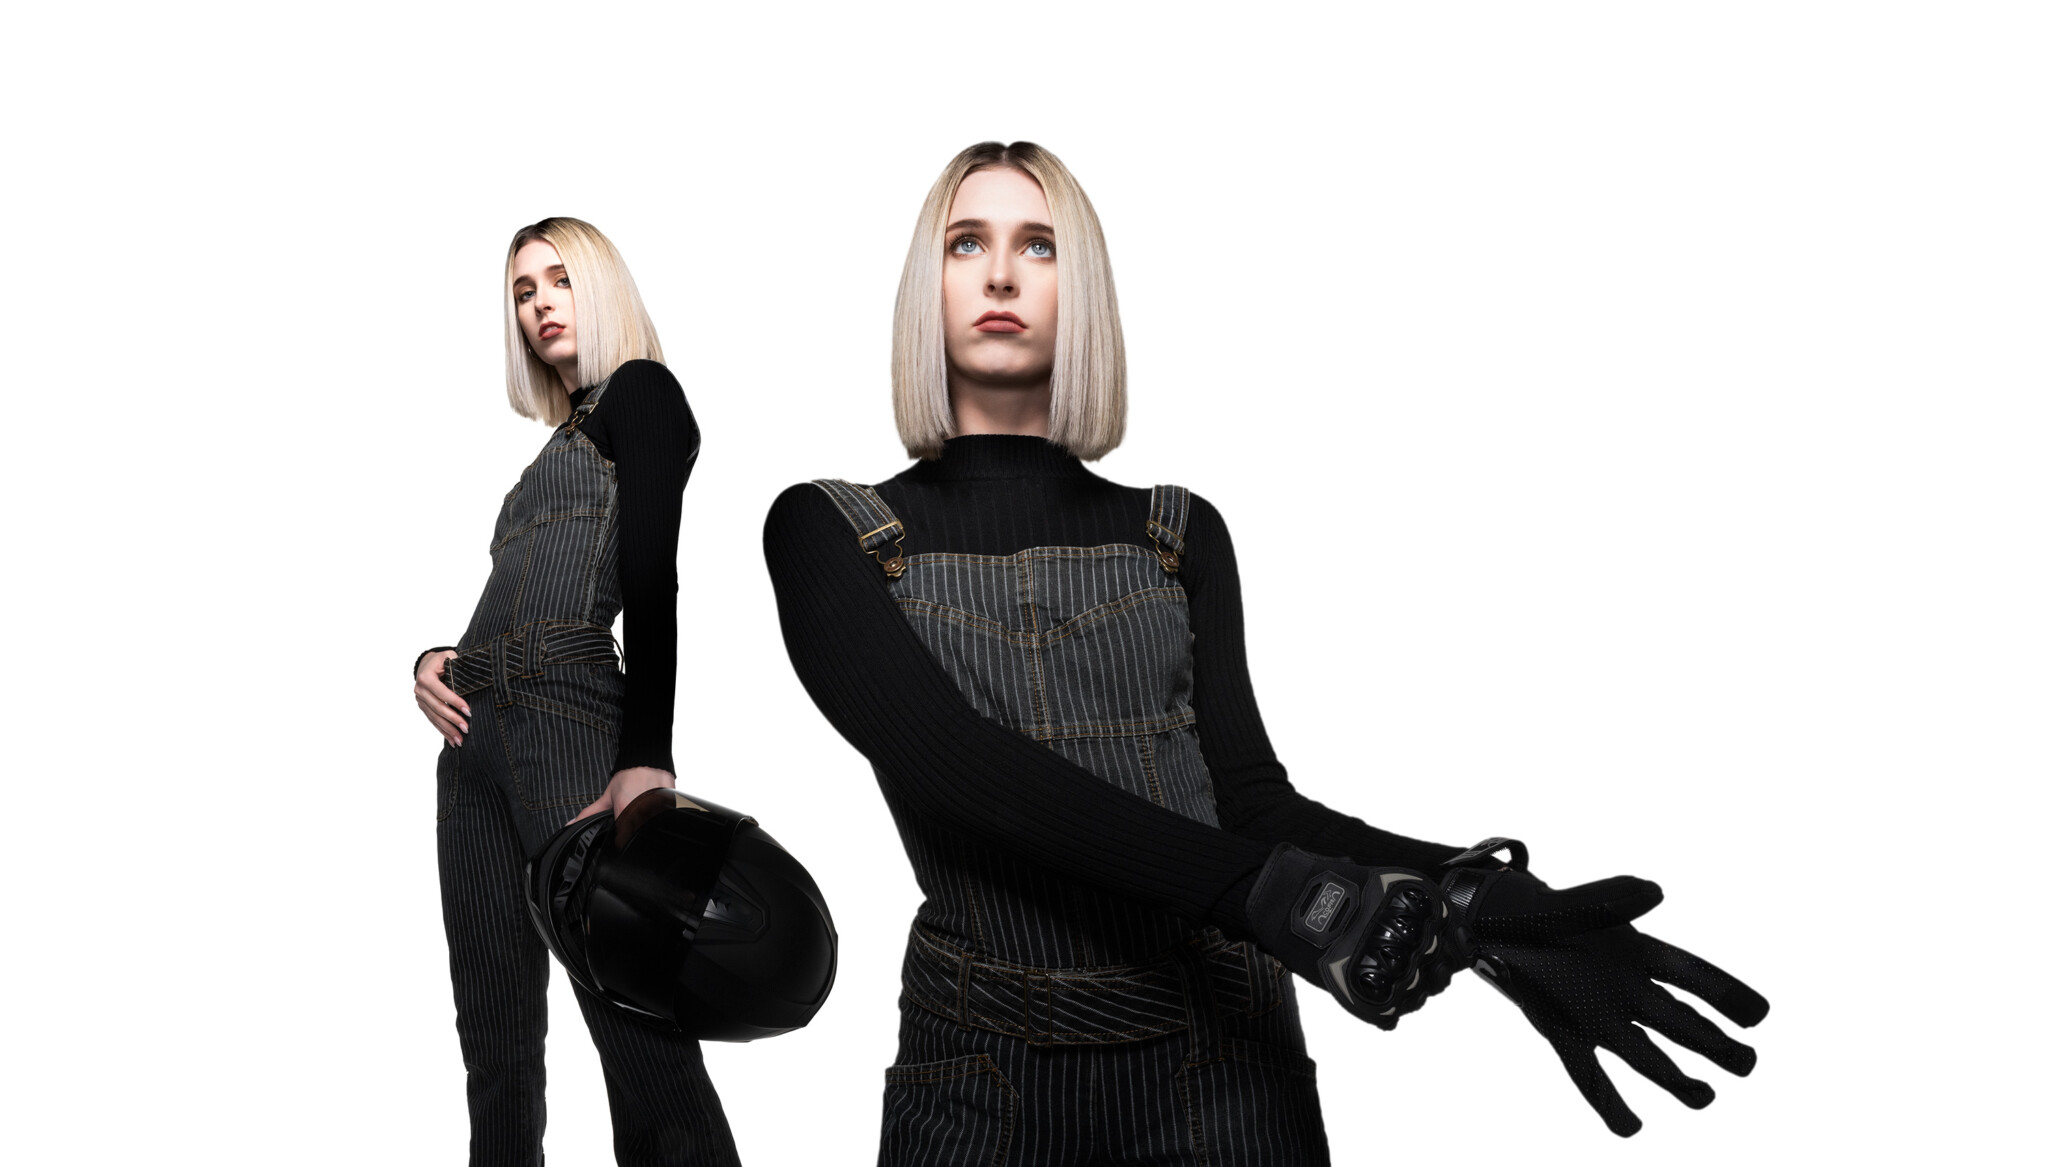
Portrait photographers often lean towards low apertures with shallow depth of field for that creamy background blur, but Ian went the other direction. His goal? To shoot at apertures like f/16 or f/22 to create portraits with deeper depth of field, allowing details throughout the frame to remain in focus.
This approach is perfect for capturing full-length subjects, props, or interactive poses, like reaching hands or held helmets, while maintaining clarity and visual connection throughout the scene. It adds dimension and style to otherwise traditional portraiture.


Why Light Control is Everything
When shooting at higher apertures, your camera’s sensor needs more light to maintain proper exposure. But blasting light at your subject isn’t the answer. You need precise, controlled, and adjustable lighting to preserve the mood and style of the image.
That’s where Ian’s lighting setup shines. With powerful strobes, modifiers, and an organized grouping system, he can shape, direct, and balance the light exactly how he wants it, giving him full creative control without bumping ISO or compromising image quality.
Gear Breakdown: Full Control, Every Step of the Way
Main Light: FJ800 Strobe + Beauty Dish with Grid
The FJ800 packs the punch as Ian’s main light. Paired with the 24″ Silver Rapid Box Beauty Dish Switch, along with a diffusion baffle and egg crate grid, it delivers a bright yet beautifully controlled light. Ian positions it close to his subject to create dramatic falloff and focused illumination on the face. The grid helps contain the light and prevent spill, while the baffle softens the overall output for a more flattering look.
Thanks to the FJ800’s extra power and fast recycle times, Ian can use both modifiers together without sacrificing exposure—something that is more difficult to achieve with lower-powered strobes.
Fill Light: FJ400 II Strobe with 7′ Shoot-Through Umbrella
Behind the camera, Ian places a fill light two stops under his key light—a consistent ratio he uses across all his shots. Using an FJ400 II paired with a 7′ shoot-through umbrella, he softens the shadows without flattening the overall look.
That two-stop difference is key. It allows him to maintain a balanced exposure with subtle shadow detail, giving him flexibility in post. Most importantly, it’s a repeatable setup that delivers consistent results, whether he’s shooting in a studio, a living room, or even outside.
Backlights: 2x FJ400 II Strobes + 43″ Deep Silver Umbrellas
To light the white background, Ian uses two FJ400 II strobes with 43″ deep silver umbrellas. These are placed left and right and grouped separately so he can adjust each one independently. This flexibility lets him fine-tune the background brightness and avoid unwanted light spill on the subject.
Pro Tip: Watch for unwanted reflections and background light bleeding onto your subject. It’s a common issue with setups like these, and keeping your background lights properly flagged is key.
Negative Fill: 4’x6′ Scrim Jim Cine with Black Block Fabric
To control contrast and avoid light bounce, Ian brings in four black flags using 4’x6′ Scrim Jim Cine frames. These act as negative fill, absorbing stray light and helping to carve out dimension that’s especially useful when you want that “cutout” look or are working with a white background.


Try New Things and Make Them Repeatable
Ian is a big believer in experimenting with lighting, and this entire project began as a way to challenge himself with new techniques and tools. But more important than trying something new is making it repeatable.
Ian launched a personal portrait series featuring motorcycle riders, shot entirely in his living room with low ceilings and limited space. Rather than seeing those constraints as setbacks, he used them to fuel his creativity.
His goal was to create a studio-quality look in non-studio spaces, and the key was consistency. By sticking to a repeatable lighting setup, especially a two-stop difference between key and fill, he was able to maintain the same visual style across every shoot, whether in a home, a full studio, or outdoors.
Thanks to detailed notes and consistent ratios, Ian stretched the project over several years, building a cohesive body of work that looks polished and unified—no matter where or when each portrait was taken.
Why More Power = More Possibility
The real MVP here is the FJ800 strobe. Its higher output meant Ian didn’t have to max out his strobe, even with light-eating modifiers like a baffle and grid. That translates to more shots per battery, lower ISO settings, and greater lighting flexibility.
Compared to earlier versions of this shoot, where the FJ400 sometimes had to be pushed to the edge, the FJ800 offered efficiency and ease, letting Ian focus more on directing his subject.
Final Thoughts
This shoot is a reminder that lighting is more than just brightness—it’s control, style, and intention. Whether you’re shooting at f/2 or f/22, having the right tools and understanding how to use them makes all the difference.
For Ian Spanier, high-aperture portraits are just one more trick in the creative toolbox. With smart lighting choices, a powerful strobe setup, and a willingness to experiment, he’s built a style that’s as versatile as it is consistent.


Want to see more of Ian Spanier’s work? Check out Portrait Lighting in Challenging Locations with Ian Spanier to see how he tackles difficult environments with creative lighting solutions.


You must be logged in to post a comment.