
Blending flash with natural light can be tricky, but it is the key to making your portraits stand out and look professional. If the flash is too strong, the photo looks fake. If it’s too weak, your subject gets lost in the shadows. In this guide, photographer Eli Infante shows how he uses Westcott lighting to find the right balance between the sun and his strobe for a clean, natural look.
Ambient vs. Flash: What You’re Actually Controlling
When you work with off-camera flash, you are managing two different light sources at the same time. The first is the ambient exposure, which is the light already in the scene, like the sun or the sky. The second is the flash exposure, which is the light hitting your subject from your strobe.
Eli’s approach is to treat these as two separate steps. Instead of trying to guess all your settings at once, you should dial in the look of your background first and then add the flash to light your subject. This prevents you from getting overwhelmed and helps you keep total control over the final image.
Step 1: Dial in Your Background Exposure
Before Eli even turns on his Westcott FJ250 strobe, he dials in his camera settings to make the background look exactly how he wants.
- Aperture (Depth of Field): Eli loves a blurry, soft background. He usually sets his lens to f/1.8 or f/2.0. Once this is set, he doesn’t touch it for the rest of the shoot.
- ISO: To keep the image crisp and free of noise, he keeps his ISO at 100. Since he’s shooting outdoors in daylight, there’s no need to raise it.
- Shutter Speed: This is Eli’s secret ingredient. Shutter speed controls how bright or dark the background looks. If the background is too bright, he raises the shutter speed. If it’s too dark, he lowers it.
For this shoot, Eli tested a very fast shutter speed (1/1600), but it looked too dark and moody. He wanted a natural look, so he landed on 1/640. This kept the trees and sky looking bright and real.


Step 2: Add in the Off-Camera Flash, Then Adjust Power for Your Subject
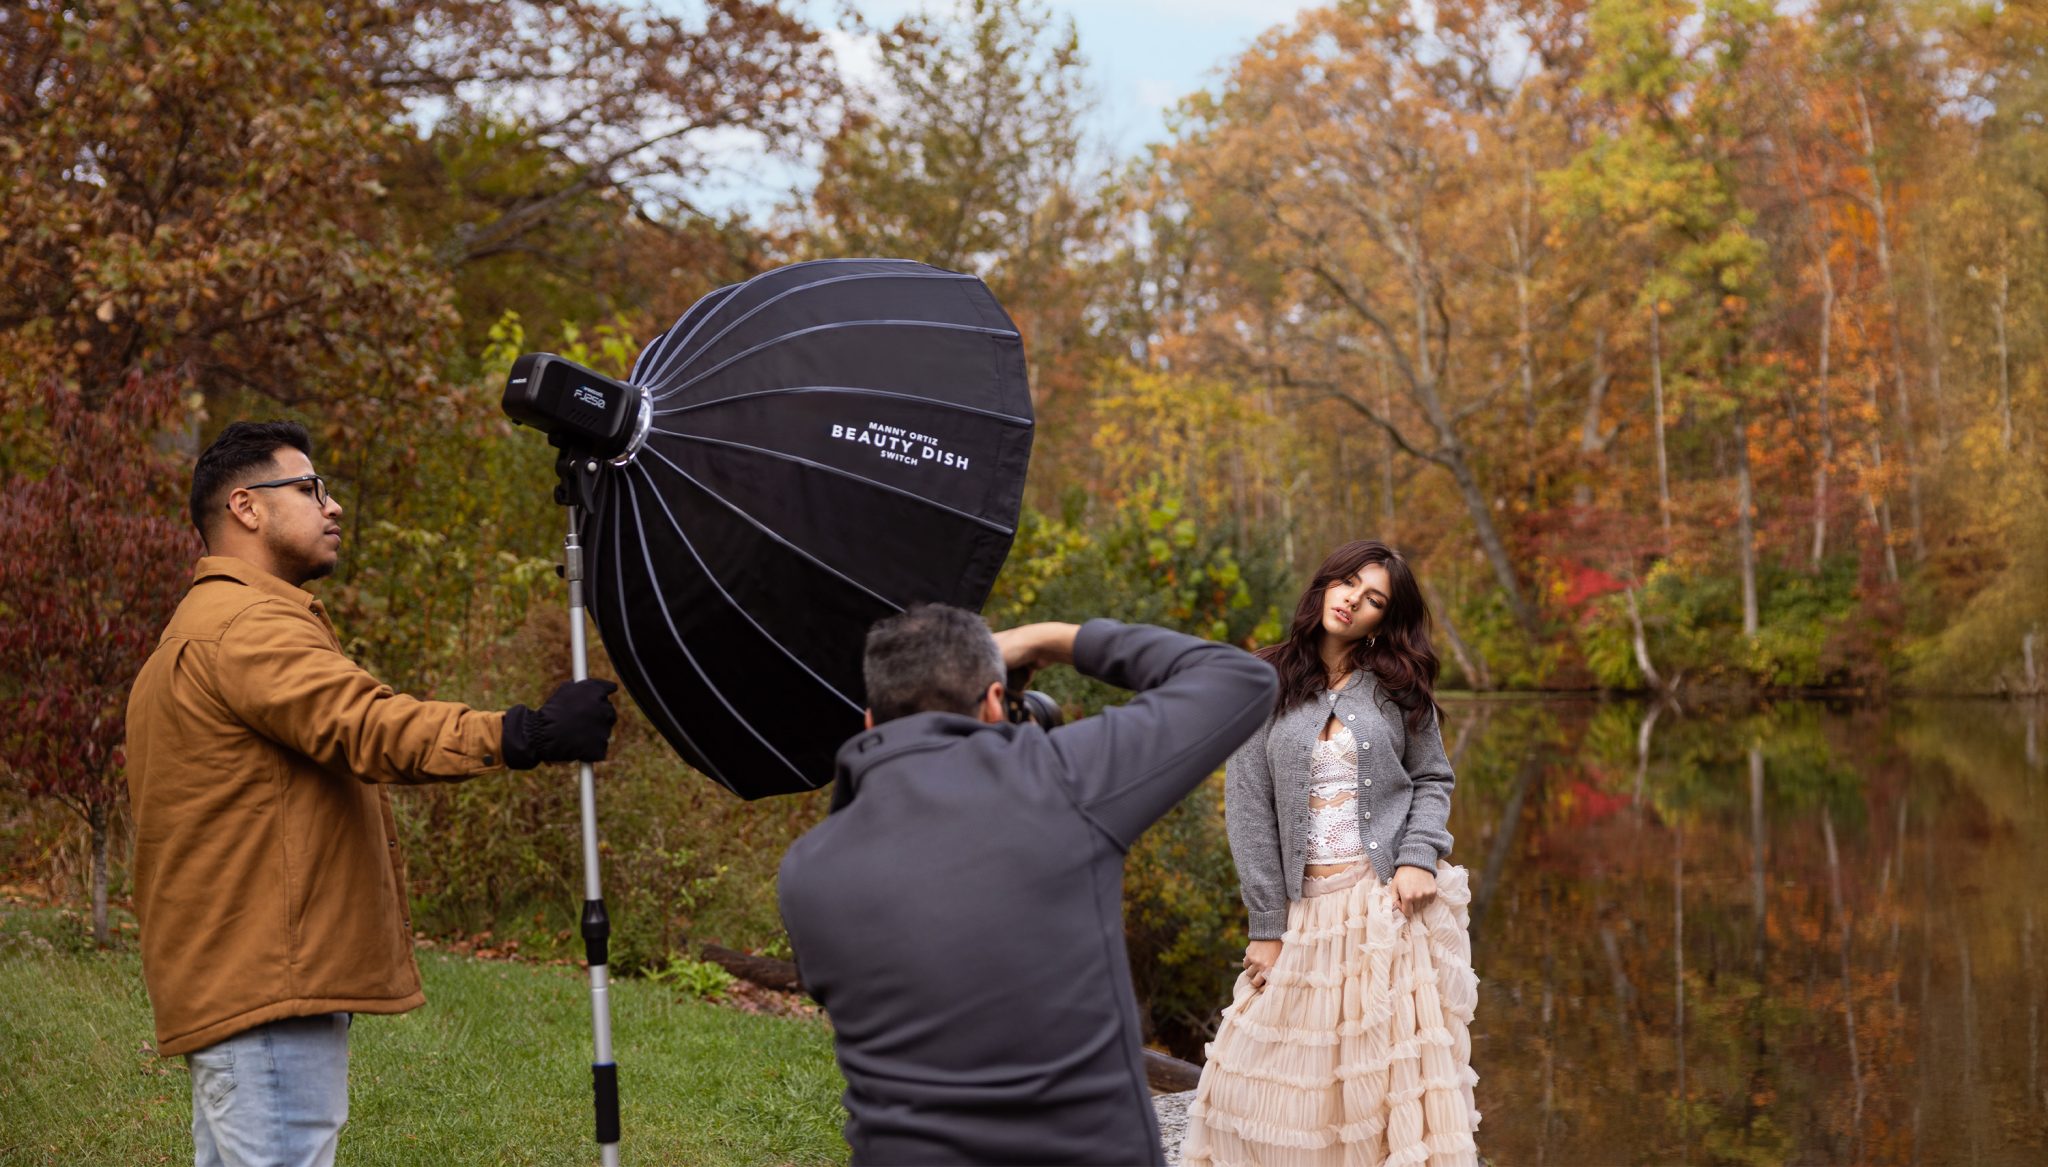
Now that the background looks great, it’s time to light up the subject. Eli keeps his lighting setups simple so he can focus on his model. For this look, he uses Loop Lighting, placing the light about 30-degrees to the side of the subject.
A great pro tip from Eli: Position your modifier, in this case, a Westcott 36-inch Beauty Dish Switch, so the bottom of it is level with the subject’s shoulder or elbow. This ensures the light fills the face beautifully.
To find the right brightness, Eli suggests starting the flash at Power 5.0. This is a neutral middle ground that makes it easy to adjust. If the subject looks too dark, you can turn the power up. If they look too bright or flashy, just turn the power down. During this shoot, Eli ended up around power 6.5 to give the image a bit more punch against the daylight.


Put It All Together: Background First, Then Flash
Getting a professional result with off-camera flash is all about working in layers. Start by setting your aperture and ISO for the style you want, then use your shutter speed to decide how bright or dark you want the background to appear. Once the environment looks right, introduce your flash at a middle-power setting and adjust only the flash power until the subject is properly lit.
If the clouds move or the sun comes out, use your shutter speed to fix the background and your flash power to fix the subject. By keeping these two exposures separate, you can avoid common mistakes and maintain a natural balance in your portraits, even in changing outdoor conditions.
Want to see more from Eli Infante?
Check out Strobe vs. Sunlight: Pro Secrets for Natural-Looking Flash Portraits to learn how to create clean, natural looking portraits on location by balancing flash with the sun.


You must be logged in to post a comment.