
Your white balance setting is how your camera decides what white should look like in a photo, and all of the other colors as well. It’s straightforward enough when shooting a subject in clean white light, but when shooting in mixed lighting conditions issues can arise and your photo subjects might look like that just came back from an overlong stay at the spray-tanning booth. After all, a piece of white paper, under orange light, will look orange if we don’t tell our camera otherwise.
With so many things running through your mind during a photoshoot though, white balance is very easy to overlook. Setting a proper white balance can be confusing, so many photographers just leave their cameras set to ‘Auto White Balance’ and call it a day. Color temperature is a major component in an image though, and can impact the overall mood of a photo greatly, so lets jump in and take back that control.

The first step in a proper white balance workflow – whether you’re shooting portraits or landscapes – begins with your file type. I know JPEGS are smaller in size and look prettier straight out of the camera, but I implore everyone to shoot in RAW. One of the main benefits of RAW deals specifically with white balance. RAW files let you change the white balance to whatever you want, after the photo has been captured. This is a great way to cover your butt incase you really screw up the white balance while shooting and need to change it later in post processing software.
Getting it Right In the Field
- Camera Presets
- Custom WB (White Balance)
- Expodisc

The first step is to fix it in the field. This means setting your white balance before you shoot. In auto mode you camera basically tries to neutralize color-cast in the entire image. This can lead to pale skin tones and dull skies. Fortunately your camera comes with Preset options for shooting under different lighting conditions. For example if you are shooting indoors with warm overhead lighting, simply set your camera to the Tungsten WB Preset and you’ll be off and running with more accurate colors.
If you find yourself shooting in a mixed lighting condition, these basic presets may no longer be the best fit. With orange tungsten lights, green fluorescent lights, and blue window light, deciding how to interpret true white can be quite a task. In these instances you’ll want to set a ‘custom’ white balance for that particular scene. Check your camera manual for specifics and once your ready to do, use a neutral card or ExpoDisc to aid you in dialing in the custom balance for the scene. These tools take into account all of the light temperatures falling on your target and average them out for natural looking skin tones.
Perfecting It In Post
- Reference target
- Grey Card
- Color Checker
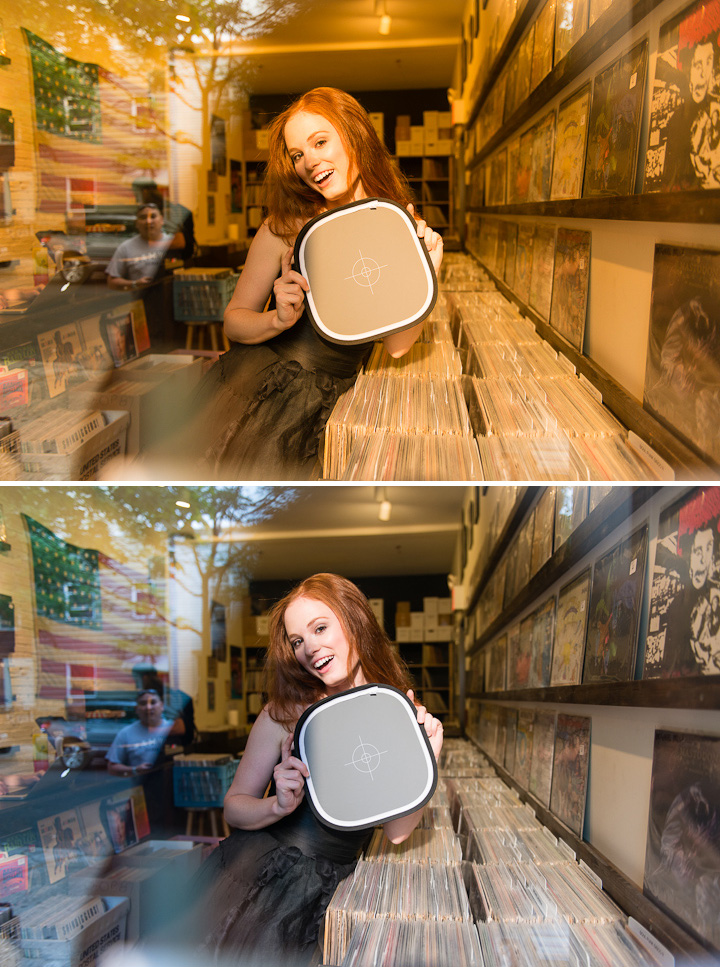
The second step to perfect white balance takes place in the post processing. If you remember, this is why we chose to shoot in RAW at the beginning. During your shoot you will want to capture an image under each lighting condition including a ‘reference target’ of some kind. This can be a simple grey card or a more precise ColorChecker tool.

Then you open up that reference photo in Lightroom or ACR (Adobe Camera RAW). Once there you’ll select the ‘eye dropper’ tool. Place this tool on the reference target and your editing software will create its own custom white balance based off of the target. This is very similar to what we did in the field, but allows us a backup option as well as more accurate editing options later. From there you just synchronize all of the other photos that you shot under the same lighting conditions – and Voila – perfect color.
You may not run and out and do this all for every shoot, but using a combination of these techniques you’ll have the reassurance of walking away from each shoot you do with the best color possible!
Leave a Reply
You must be logged in to post a comment.