As most of you know, I’m kind of obsessed with studio lights. I spent my first 3 years in business as a “natural light snob”, terrified of lights/flash only because I was completely intimidated by its complexity, and worried it would make my work look “flashy” and “unnatural”. Once I moved into my studio space and decided to give studio lights a try 3 years ago, I’ve grown to love studio lights and would never go back to only shooting natural light again. As a professional photographer, I think it’s important to master all light, natural and artificial, to be well rounded and set yourself apart from your competition.
I’m going to tell you how you can add a second light to your lighting arsenal and why it rocks. I’m here to tell you if I can figure this out, anyone can. I’m by no means a true lighting master, but I’ve learned to see the light and how it can be used to sculpt and transform your portraits from ordinary to extraordinary.
For newborn work, I do love how I can control the shadows with one light, but when shooting parents against a dark backdrop, which I often do, or shooting dramatic maternity portraits, I knew I needed a little something else. Enter the small but mighty Westcott Stripbank. I love that it’s small, easy to fold up and put together fast, and easy to change from a 2nd fill light to the main light by just switching out the 3 diffusion panels it comes with. The asymmetrical feather feature of the light is extra awesome when using it for dramatic studio maternity portraits.
If you are using the AB400 from Paul C Buff (which is the light I already owned), you will need this adapter ring from Westcott so that the softbox easily fits right over the light. You will also need another heavy-duty light stand, a boom arm would be helpful in this situation, but I was able to get the light up high enough and angled down by just using a standard heavy-duty light stand without the boom.
For all of these examples, I’m using my Einstein Light inside my Westcott 50×50 Softbox as my main light and then added my AB400 inside the Westcott Stripbank for my 2nd hair light. Adding a second light is easy, especially if you already have one light wirelessly triggered. When pushing the shutter button on your camera and firing off your main strobe, your 2nd light will also fire without any additional triggers on the slave.
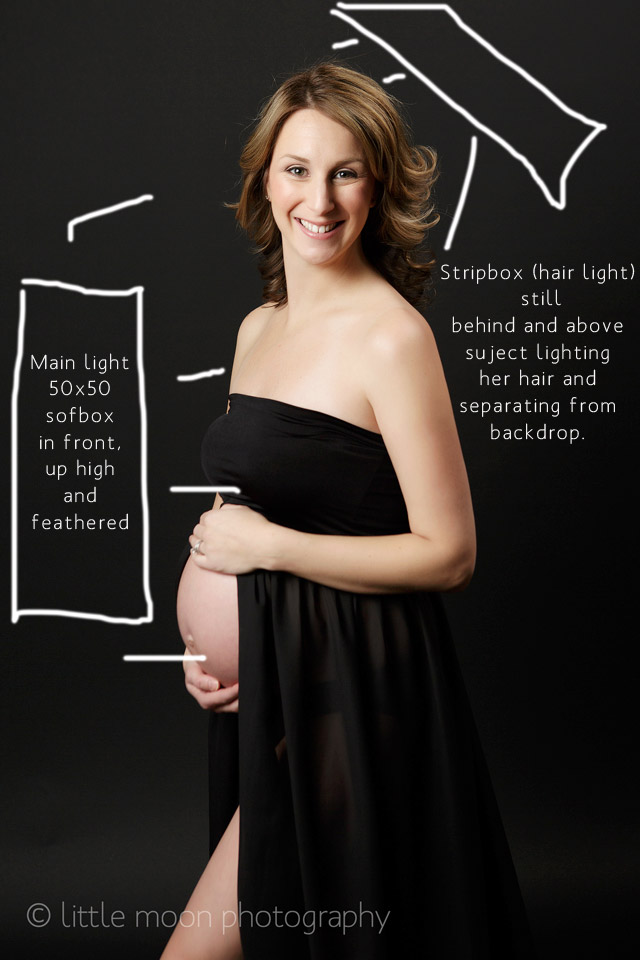
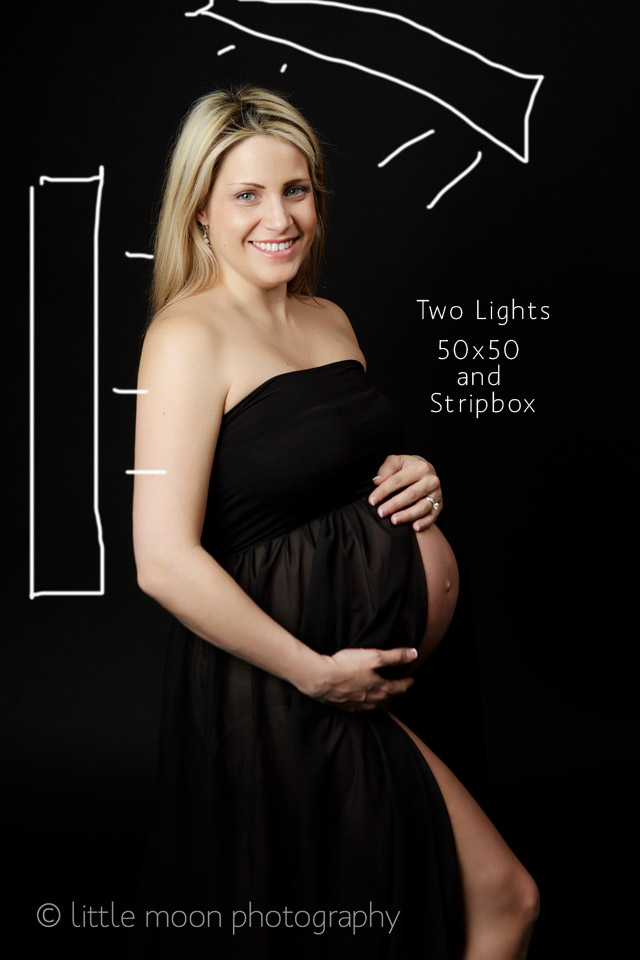
First up, I had my main light feathered out in front and the hair light positioned above and behind the subject to light my subject more traditionally. Both lights are on the same side, and both camera right.
I adore how I’m still getting beautiful shadows on her face, but her hair and body are being lit from behind so there’s more separation from the dark backdrop.
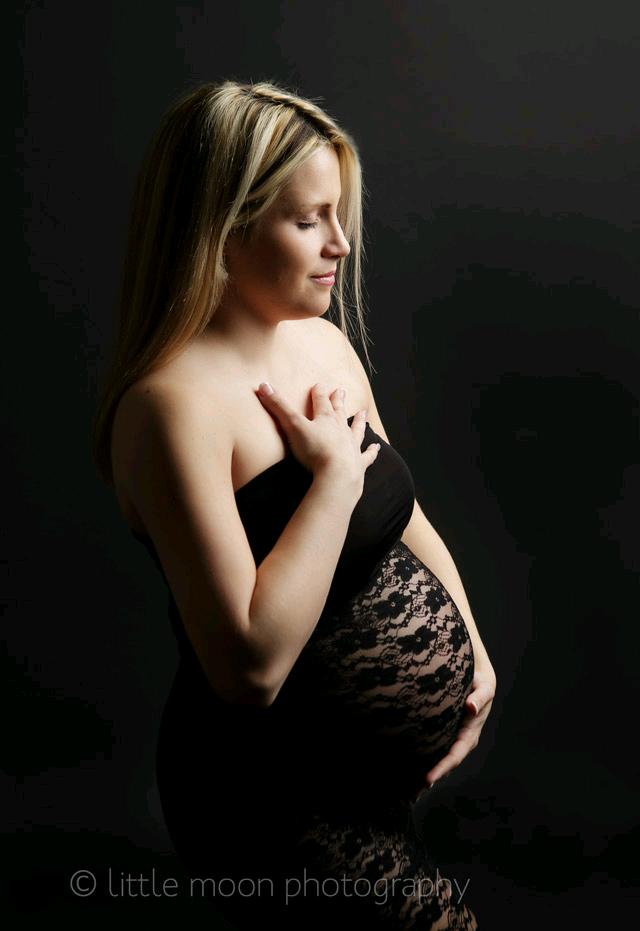
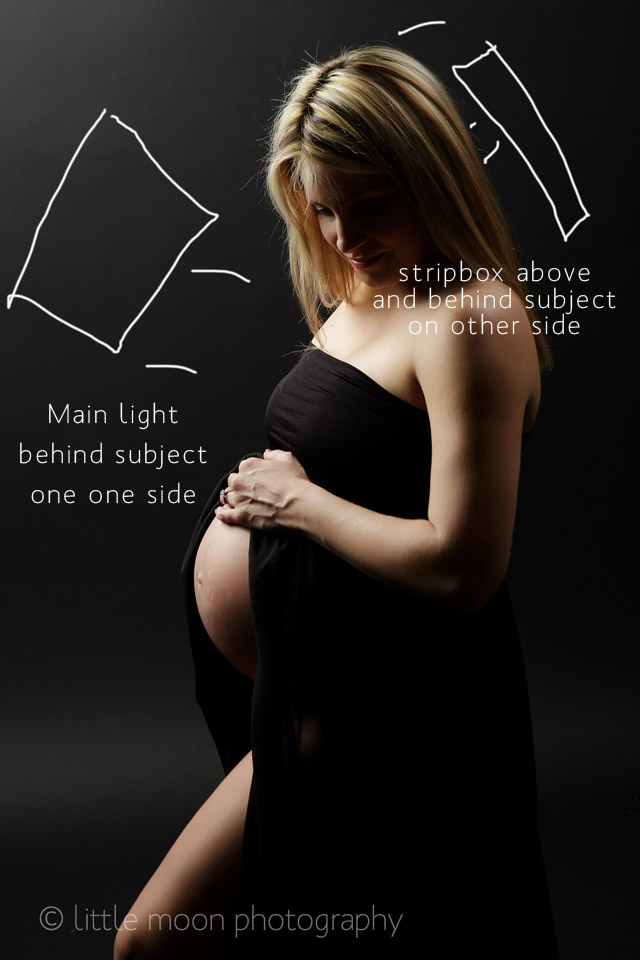
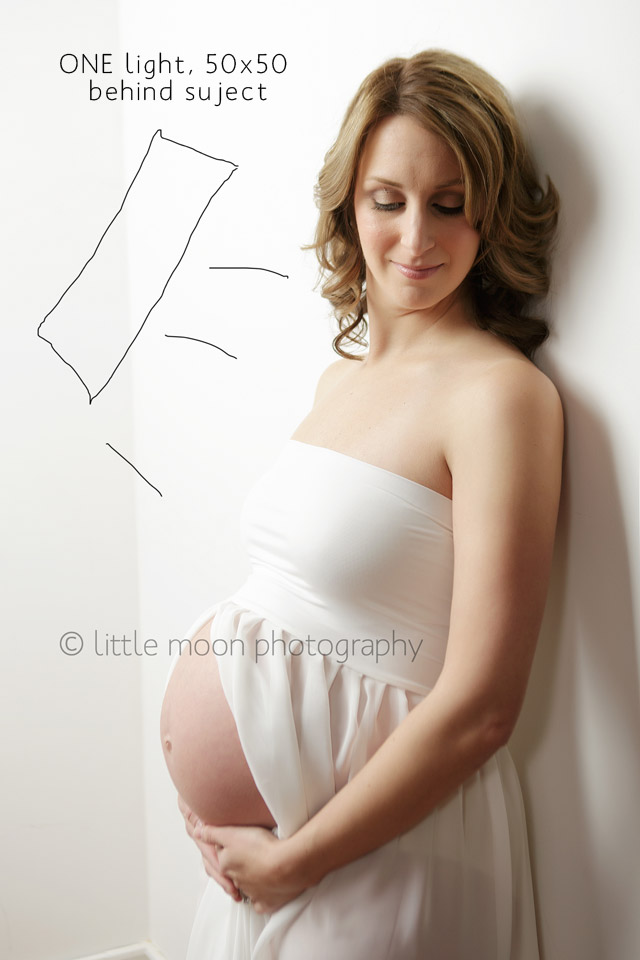
For the next example, I know I wanted some more dramatic lighting to accentuate her gorgeous pregnant belly so I pulled my main light inside the 50×50 softbox BEHIND the subject along with the stripbox still above lighting her hair to get this look. Both lights are still on the same side, both camera right, but the 50×50 main light is pulled behind the subject, as opposed to in front, feathered.
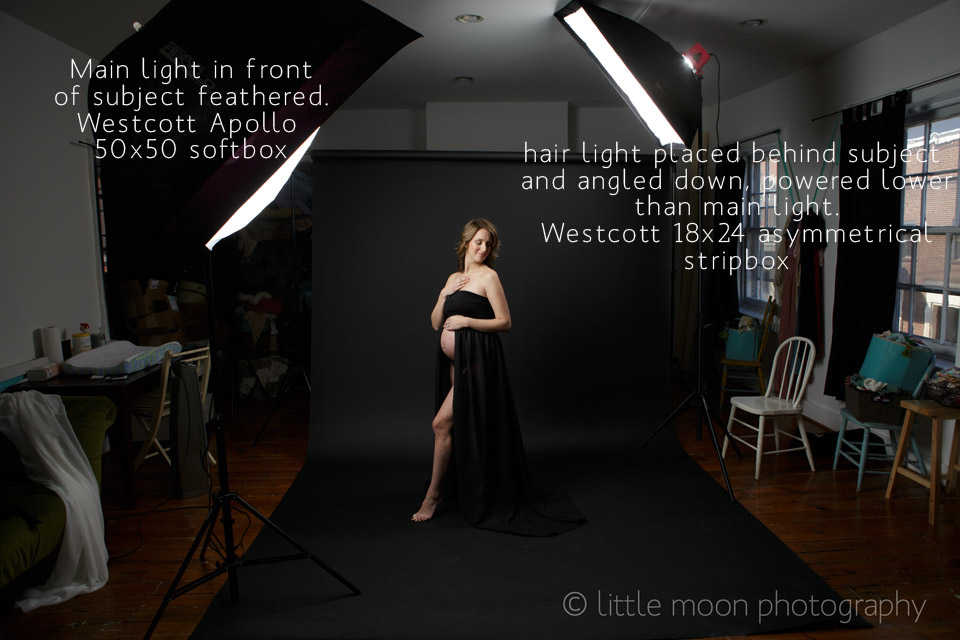
In the first image, I loved it, but I wanted to light the belly from the front so I pulled my main light out front and to the other side and had my stripbox lighting her from behind and above. The 2nd light (which I powered up a bit more from the shots above) now acted not only as a hair light but as a nice fill light. Now I have the lights on each side, the main light camera left and stripbox camera right.
Here’s a pullback from that setup:
And some shots with that setup, you can see that even with 2 lights on opposite sides of the subject, I’m still getting nice shadows by pulling the 2nd light more behind the subject with the main light feathered in front.
Here you can see what the above setup, two light’s on opposite sides, looks like on a lighter backdrop:
To give you an example of how much of a difference the 2nd light makes, I took one shot with it on (with the 2 light setup as shown in the pullback above) and then turned the hair light OFF and used just the 50×50 feathered in front.
With hair light:
WITHOUT hair light:
The shot without the hair light is still dramatic and beautiful, but I love how the 2nd light adds that little extra behind her so that there isn’t as much darkness on her back shoulder/hair. I could have also had my subject turned towards the light and gotten the look like the first shot, with the belly more lit.
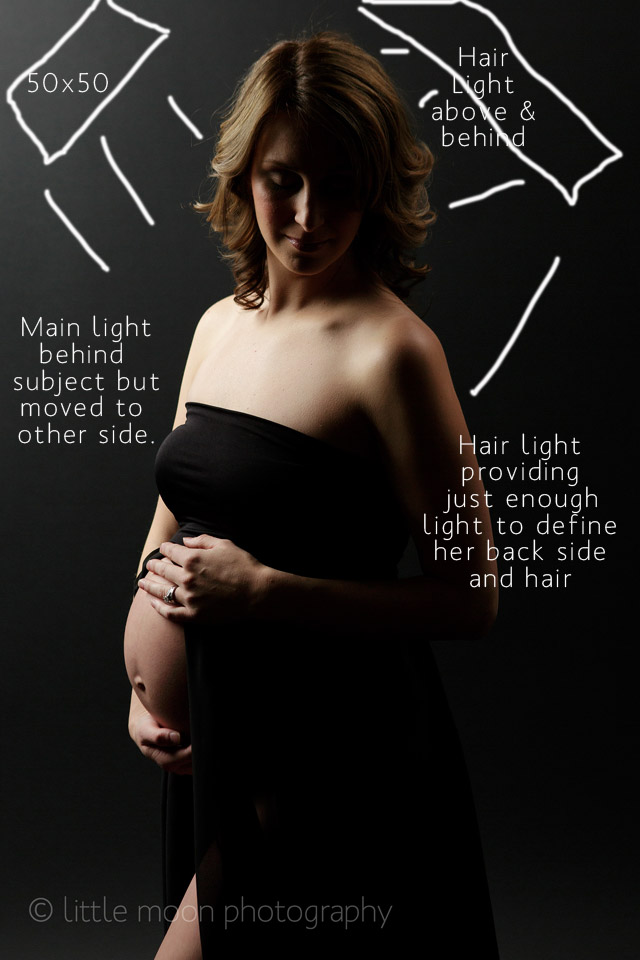
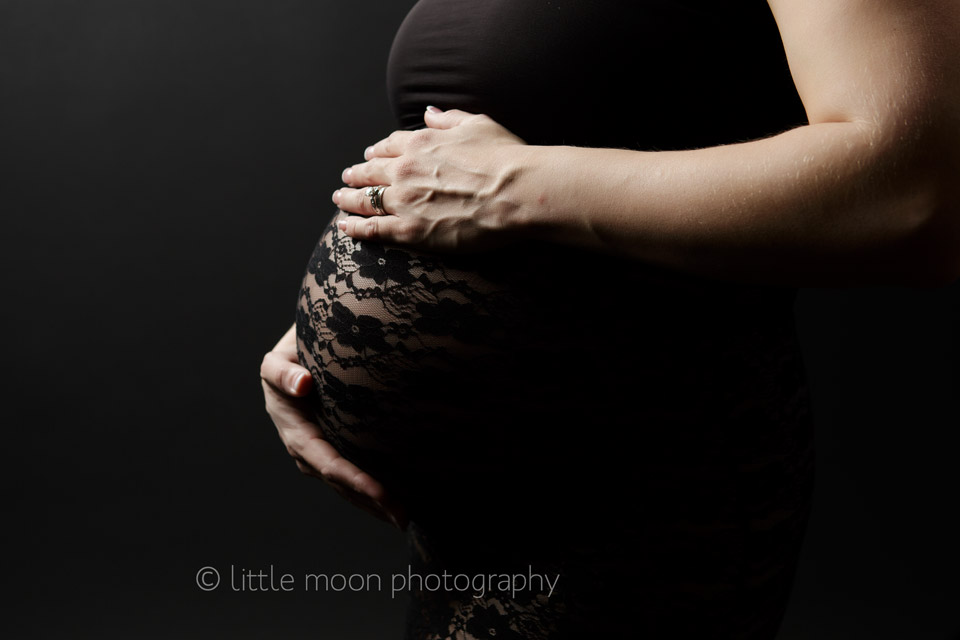
Next, I decided to do more dramatically backlit images with the lights still on both sides sculpting their pregnancy curves, I placed the main light behind the front of the subject and had the hair light above and behind the subject to add some fill to the opposite side and light their hair. I LOVE this look.
In the above shots, with both lights BEHIND my subject, but still on each side of her (main light camera left, stripbox on camera right) I’m using the lights to form a rim of light around both sides of my subject which illuminates their shapes perfectly and dramatically.
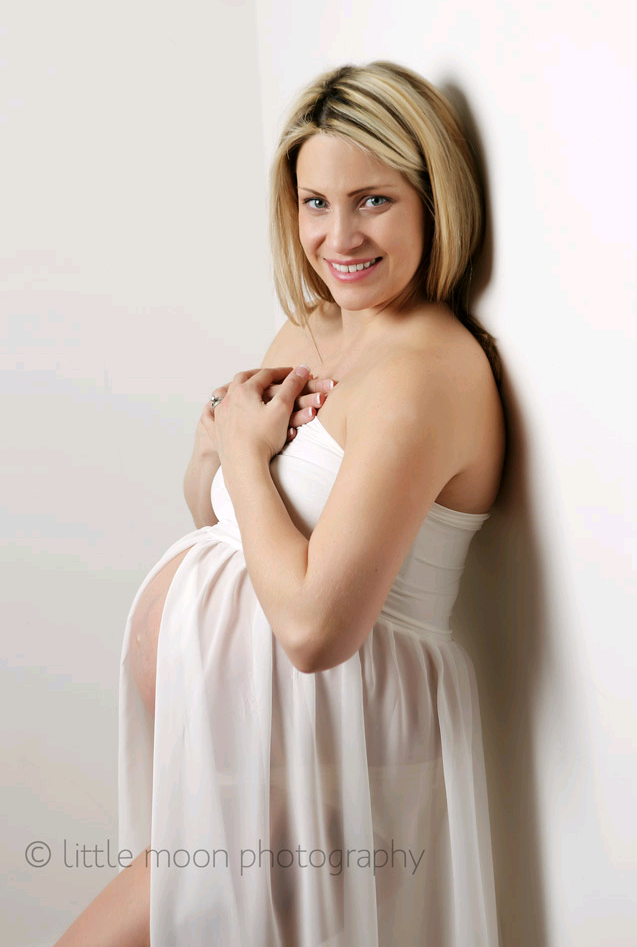
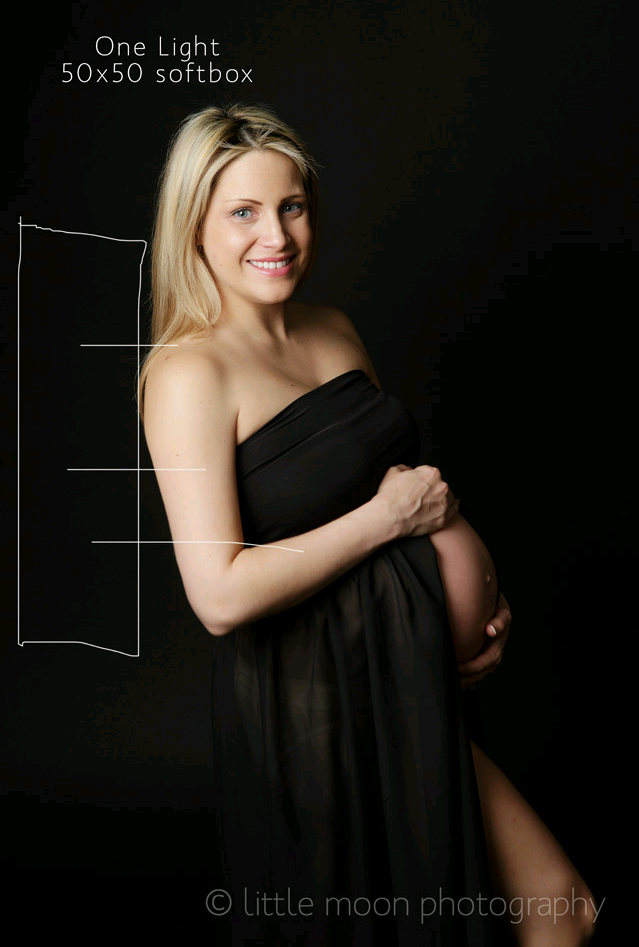
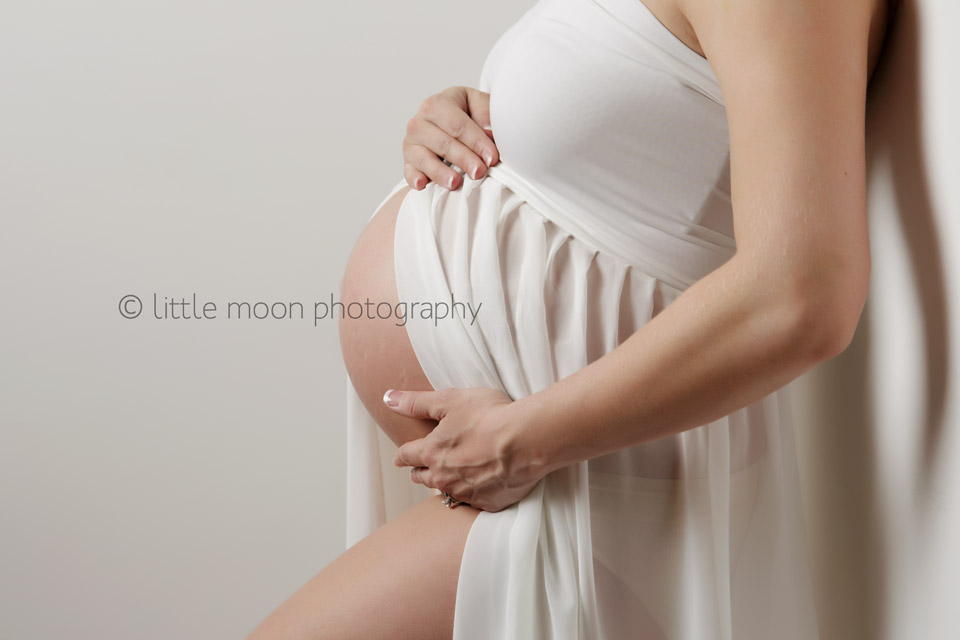
Here are a few examples of using only one light in the 50×50 softbox. In this situation I was using a wall in my studio to pose my subject and did not have room to throw in the 2nd hair light. First here’s the light pulled behind the subject:
And then here it is pulled in front of the subject, feathered:
I hope these examples give you the inspiration to go out and try new things with lighting! I cover newborn lighting extensively during my in-person newborn workshop and am now taking students for my October class, May’s workshop is already sold out. As always, I’m always happy to answer questions in the comments of his blog post, via email (amber@littlemoonphotography.com), or on my busy Facebook Page.
Westcott Lighting Gear in Action

Pro Stripbank3667
Speedring for Alien Bees, Balcar, Einstein, White Lightning (various)3500

Pro Stripbank3667

Speedring for Alien Bees, Balcar, Einstein, White Lightning (various)3500

Speedring for Alien Bees, Balcar, Einstein, White Lightning (various)3500






You must be logged in to post a comment.