When photographing subjects that are wearing glasses, you often run into the issue of capturing a glare off the lens. In this tutorial, photographer Ashley Boring walks you through avoiding unwanted glare when using the Eyelighter 2.
Lighting Preparation for a Subject with Glasses
One of the most critical places to start is ensuring your subject’s eyeglasses are thoroughly cleaned. Dirt and dust filled lenses catch the light, causing more post-production work that often results in unnatural looking photos. Make sure to clean with a mild soap and water then dry with a microfiber cloth to get rid of any smudges or dirt so they are as clean as possible before shooting.
Another tip prior to shooting is photograph glasses with anti-glare coating vs glasses without. Photographing anti-glare coated glasses makes it easier to reduce light bouncing off the lens. It’s important to ask them if they have the coating on their glasses or if you need to prepare to have some for the shoot.
Lastly, you want to keep in mind that the smaller the glasses, the easier it will be to control reflections. Working with smaller glasses creates less glass for the light to bounce off of.
Benefits of Using the Eyelighter 2
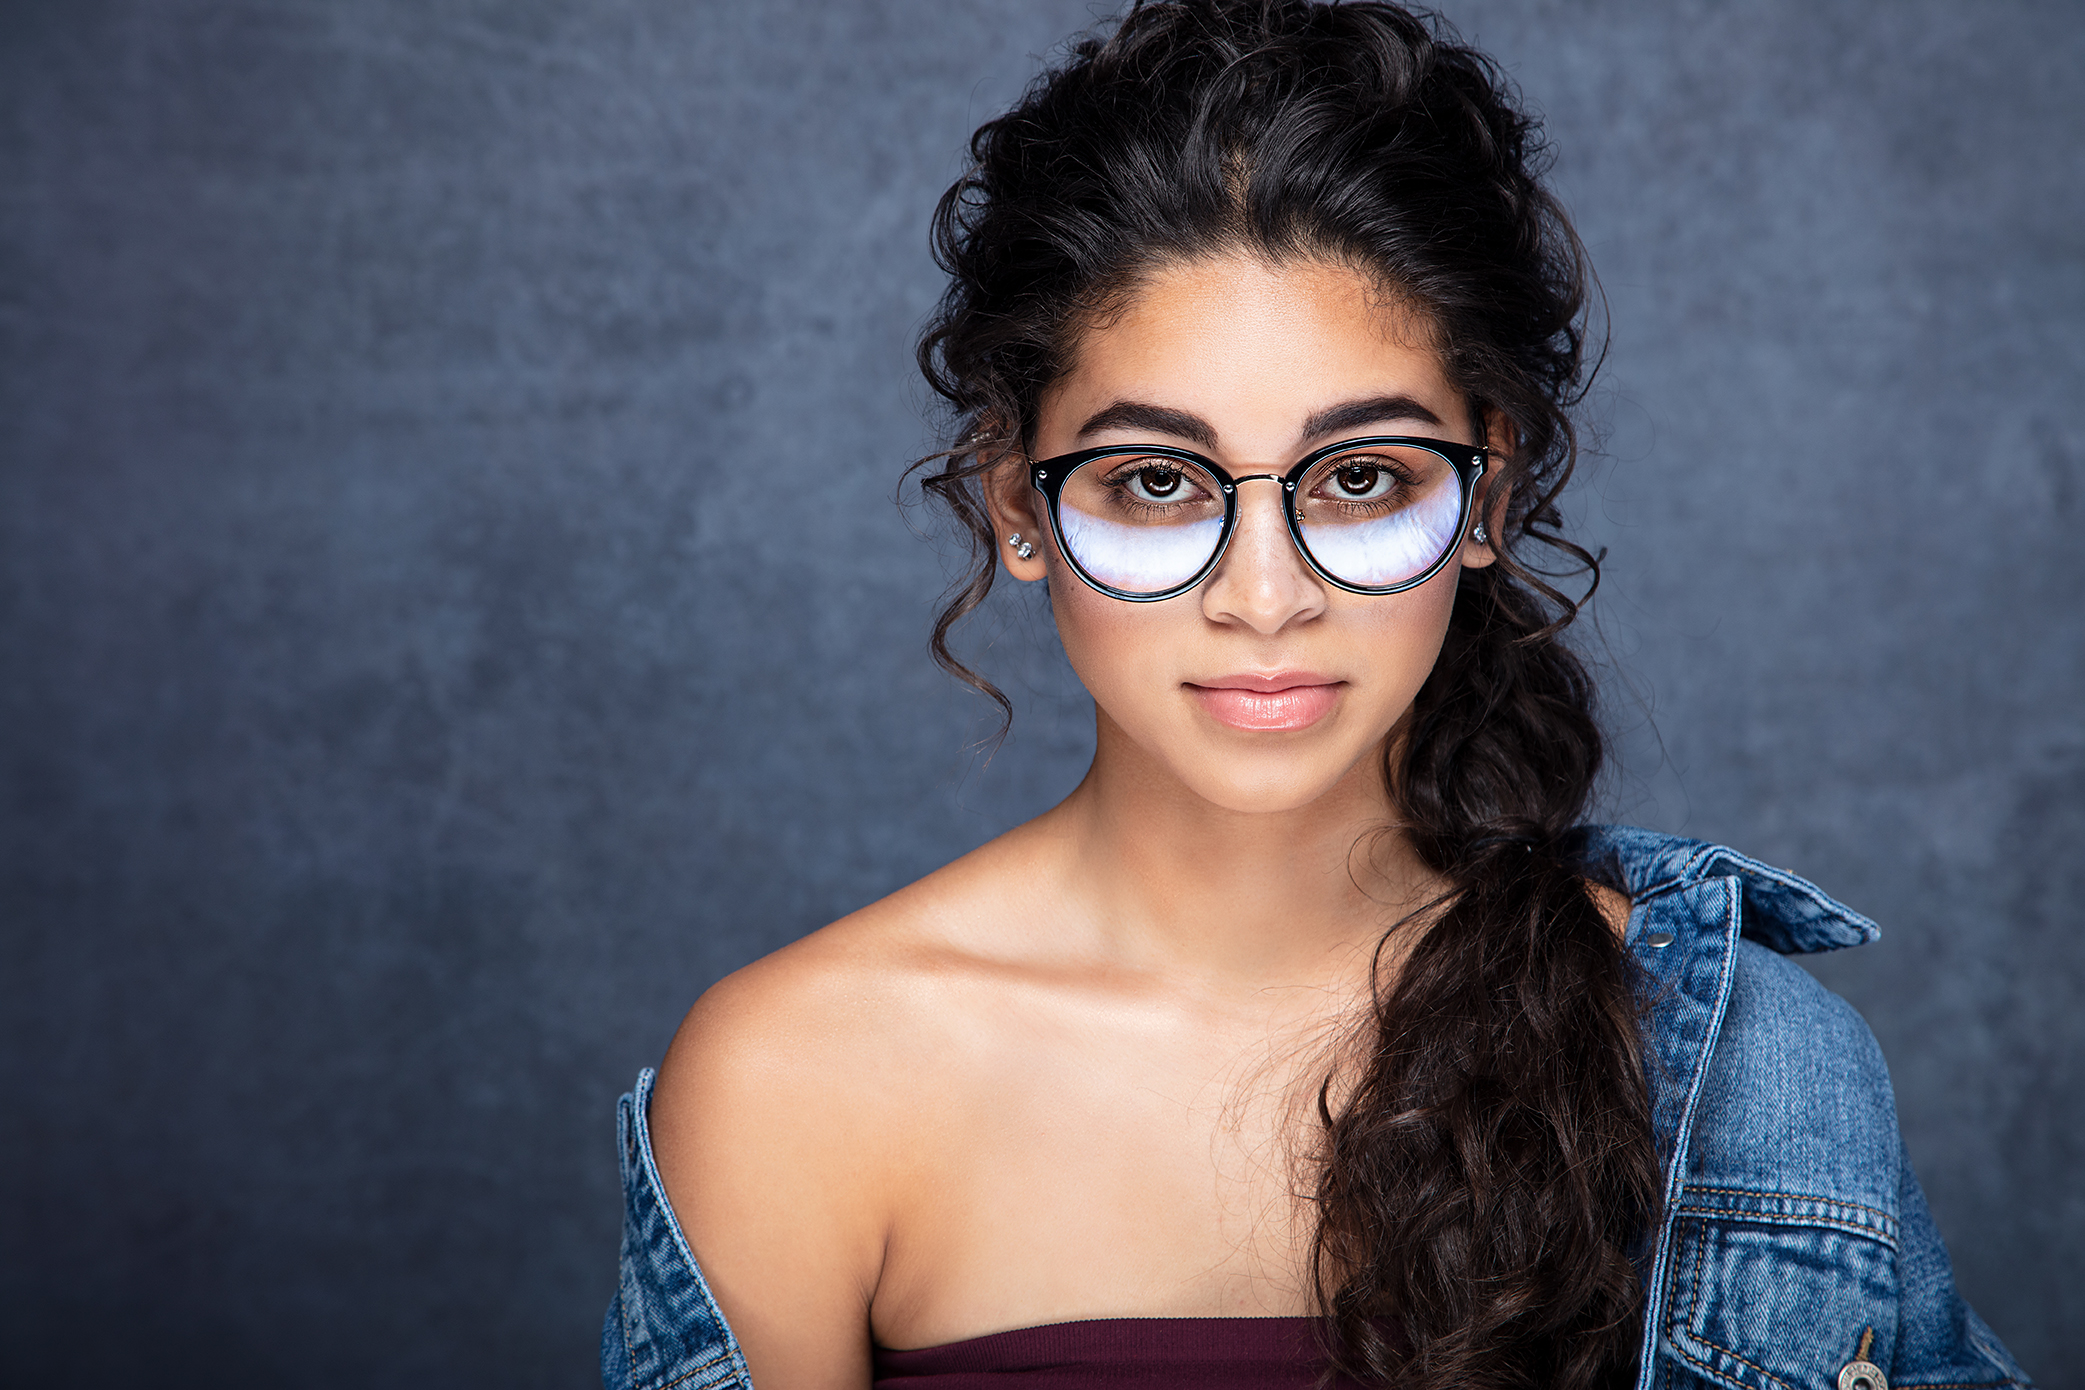
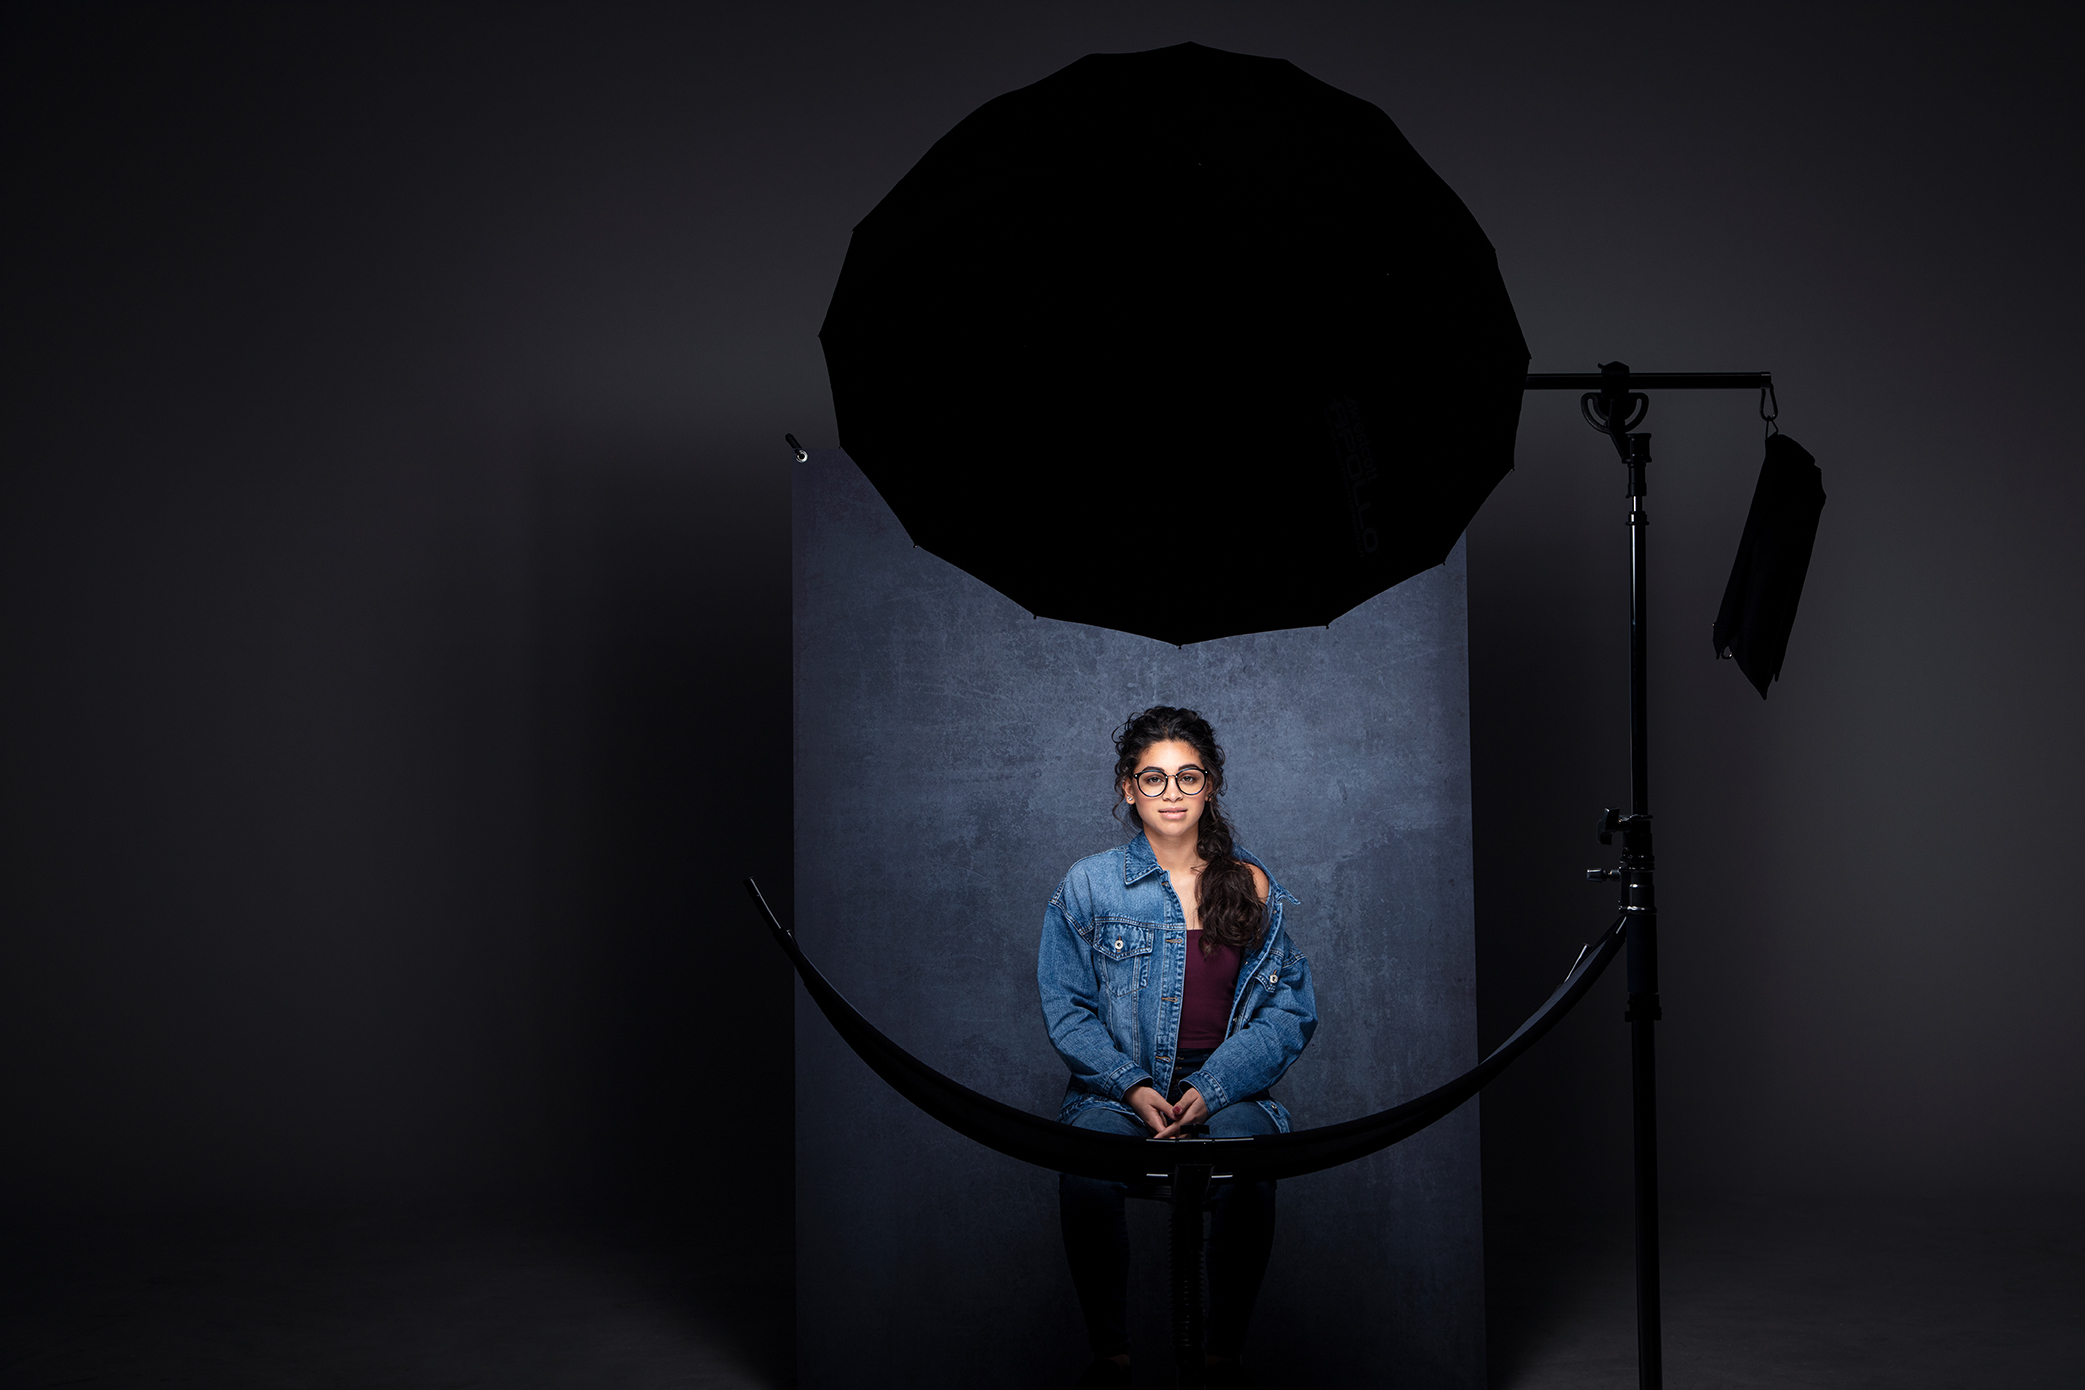
In this shoot, Ashley set up the FJ200 off-camera flash above her subject and modified the light with a 43” Deep Silver Umbrella. To create beautiful catchlights and fill unwanted shadows for this shot, she placed an Eyelighter 2 curved silver reflector in front of her subject.
There are a lot of benefits to adding an Eyelighter to your headshot and portrait lighting setups. One being the desire to fill shadows under the chin and nose on your model. Another benefit to using the Eyelighter 2, especially for photo shoots like this, is the Eyelighter’s ability to fill in shadows on your models cheeks that are created by their eyeglasses. A third benefit of using the Eyelighter is to create a curved catchlight in the subject’s eyes. This will add a definitive sparkle and help their eyes “pop” through the lenses of their glasses.
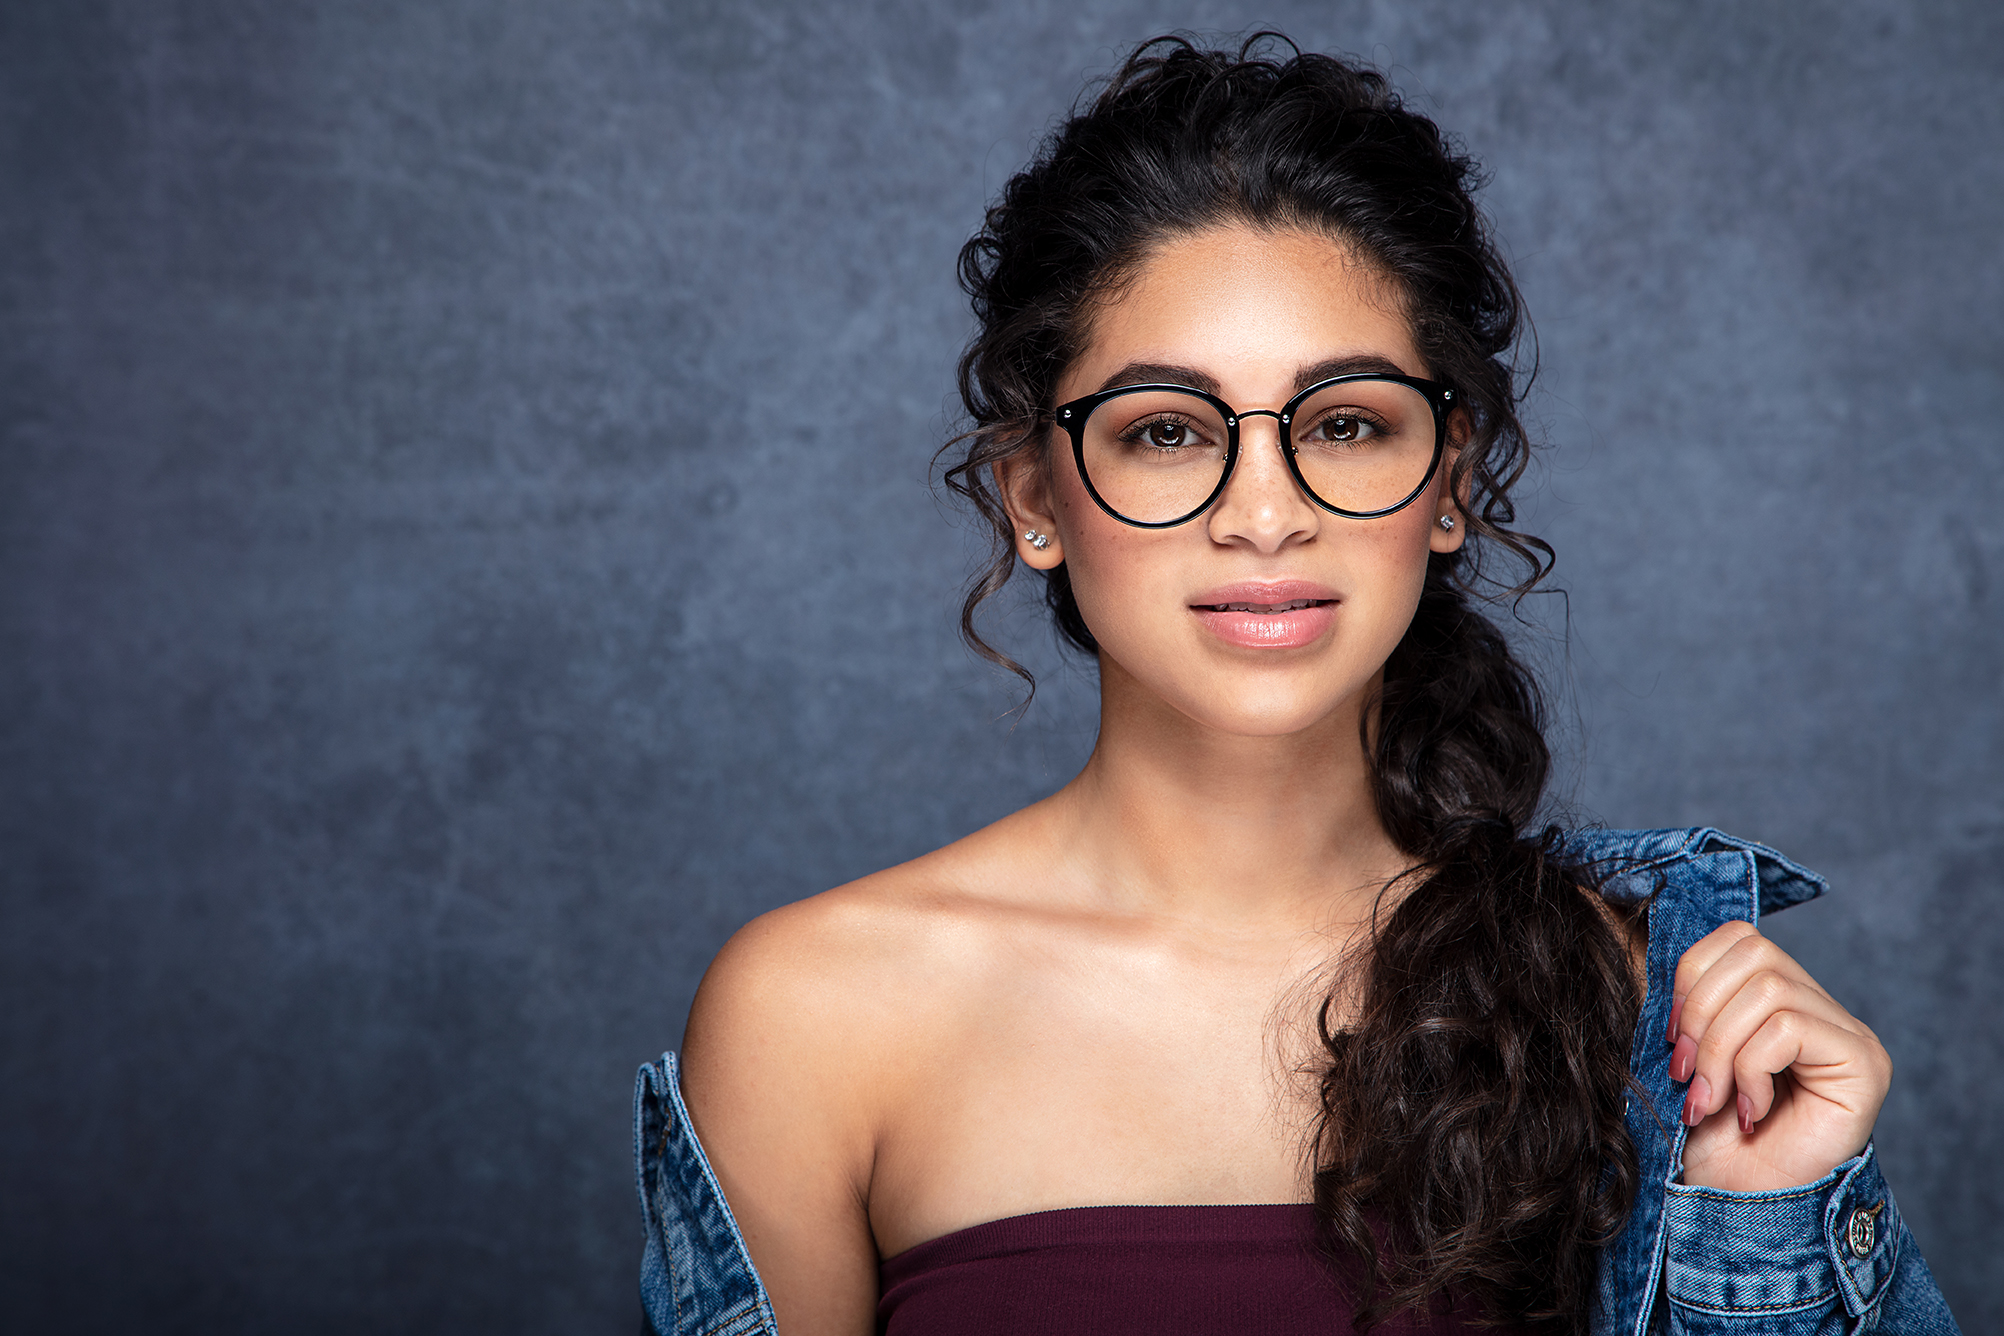
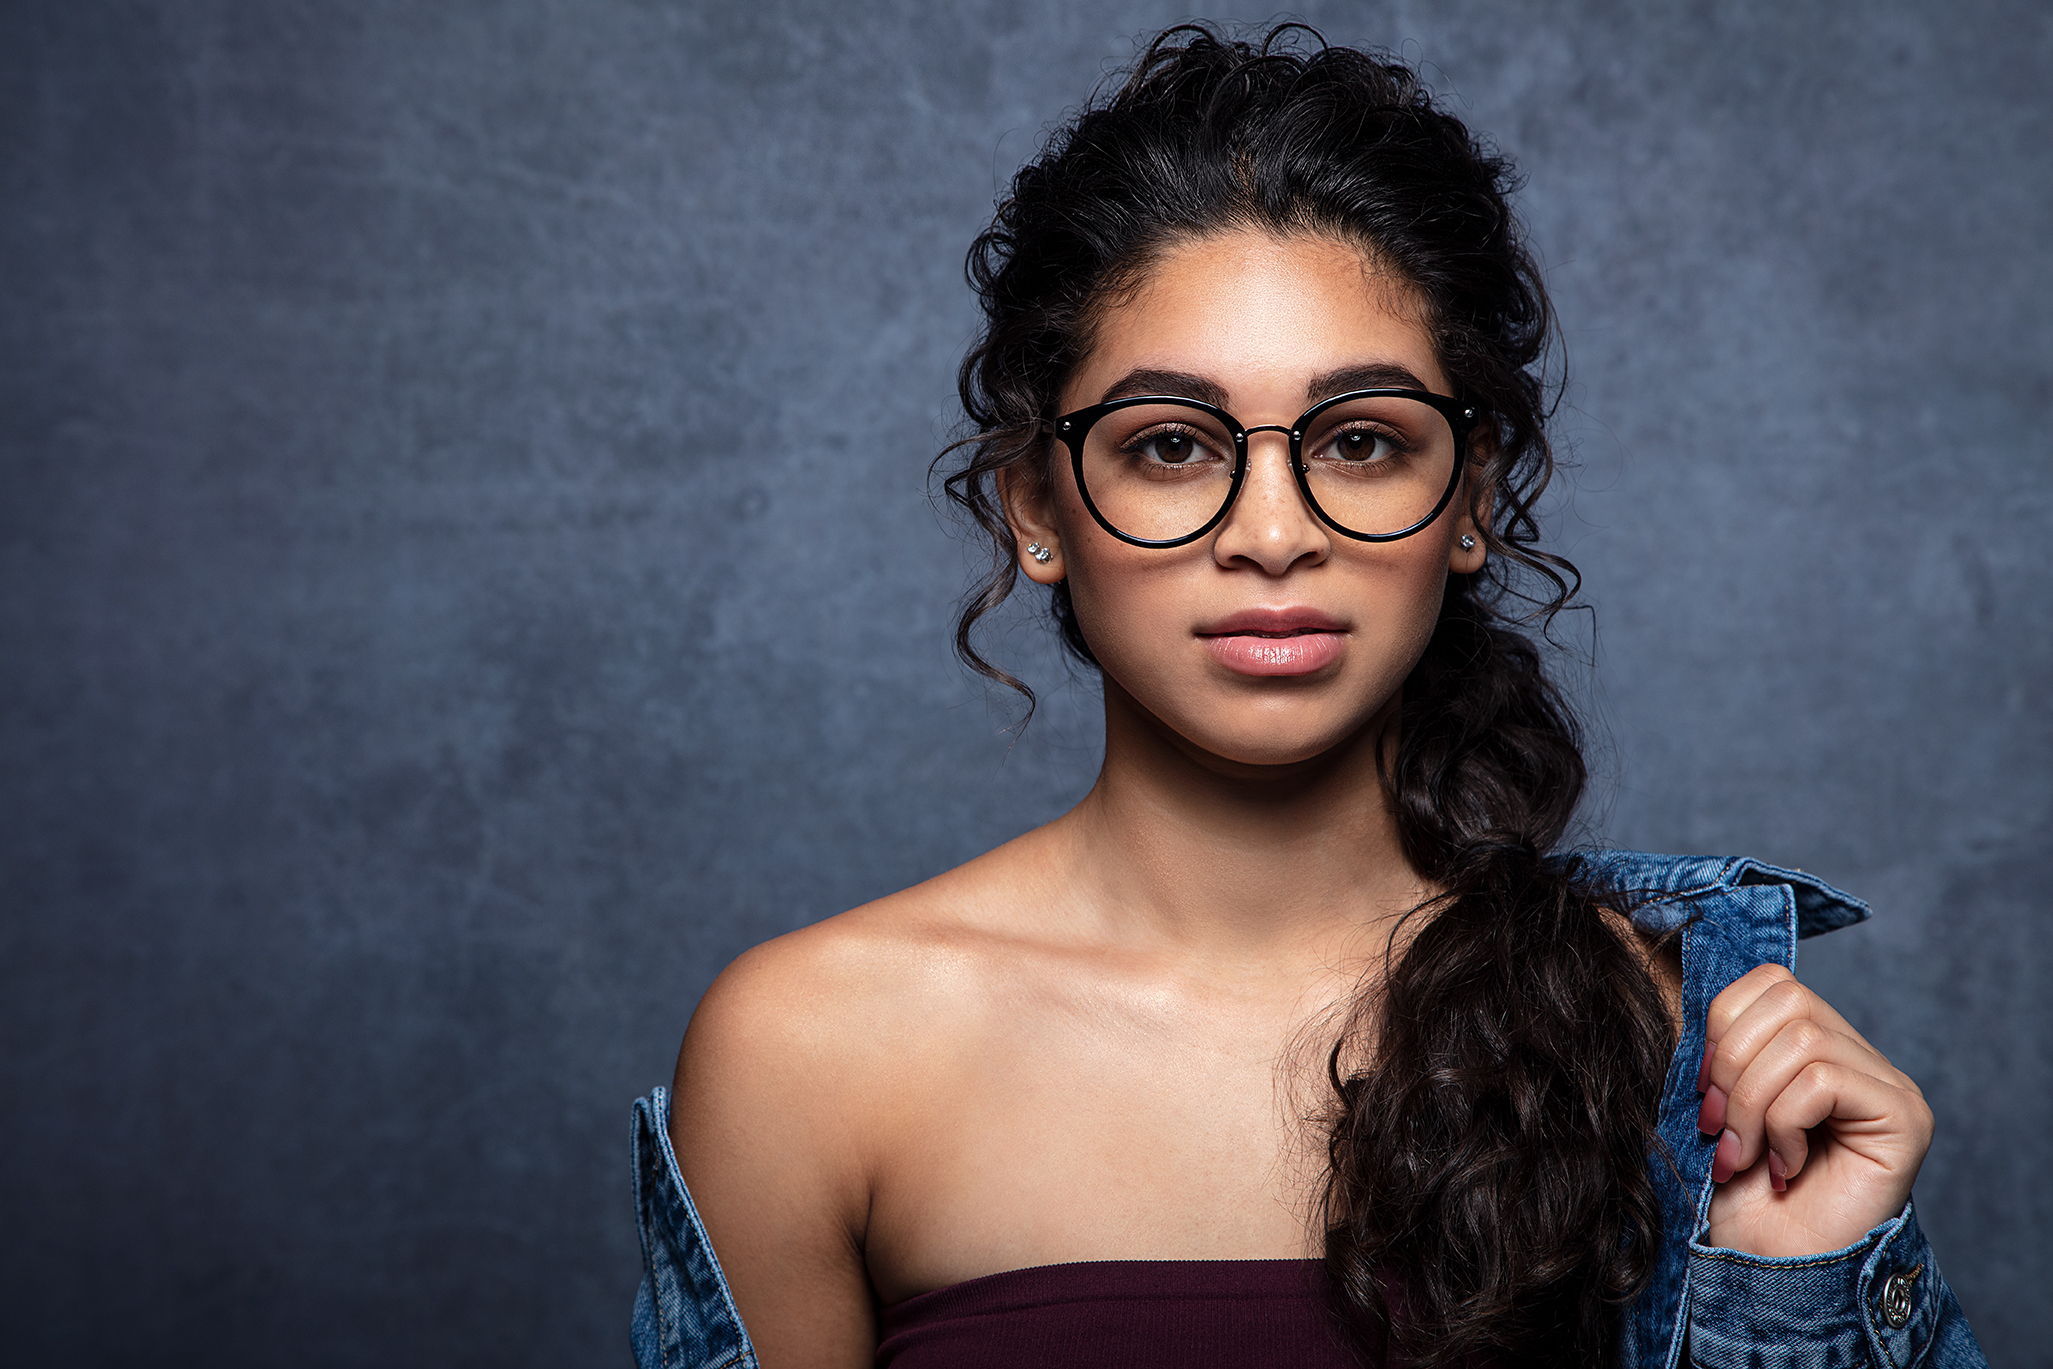
In this photo comparison, you can see a noticeable difference that the Eyelighter makes to create a curved reflection in the subject’s eyes. You can also notice the subject’s eyes stand out more in the shot using the Eyelighter. Her eyes look brighter and more engaged, which helps viewers connect with the subject’s “liveliness” more than the photo that wasn’t using the Eyelighter.
The Science Behind the Glare
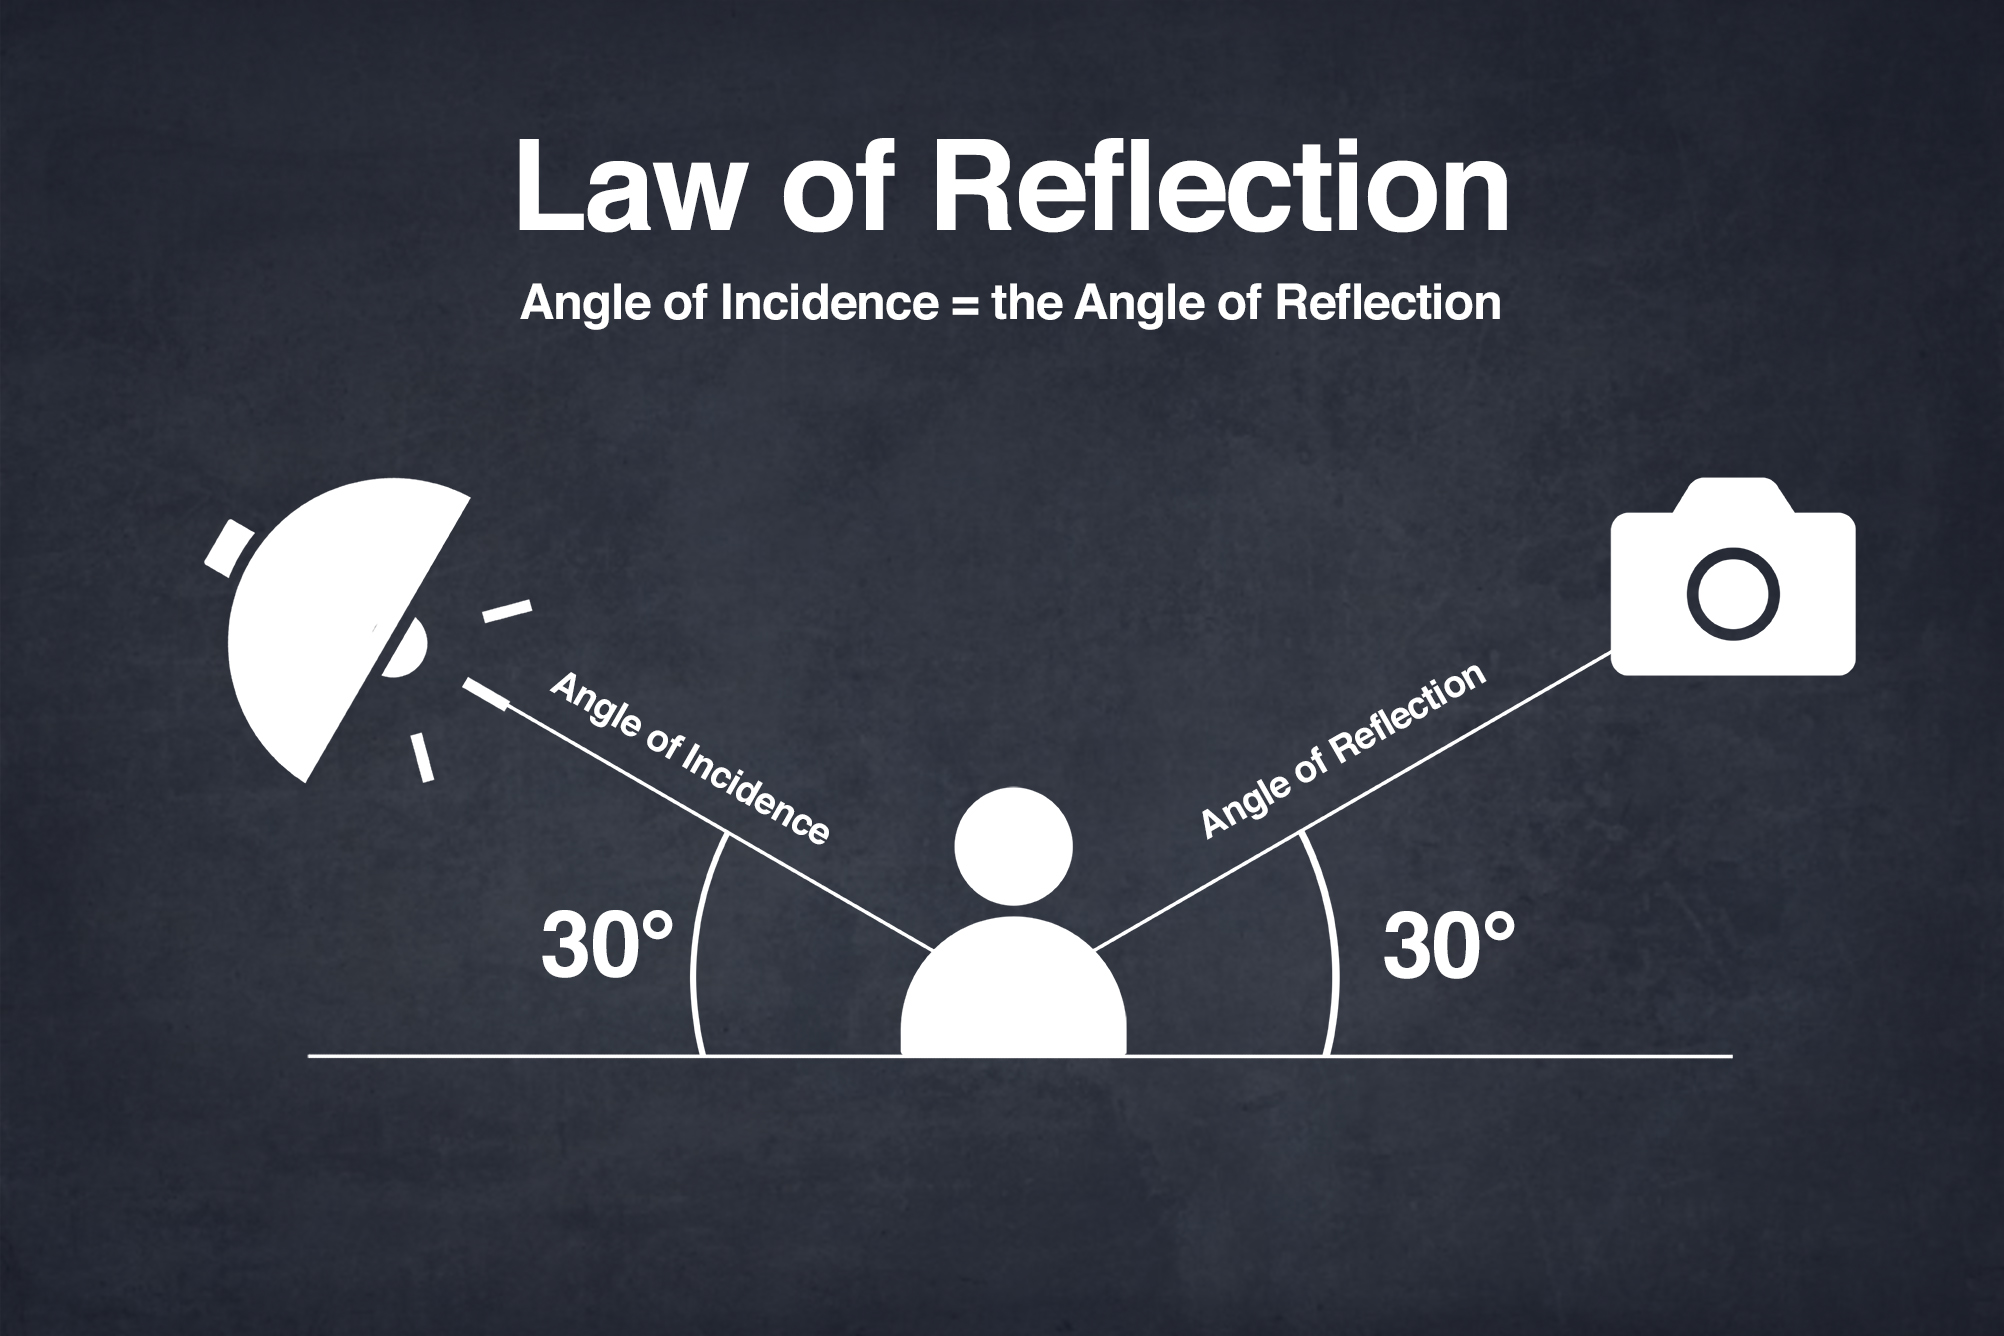
You may be aware of the common glare created when bouncing light off of glasses, but it’s important to understand the reason it’s happening so you can avoid it in your photography. The science behind this reflection, called the Law of Reflection, states that the angle of incidence always equals the angle of reflection.
Although this may sound complicated, the principle is simple. When light travels, it moves in a straight line. This is why shooting off camera flash directly at your subject will produce a large glare. The angle that your light source hits your subject is known as the angle of incidence. In this case, the angle of reflection is going to mimic the angle of your light source.
By placing the Eyelighter 2 at a proper angle in front of your subject below the FJ200 strobe, the angle of reflection will not travel in the path that will cause the lens to glare.
In simpler terms, if you are getting unwanted glare, simply change the angle of reflection so it does not interact with your camera. This can be done in one of three ways:
- Change the angle of your light.
- Change the position of your subject.
- Change your shooting position.
How to Get Correct Placement of the Eyelighter
A common issue that’s encountered when using the Eyelighter to photograph subjects with glasses is that both the Eyelighter and the light are positioned incorrectly. If the source of reflection is improperly placed, it will still result in unwanted glare in their glasses.
To avoid the unwanted glare, Ashley sets up her main light in the butterfly position. This is when the light is placed in front and above her subject, and angled down. Then, by pulling in the Eyelighter 2, she strategically places it below her subject. This placement does a few things for her capture. It evenly fills the reflective surface and it creates smooth clean highlights in her subject’s eyes. She then tests to see if the angle of the Eyelighter was producing any glare in the glasses and notices that it is. So, to adjust this she simply raises the light source up changing the angle of her light source and the reflection is gone.
Since Ashley was also getting a reflection from the Eyelighter, she lowered it until the reflection was resolved. Keep in mind that if you are noticing the light reflecting in the glasses, she suggests only adjusting one light source at a time.
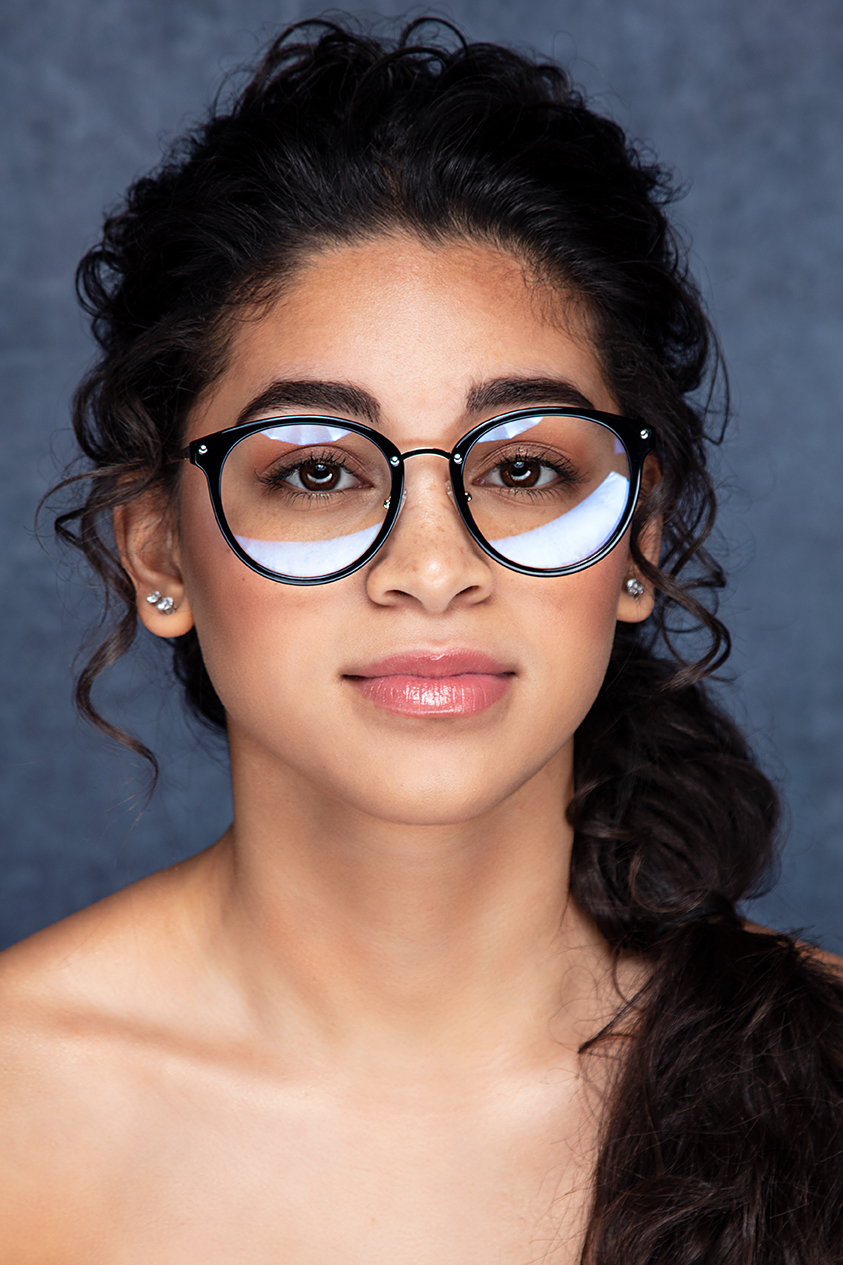
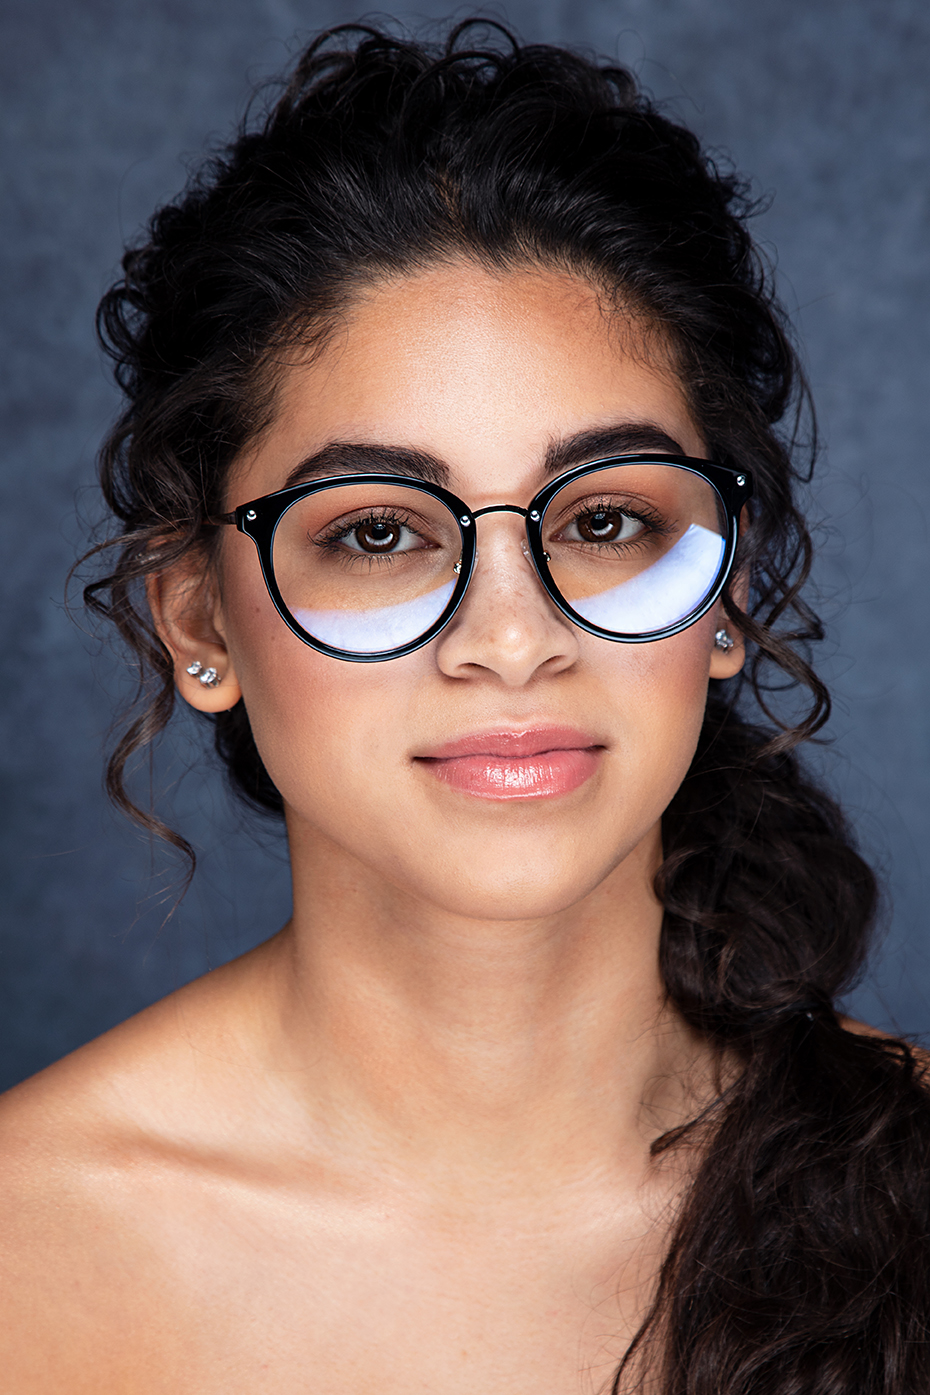
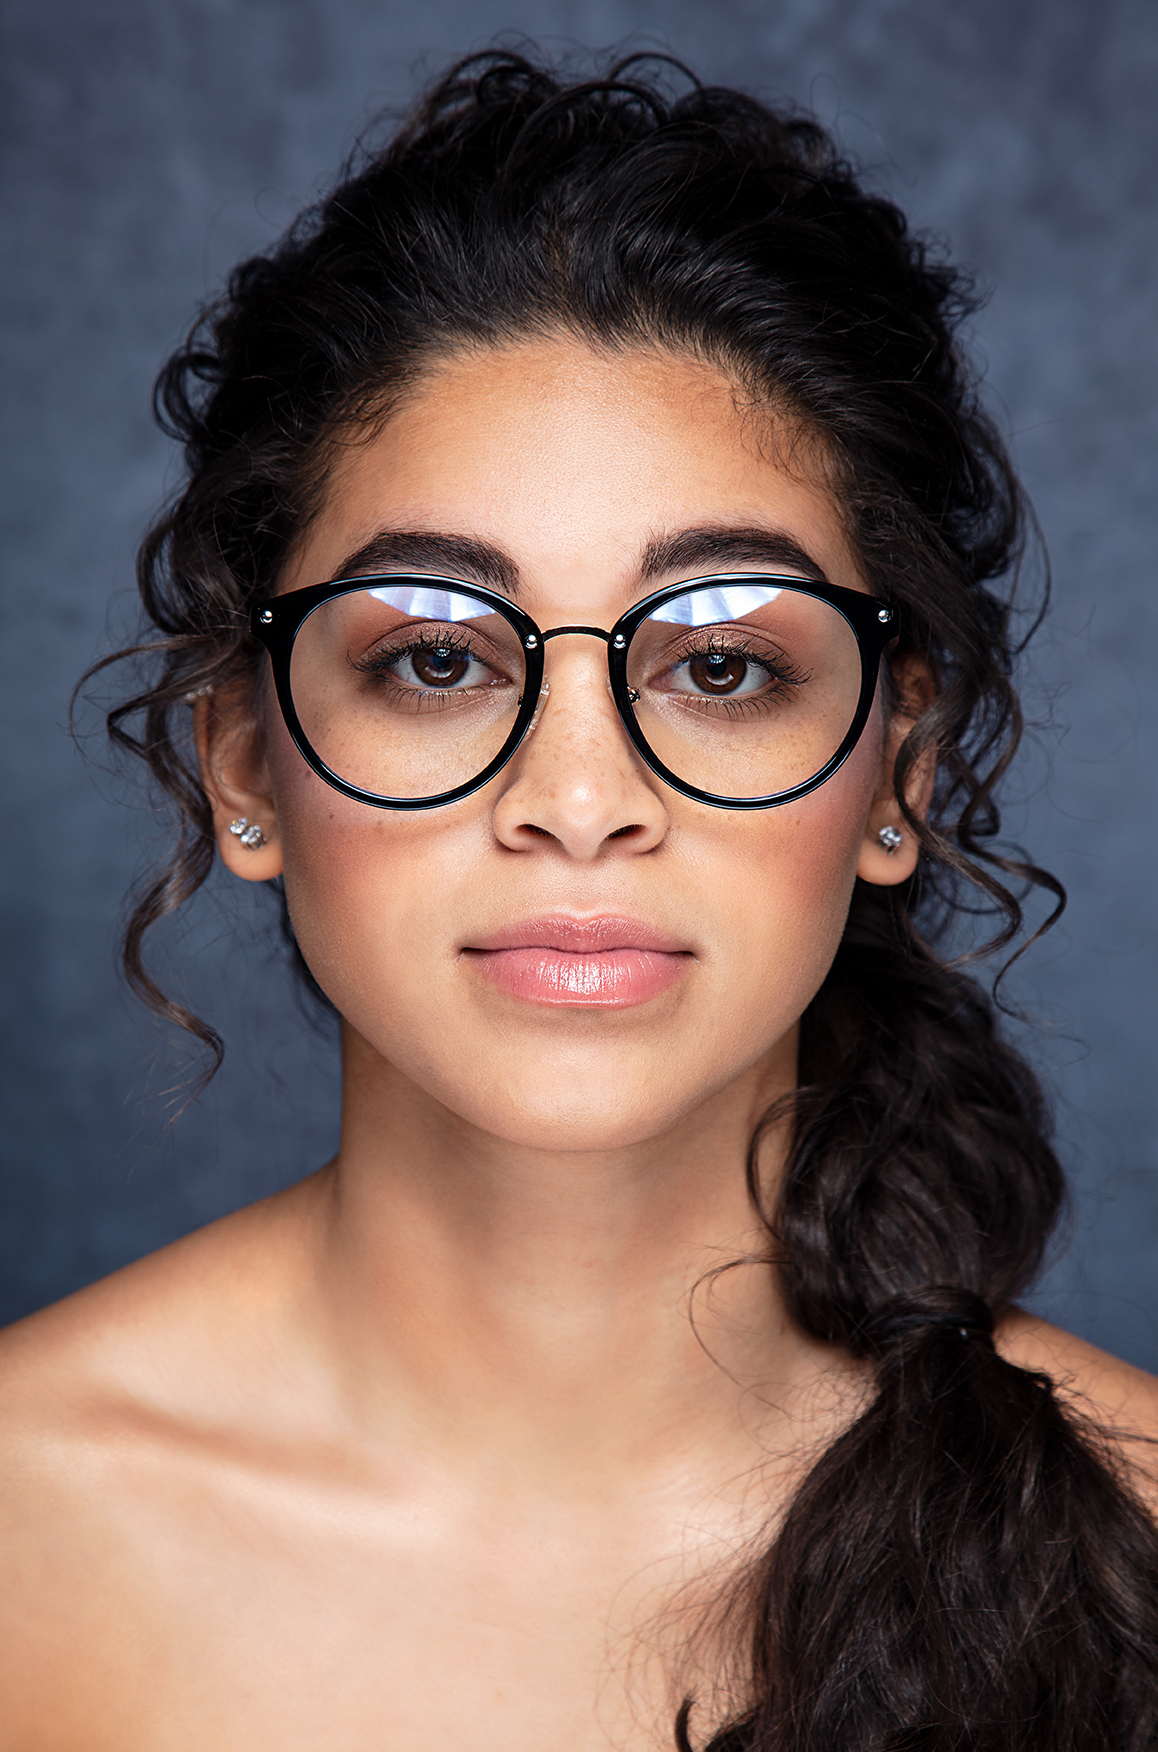
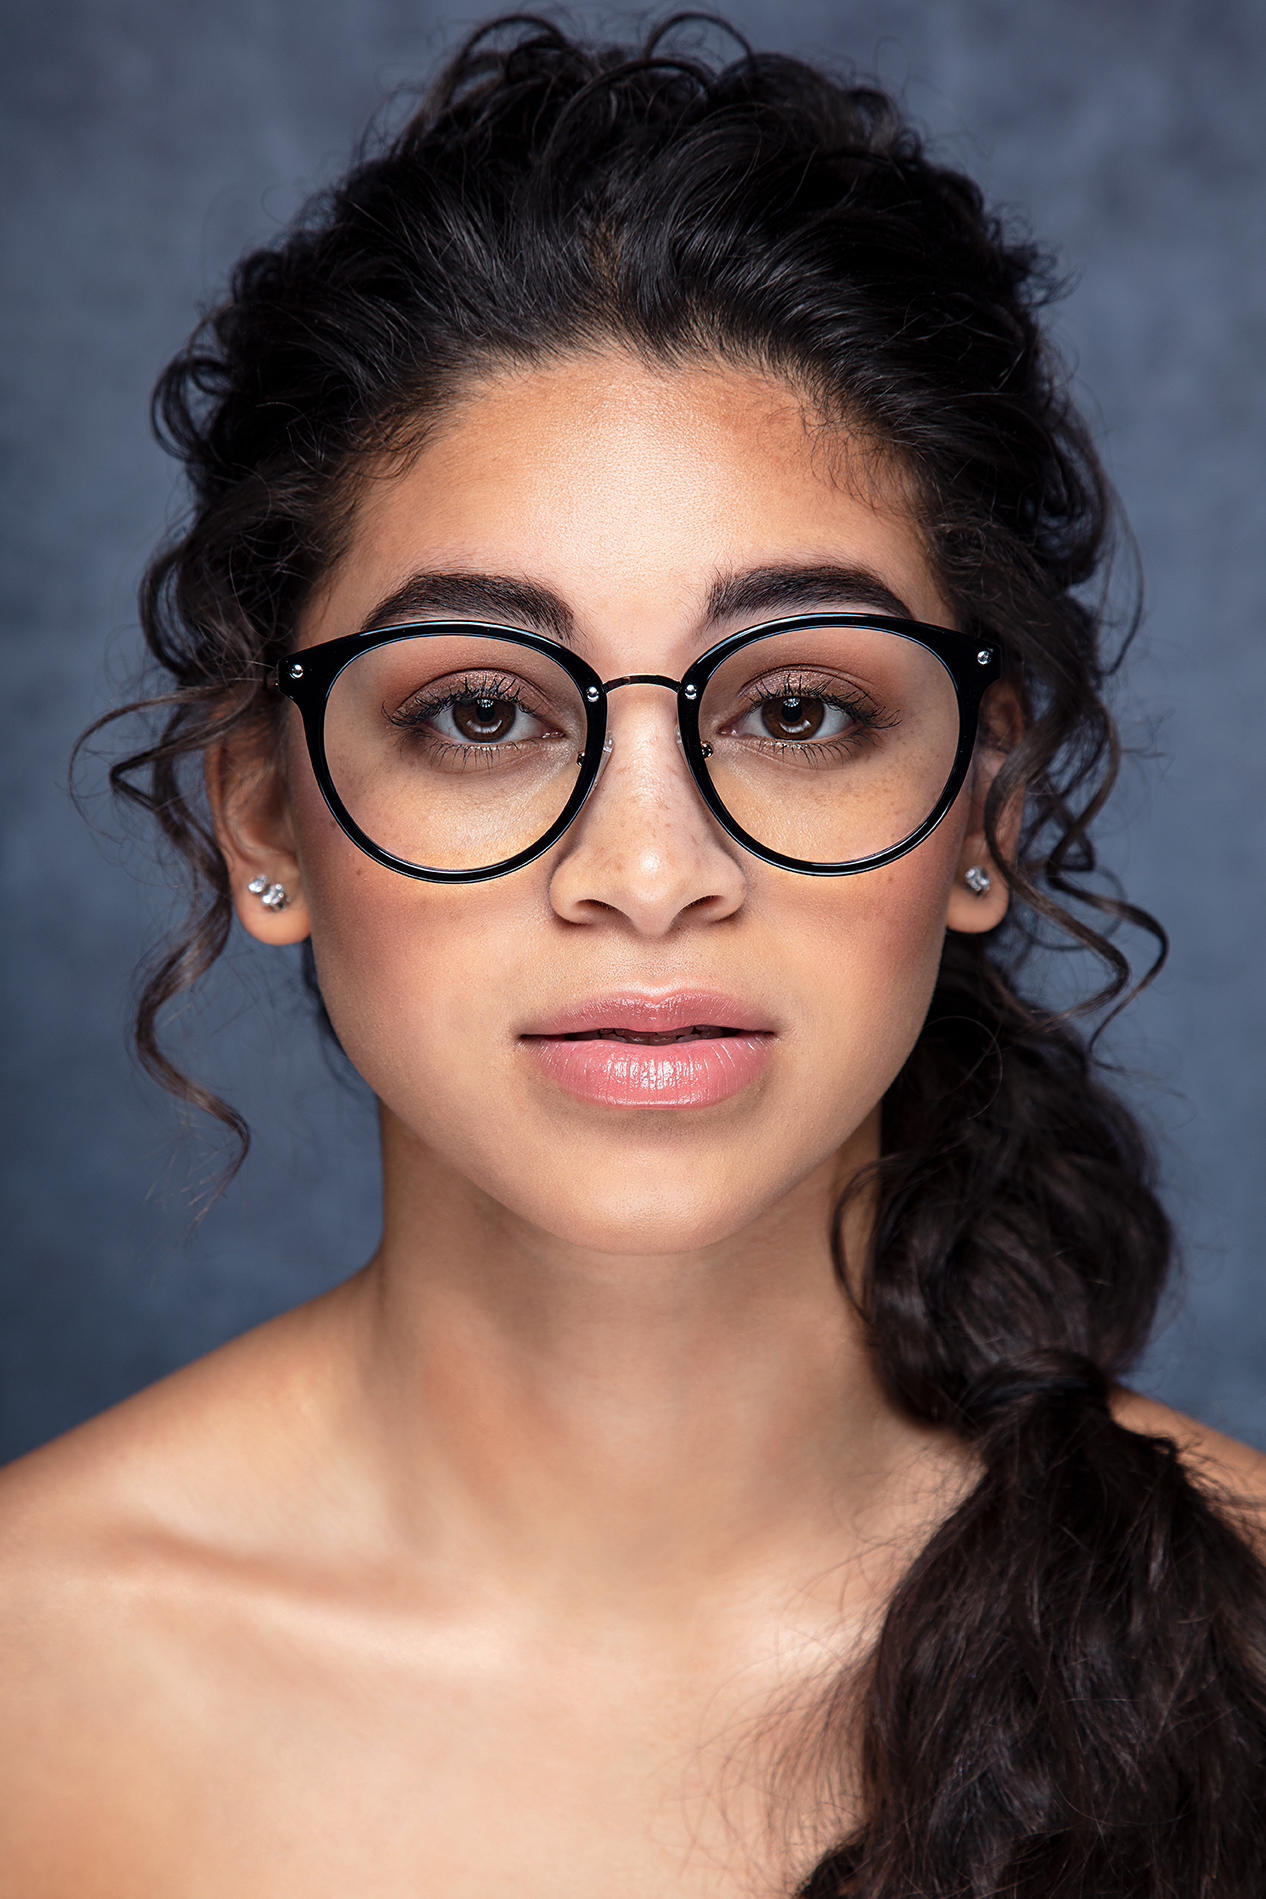
As stated previously, a solution to avoiding glare is changing the position of your subject. This can be as easy as considering your subject’s head placement. If your subject’s face is either angled up or down too much, it can change the angle of reflection. Even if your lights are placed correctly, this can still produce glare on their glasses.
If you’re picking up unwanted glare, you can use your strobe’s modeling lamp to help you see when your subject’s head is angled too much.
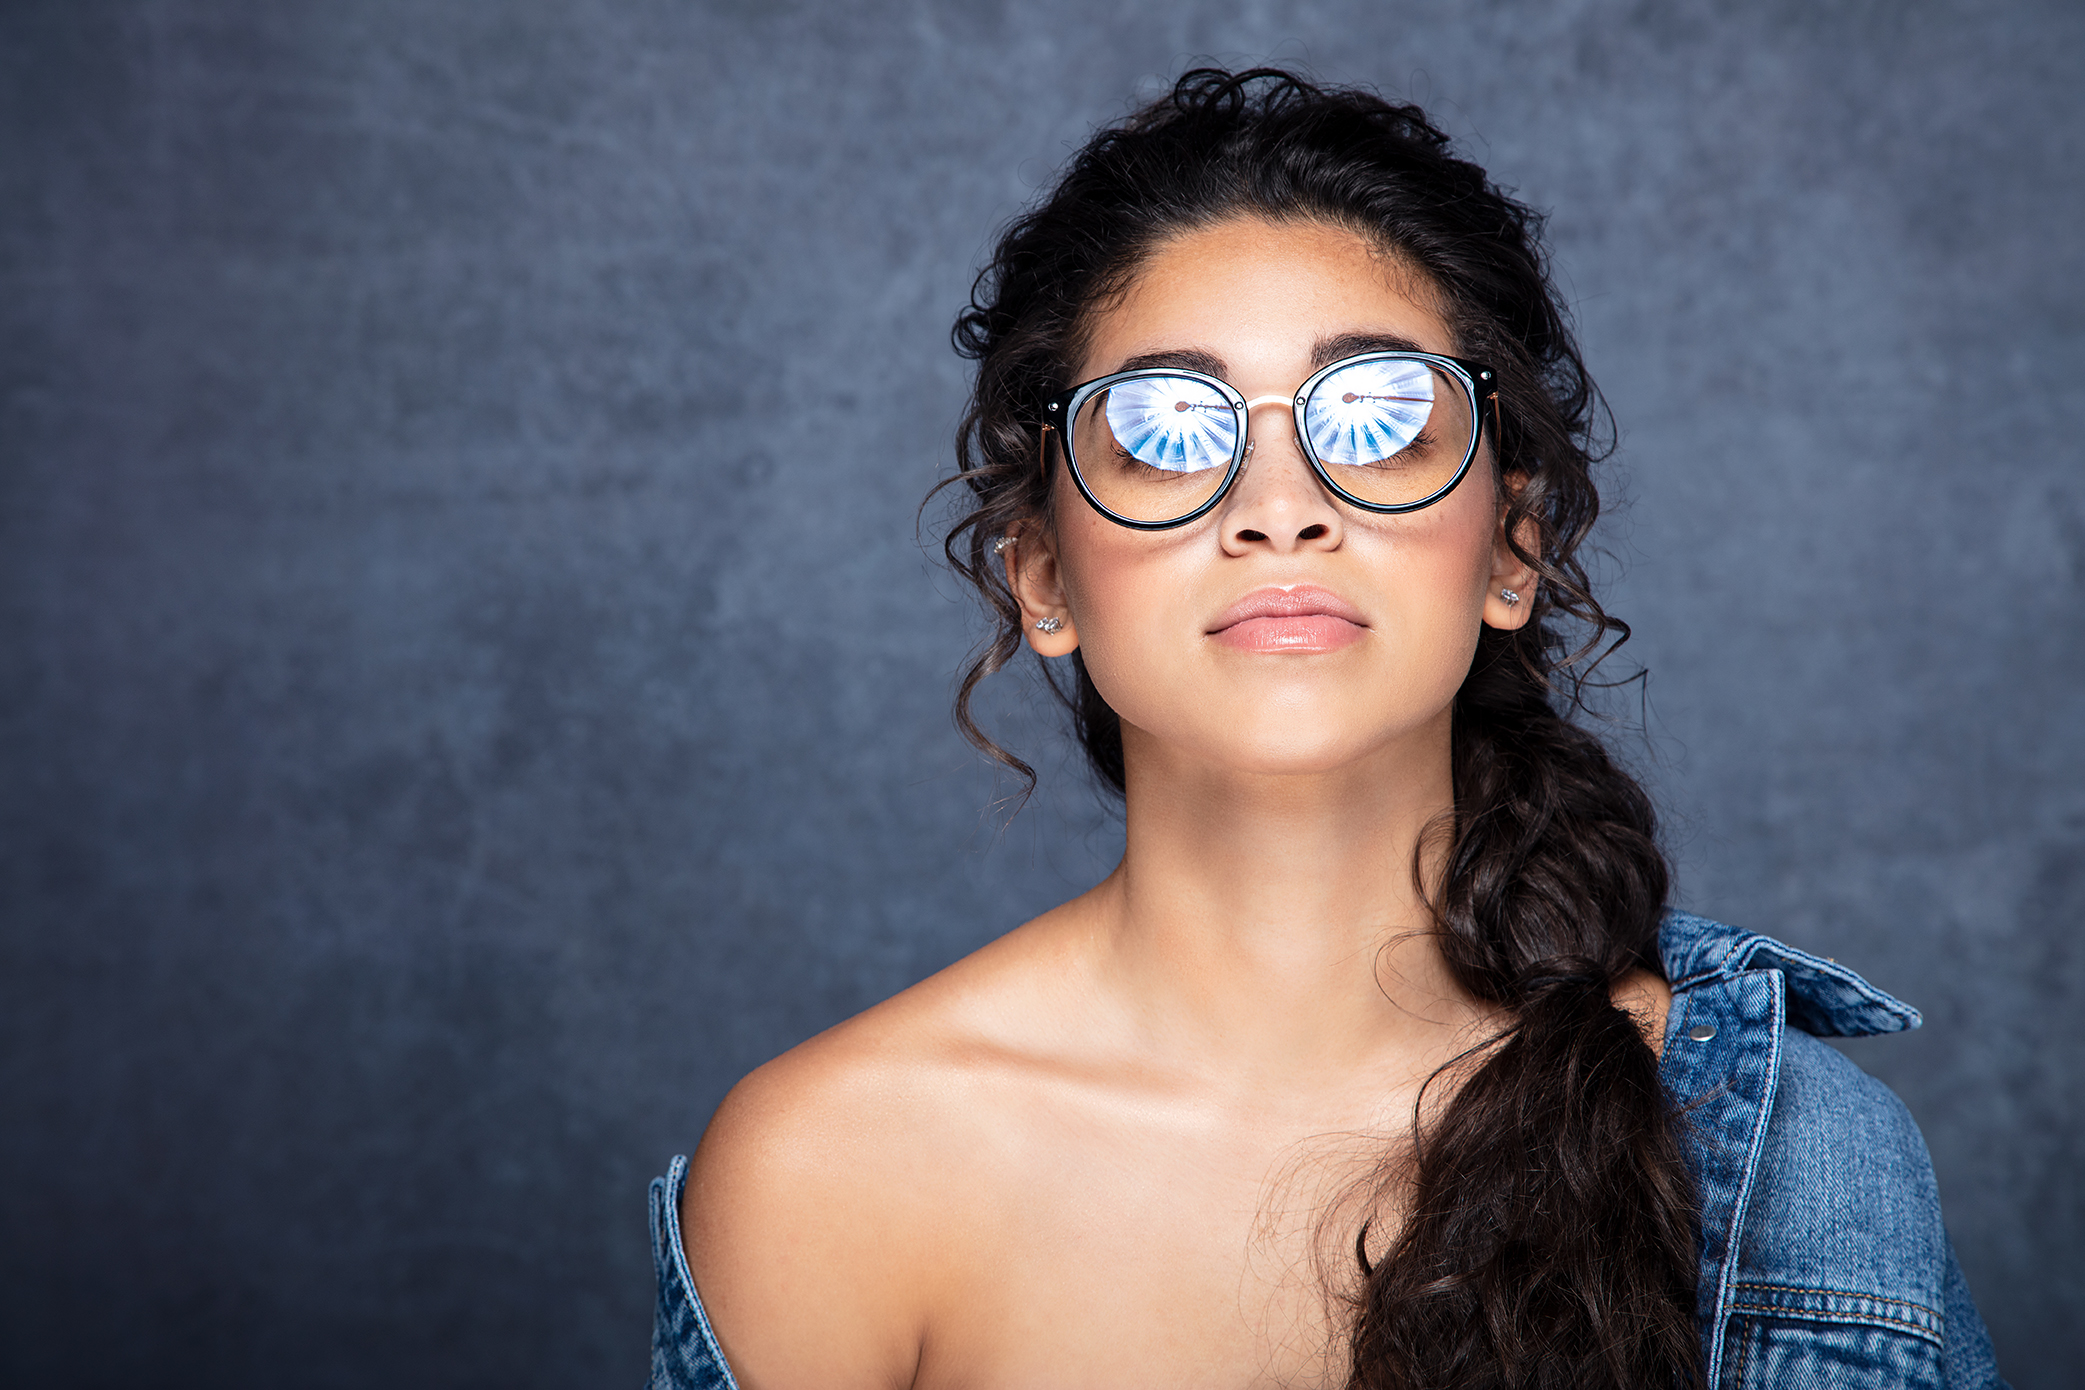
Shooting portraits of subjects with glasses may seem like it is an intimidating task, but if you keep these tips in mind it can help you troubleshoot any problems that you encounter with glare. As a reminder, it’s best to adjust one thing at a time–light position, camera position, or your subject’s position–so you can quickly pinpoint the source of any unwanted reflection.
Learn how Ashley uses the FJ200 and FJ200 reflector outdoors.


You must be logged in to post a comment.