
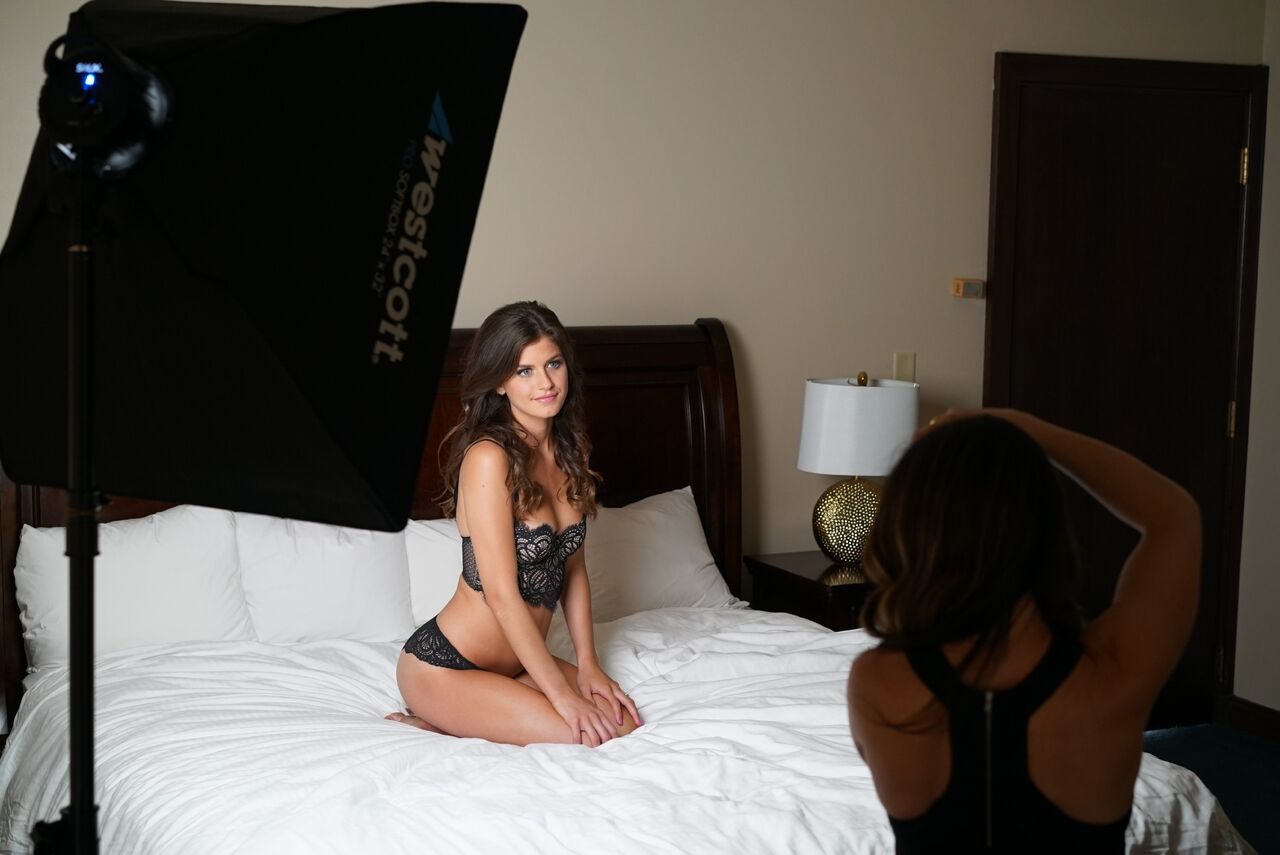
When shooting boudoir photography, having a go-to lighting setup is key to flattering your subjects. A simple 2-light setup allows photographers to use shadows and highlights to accentuate bone structure, build curves, and shape the body. In this video tutorial, New York-based boudoir photographer Jen Rozenbaum demonstrates how to use a compact 1 and 2-light setup to build a classy boudoir portrait.
Behind the Scenes: 1-Light Setup
Jen begins by eliminating the harsh ambient light pouring into the hotel room by closing the curtains. Then, she sets up a single Solix LED light. This light is modified by a 2×3′ softbox to create a soft, relatively broad key light. This light is placed to the front right of her subject. Since she is working in a hotel room with limited outlets, Jen is running the Solix off of a d-tap battery.
ISO 1250 • f3.2 • 1/160
This simple 1-light setup creates a full-length shadow on her subject helping to shape her body and add dimension to the relatively low-key setting.
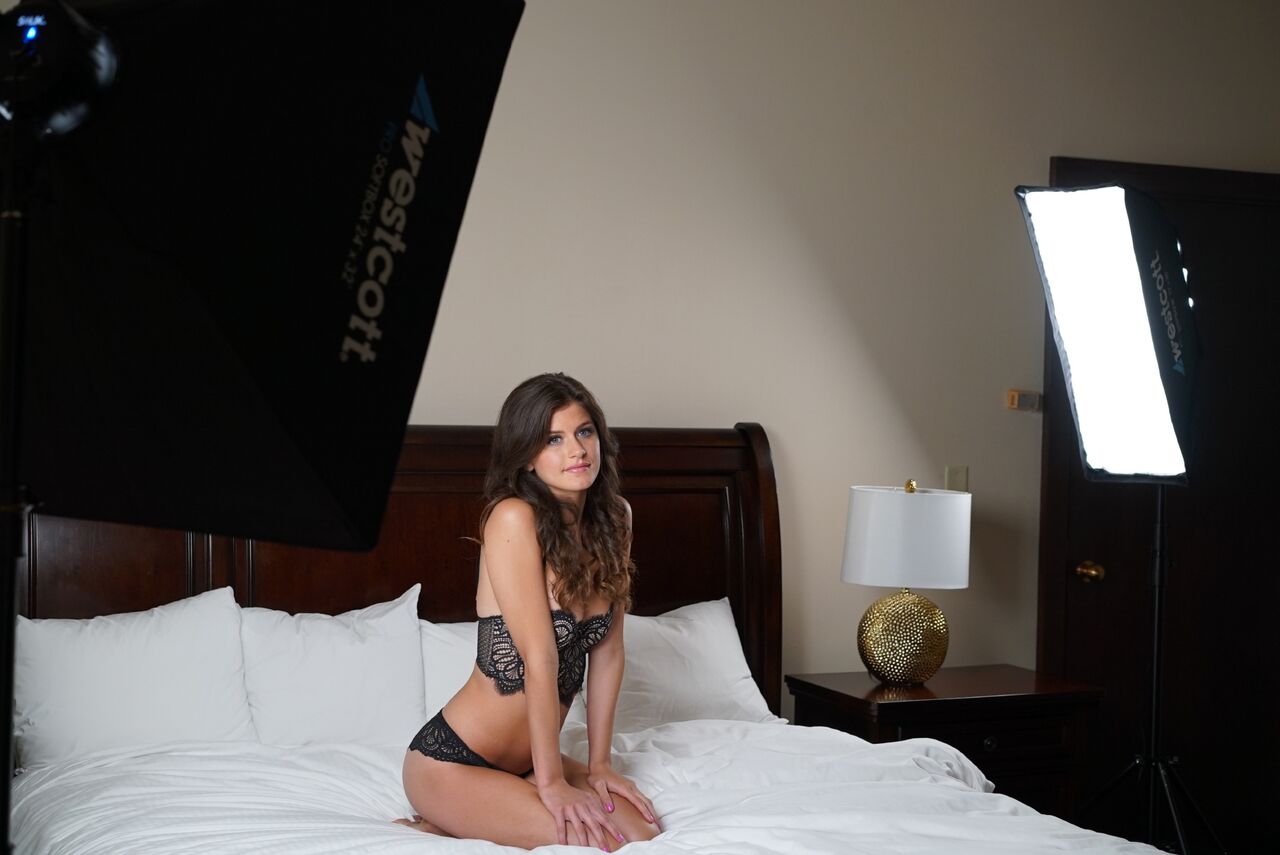
Behind the Scenes: 2-Light Setup
To add even further dimension to the image, Jen adds in a second Solix for this setup. This second light is modified by 1×2′ stripbank, creating a soft but narrow output. This light is placed behind and to the left of her subject to help highlight her cheekbones and shoulder. As mentioned above, this light is also powered by a battery to eliminate the need for excess cables and power strips.
ISO 1250 • f3.2 • 1/160
This setup can be purchased separately or in a complete kit created by Jen Rozenbaum.
See more boudoir photography tutorials with Jen Rozenbaum here.
Lighting Gear in Action

Solix Daylight 2-Light Kit by Jen Rozenbaum6252
Portable D-Tap Battery7424
2 Responses

Solix Daylight 2-Light Kit by Jen Rozenbaum6252
Portable D-Tap Battery7424

Portable D-Tap Battery7424
[…] Easy Lighting Setups for Boudoir Photography […]
[…] done by the Brittany Elise Photography Styling Team. The styling team helped us transition into a boudoir style for the second part of the session in the studio. Erika rocked a simple white sweater dress and a […]