
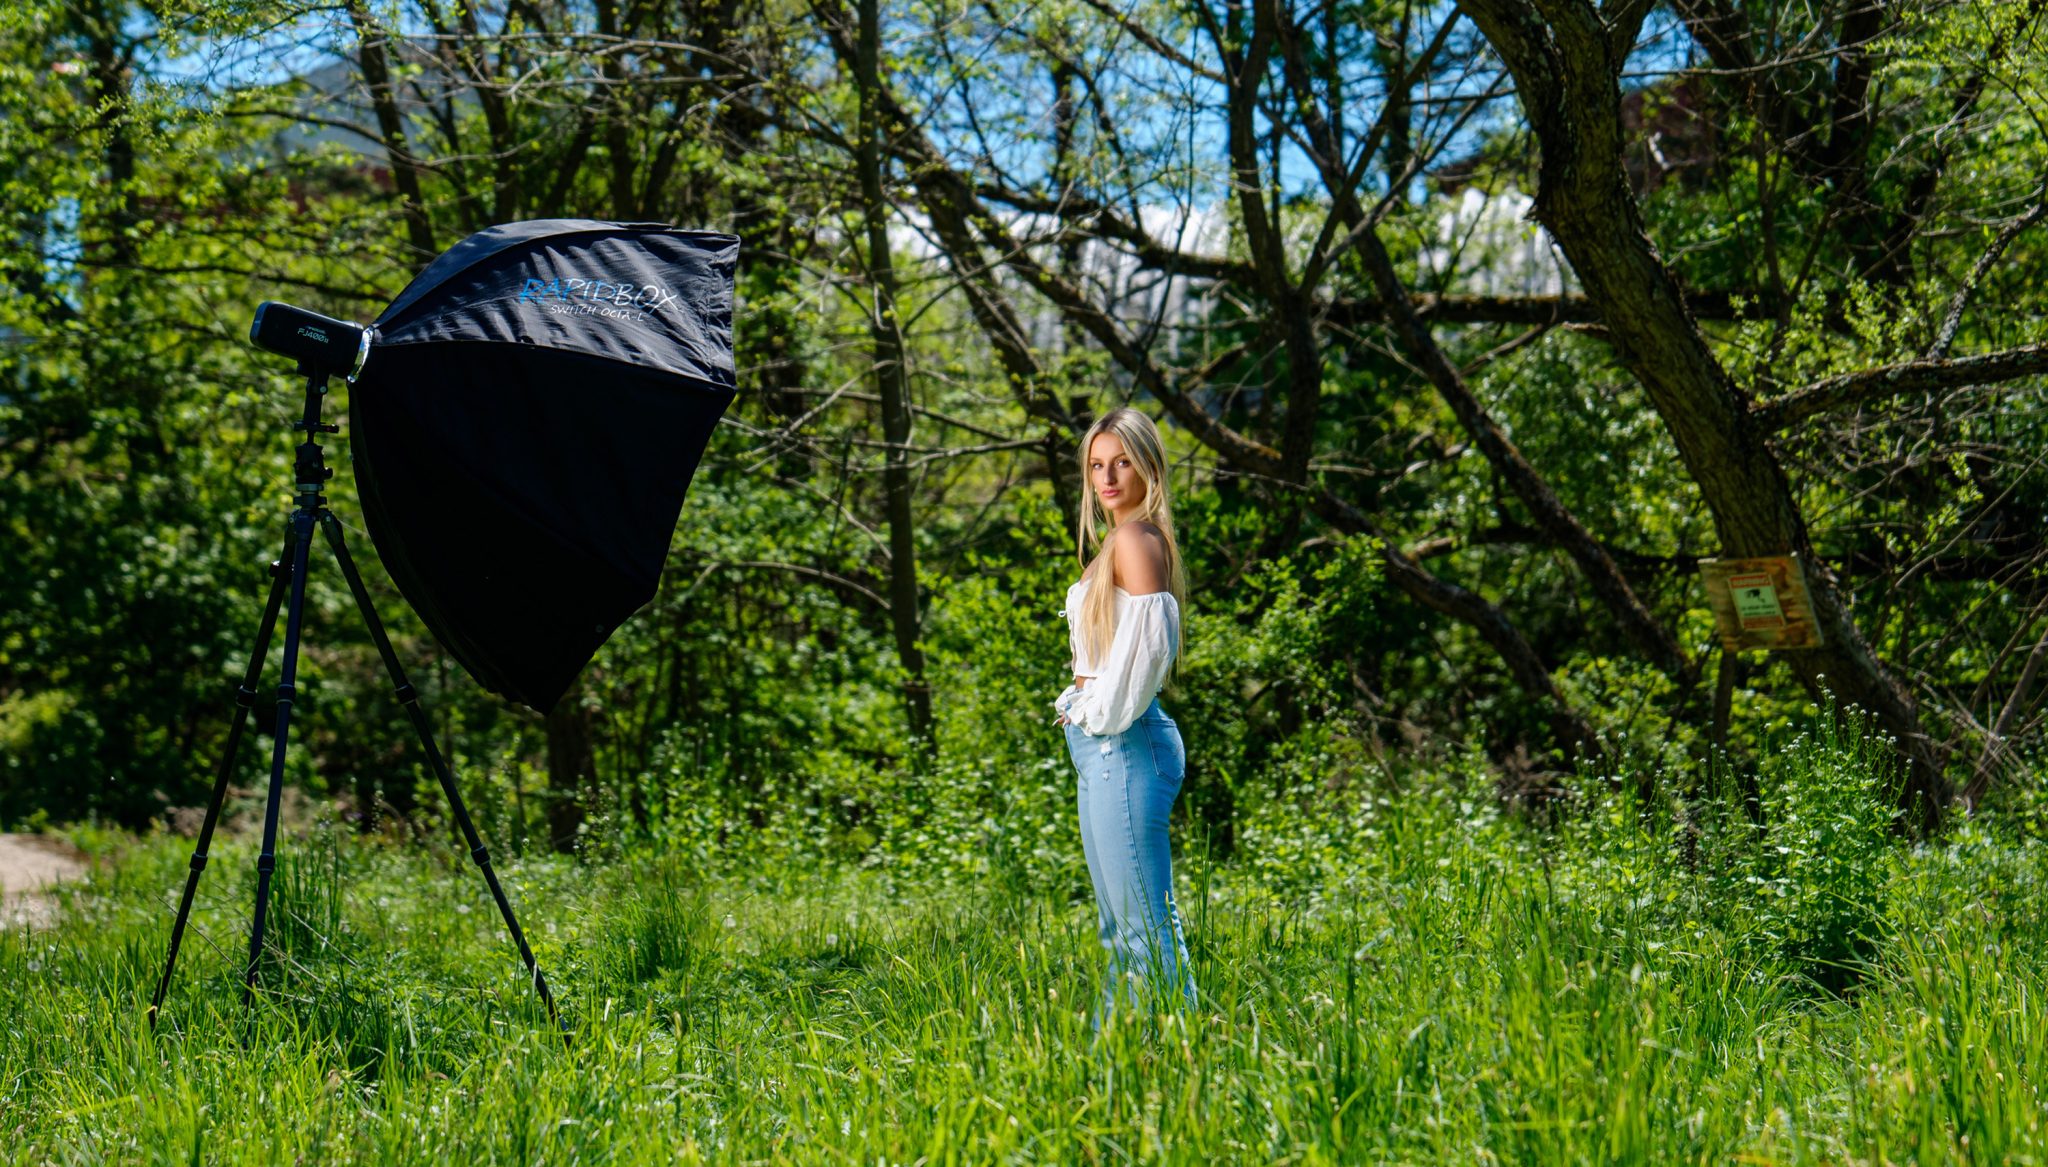
You take a photo with flash. Your subject is too bright, the background is too dark, and suddenly you’re not sure which setting to change. Sound familiar? The way forward is simpler than you might think.
In this video, photographer JC Carey takes us on location to demonstrate a repeatable process for using flash. Instead of memorizing settings for every situation, you’ll learn what to adjust next, and why. Using Westcott strobes and modifiers, JC shares his go-to technique for dialing in camera and flash settings across five different lighting situations, from a dark barn to bright afternoon sun.
Take the Guesswork Out of Off-Camera Flash
Every flash photo you take is actually two separate exposures in one: the exposure for your background (controlled by your camera) and the exposure for your subject (controlled by your flash). Whenever you shoot with flash, follow these 4 simple steps in order:
1. Choose Your Camera Settings
Before turning on a flash, set your camera settings just like you would for a natural light photo:
- ISO: Set this to your camera’s base setting (usually ISO 100) to ensure the highest image quality.
- Focal Length: Pick your lens based on your framing or the visual effect you want (like wide-angle perspective or telephoto compression).
- Aperture: This is your first big creative decision. Choose your aperture solely to control depth of field, which is how much is in focus. What is in focus tells the viewer what is important in your story.
- Shutter Speed: Use shutter speed to control the ambient light (the background brightness).
2. Set Your Background Exposure
With your camera settings set, take a test shot without the flash. Adjust your shutter speed until the background environment looks exactly how you want it. Want a rich blue sky or dark, moody background? Speed up your shutter. Want more natural room light? Slow it down.
3. Select Your Strobe and Light Modifier
Now it’s time to match your flash gear to your environment and the mood you want to create:
- Matching Strobe Power to the Scene: Choose your flash output based on the ambient sunlight. Compact strobes like the Westcott FJ100 or FJ250 are perfect for indoor fill or open shade. When you need to overpower harsh midday sun, shoot with High-Speed Sync, or when using large modifiers, step up to a higher-wattage strobe like the Westcott FJ400 II or Westcott FJ800.
- Choosing Hard vs. Soft Light Modifiers: You can use bare strobes, deep reflectors, or grids to create bold contrast, grit, and dramatic shadows. For smooth, flattering skin tones and a glamour look, choose diffusion modifiers like umbrellas or softboxes. Use smaller sizes like the Rapid Box Switch Octa-S for headshots and larger softboxes such as the Rapid Box Octa-L for full-body coverage.
Pro Tip: Moving your modifier closer to your subject creates softer light and uses less flash power. Adding diffusion reduces light output, so take another test shot and adjust flash power as needed.
4. Power Up Your Flash to Expose Your Subject
Turn on your flash and adjust its power until your subject is lit the way you want. If your subject is too dark or too bright, start by turning the flash power up or down while keeping your camera settings the same. This helps preserve the background exposure and depth of field you already chose.
Look 1: Balancing a Dark Barn and a Bright Doorway
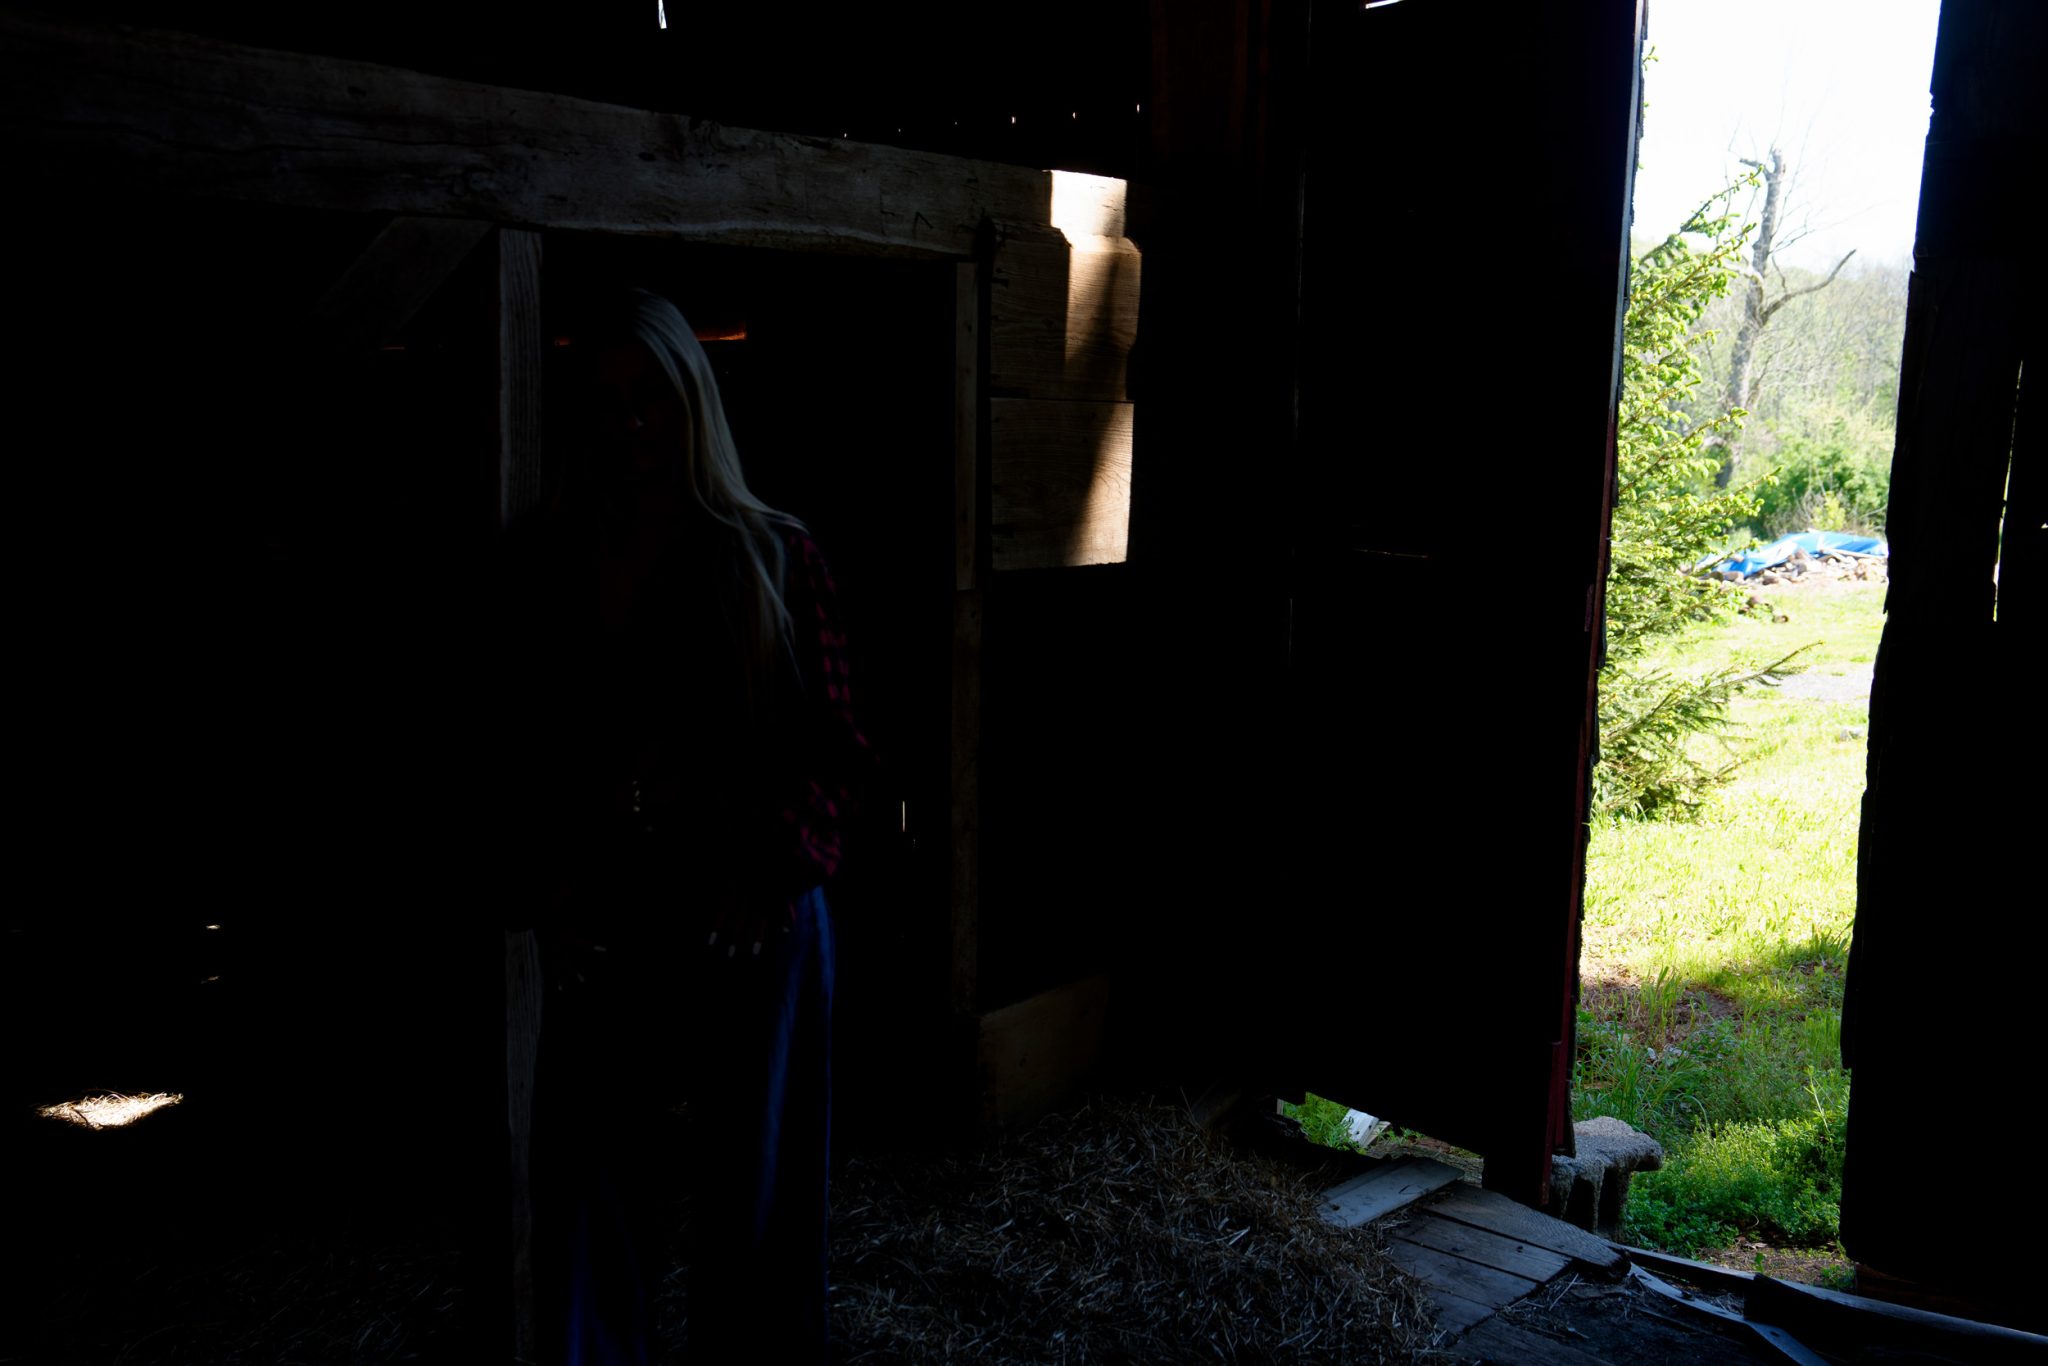
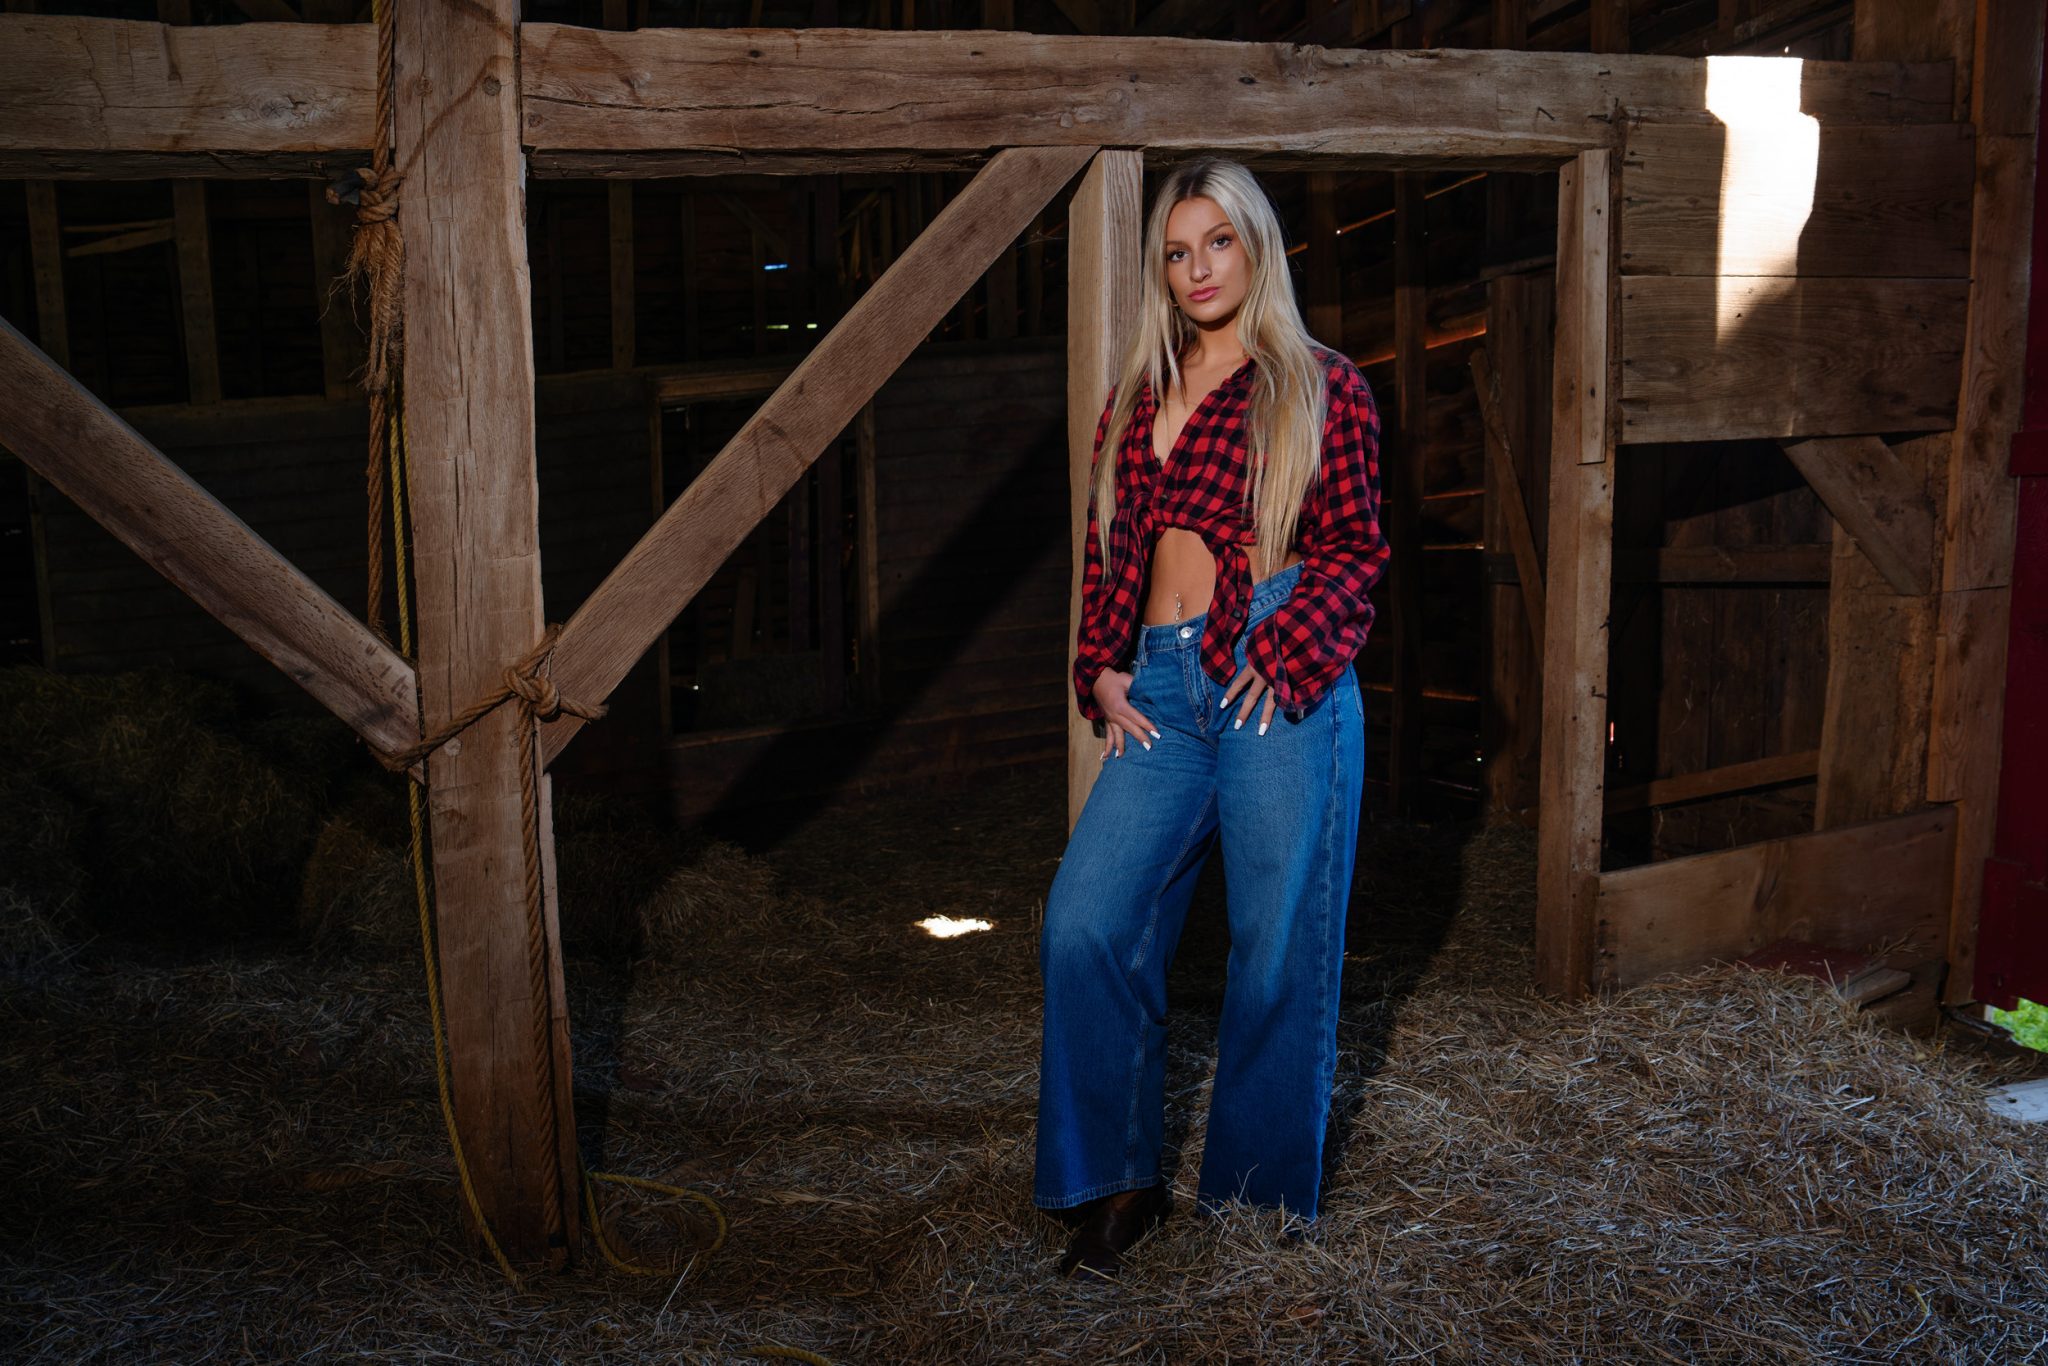
For our first setup inside a dark barn, JC wanted to illuminate model Liv without overpowering the rustic scene or blowing out the bright natural light coming through the barn door.
JC started with a compact Westcott FJ100 Strobe. To keep enough detail in the barn surroundings, he chose a 35mm focal length at F4 and ISO 100. He set his shutter speed to 1/100s to balance the outdoor light visible through the doorway.
Starting with a bare flash created hard, dramatic shadows. For this portrait, JC wanted softer light. He added a Westcott 43-inch Diffusion Umbrella and placed the light on a stand close to her at a classic 45-degree angle. Because the diffusion reduced the light output, he raised the FJ100’s power slightly. By speeding up his shutter speed to 1/400s, he was able to darken the background slightly, drawing more attention to Liv.
Look 2: Keeping Color and Texture in the Background
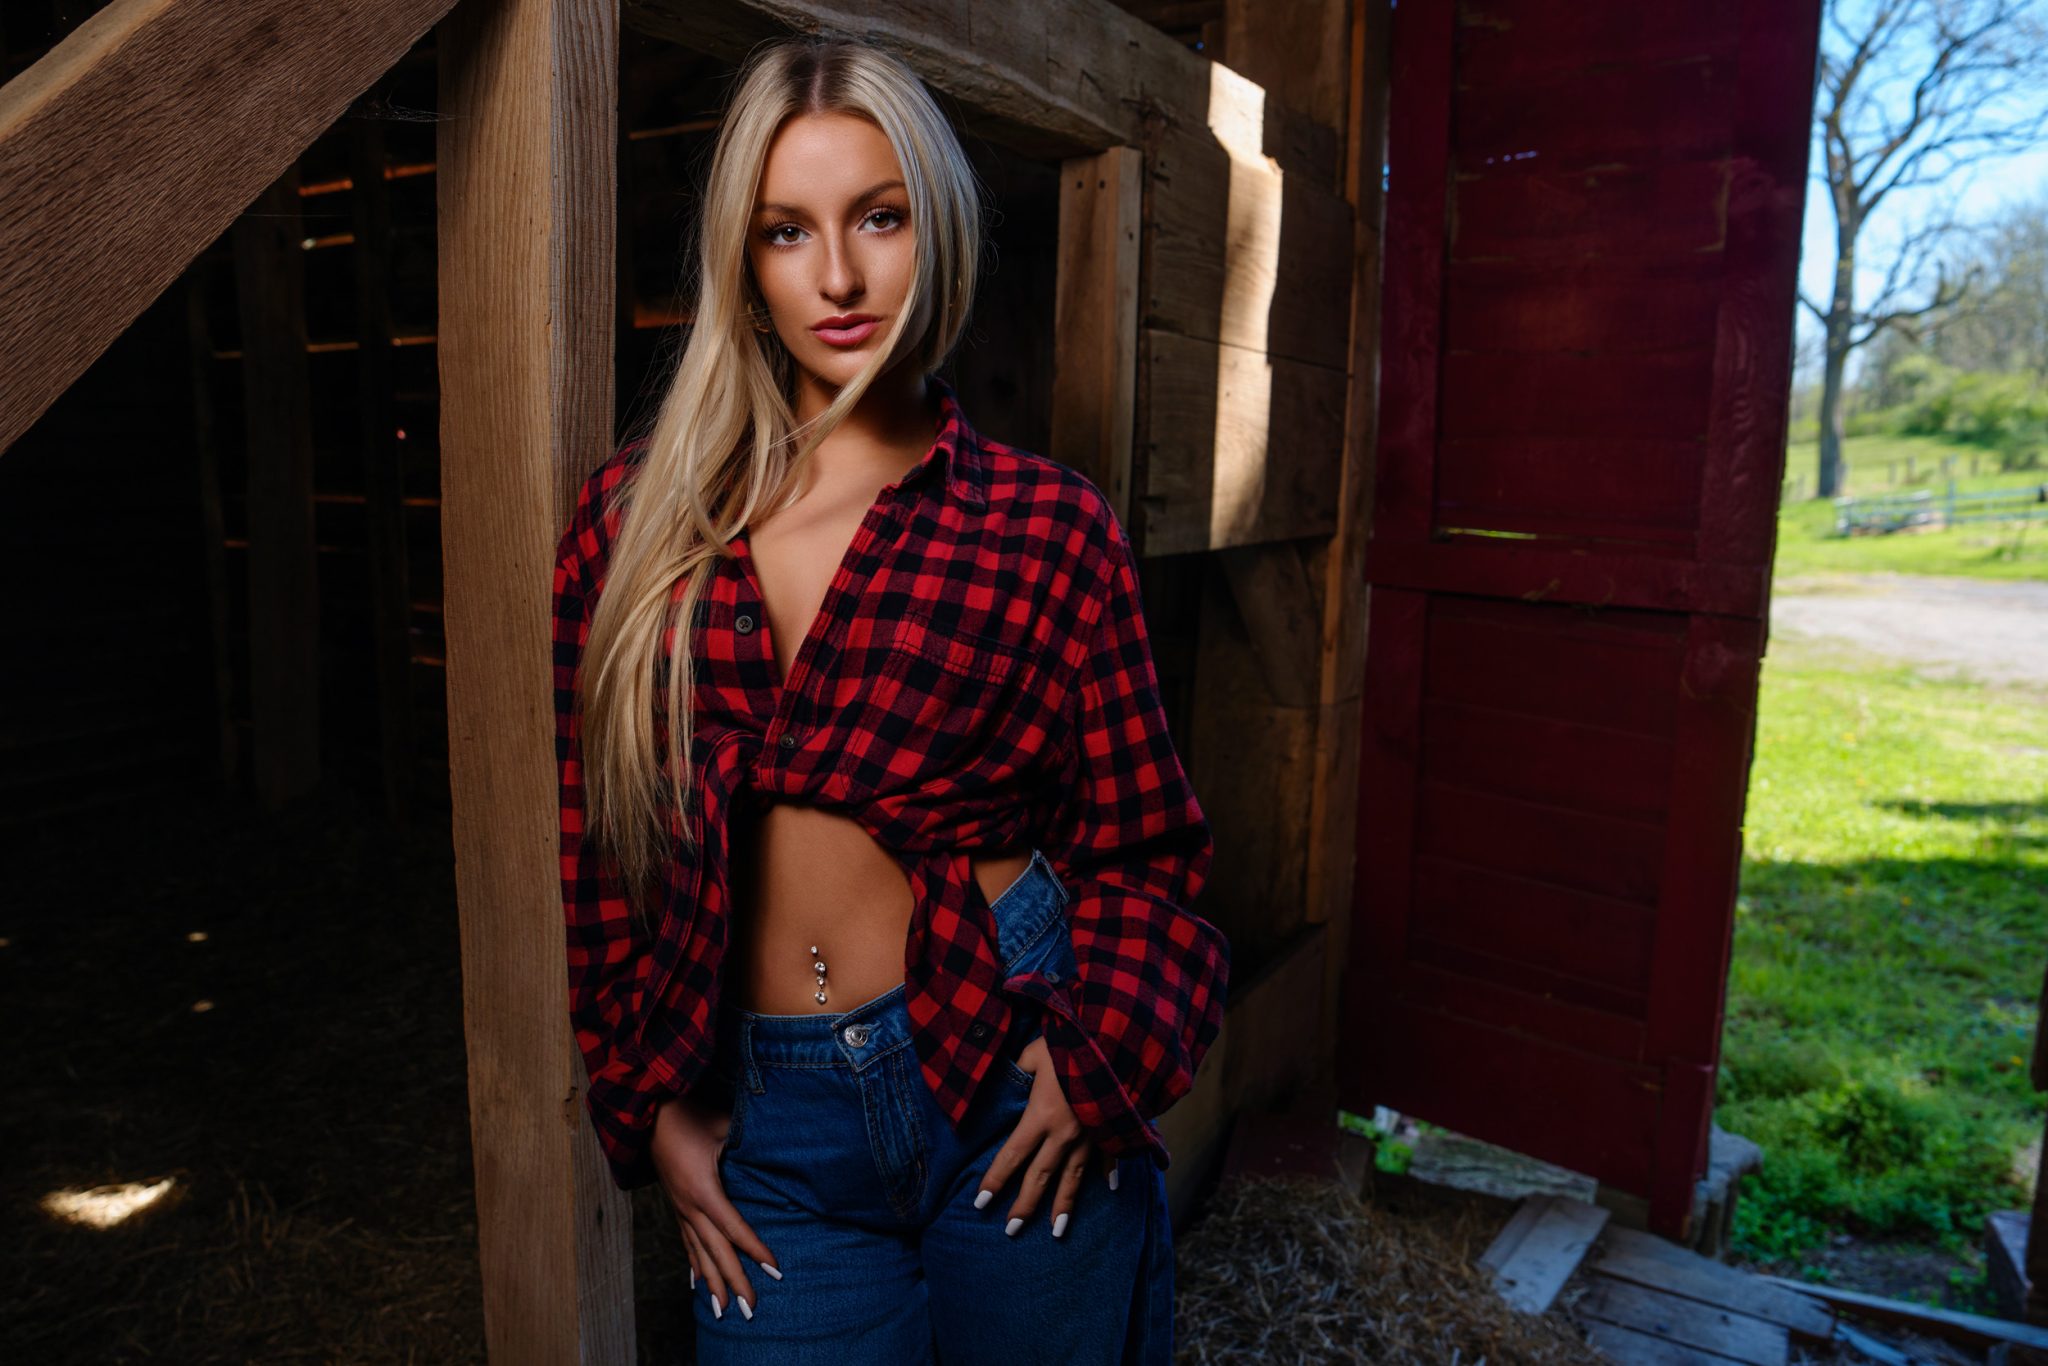
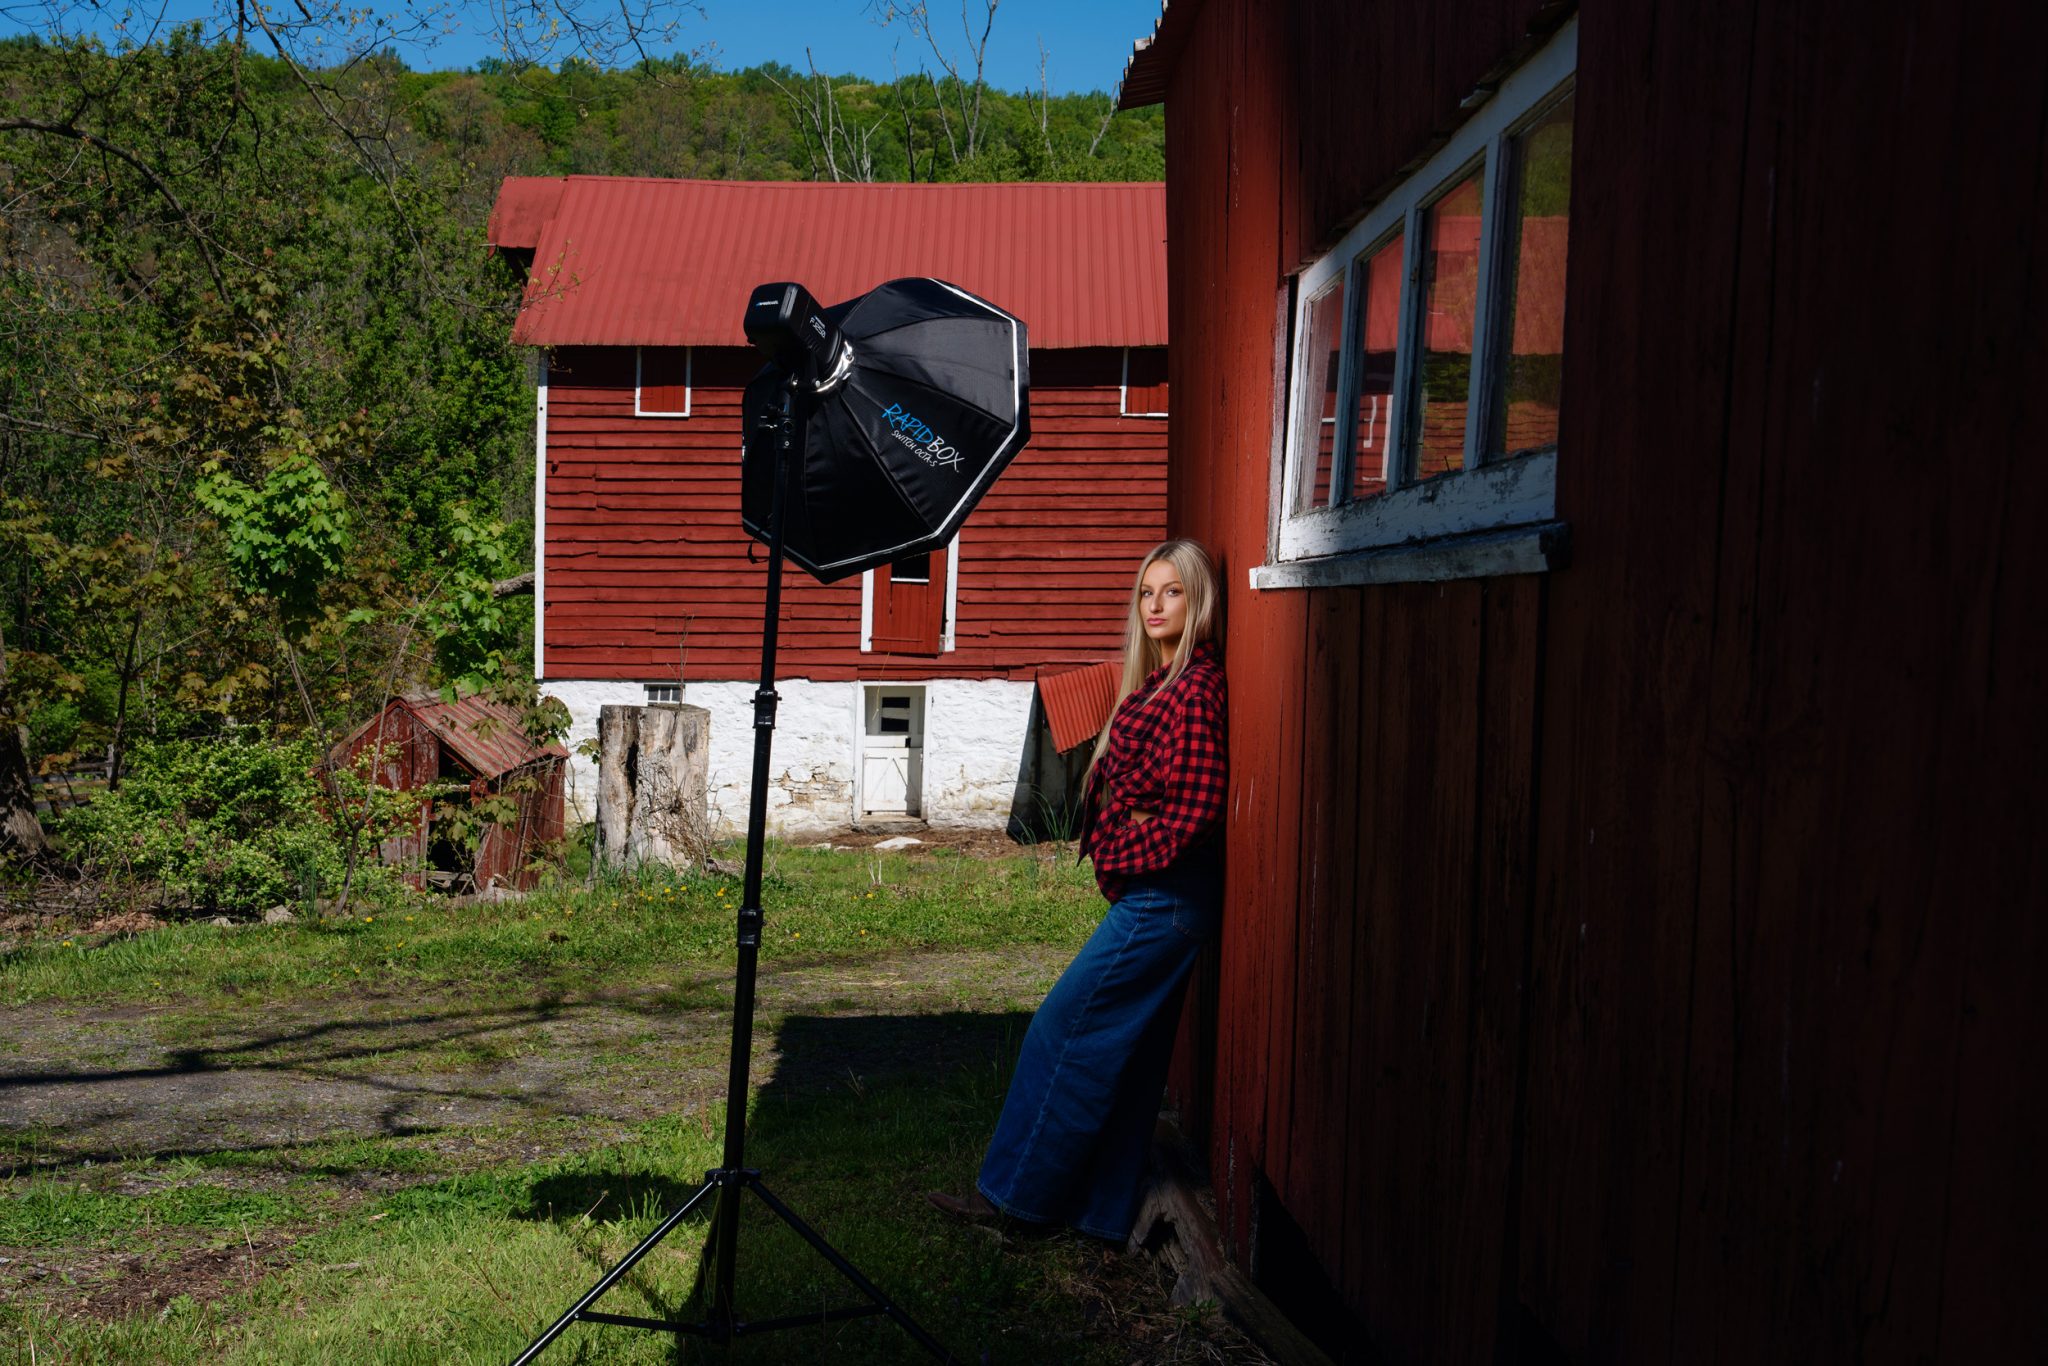
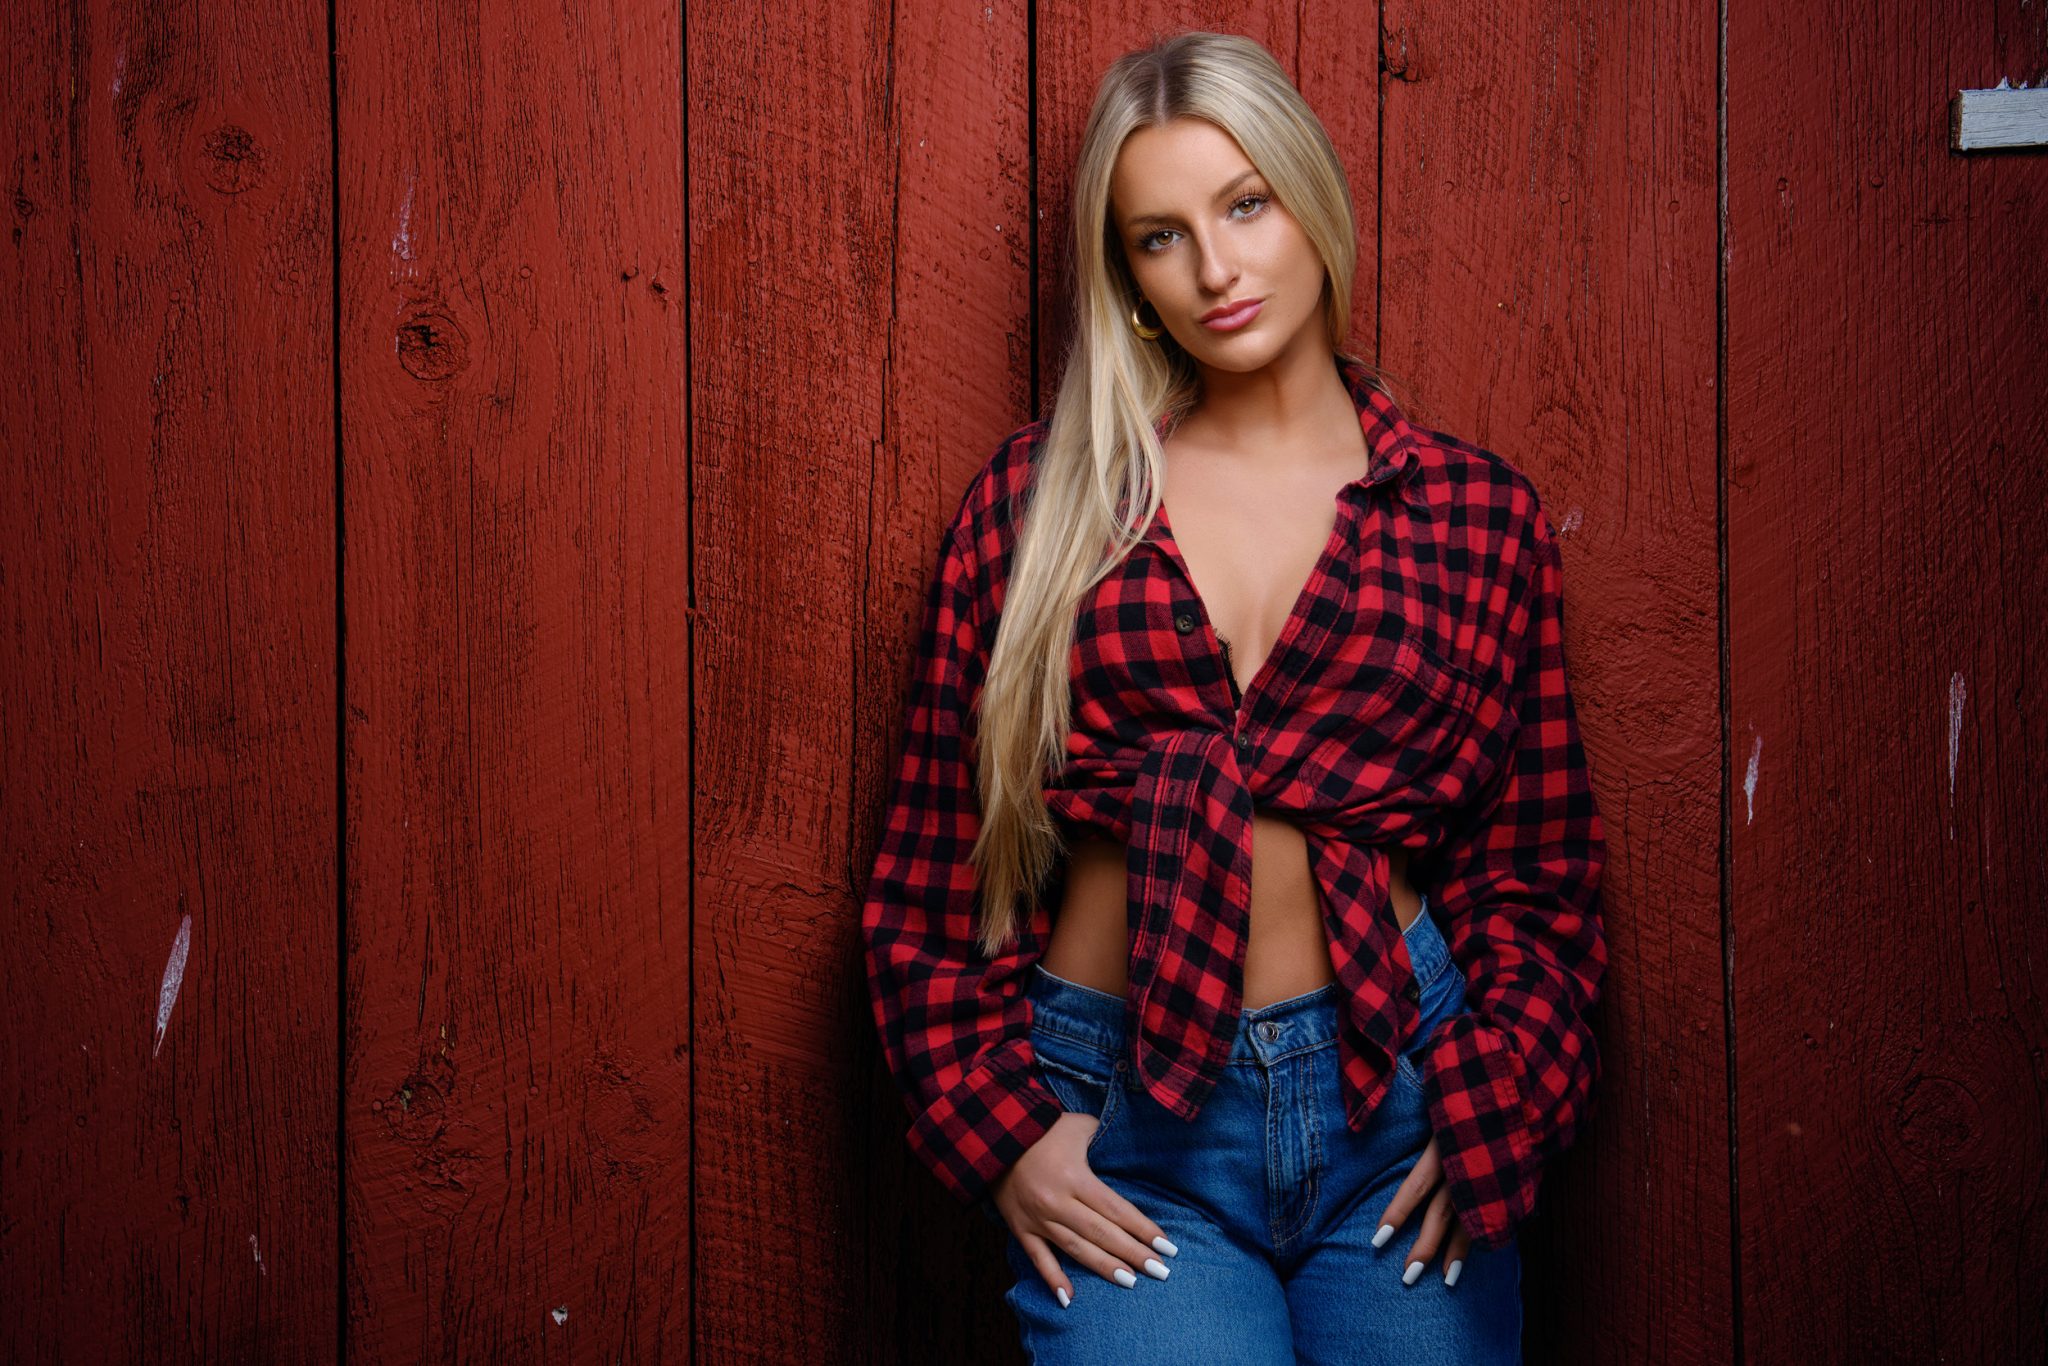
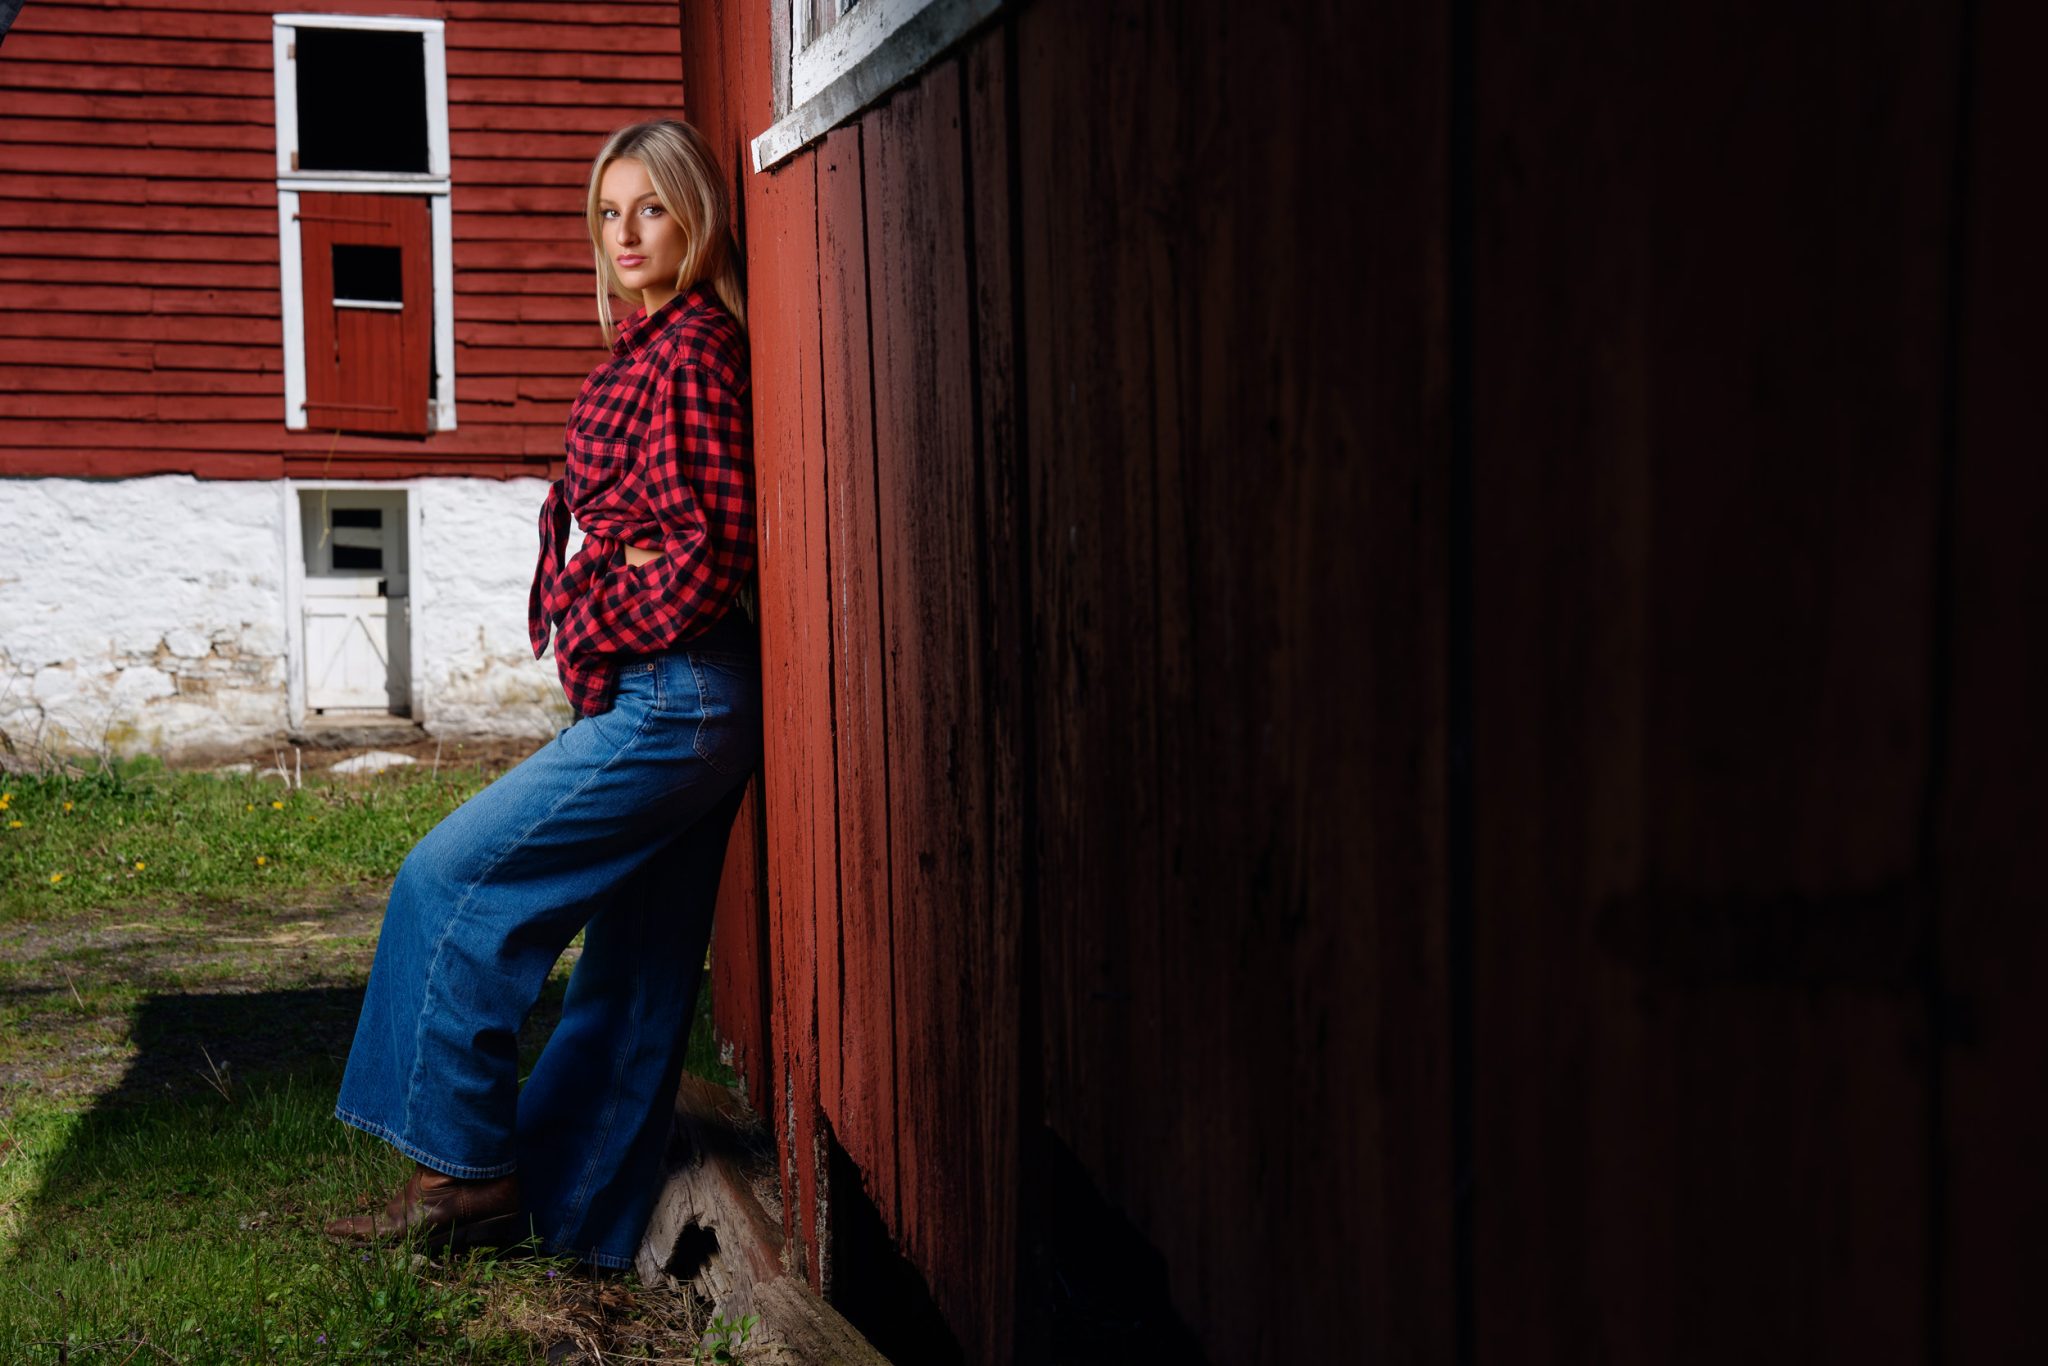
Moving outside, JC wanted to capture the rich texture and color of an old red barn wall. He switched to the Westcott FJ250 strobe for a bit more power against the daylight.
To keep more of the scene in focus, JC stopped down his lens to F8 at 70mm, with ISO 100. He set his shutter speed to 1/200s (standard flash sync speed) to slightly underexpose the background, making the red barn paint and blue sky look deep and vivid.
For soft, flattering light across Liv’s face, JC used a Rapid Box Switch Octa-S. To prevent a bright “hot spot” of light on the wall behind her, he feathered the softbox, angling it slightly away from the wall so only a soft edge of the light hit Liv. When capturing full-body shot, JC swapped to a larger Rapid Box Switch Octa-L for broader coverage.
Look 3: Overpowering Midday Sun in an Open Field
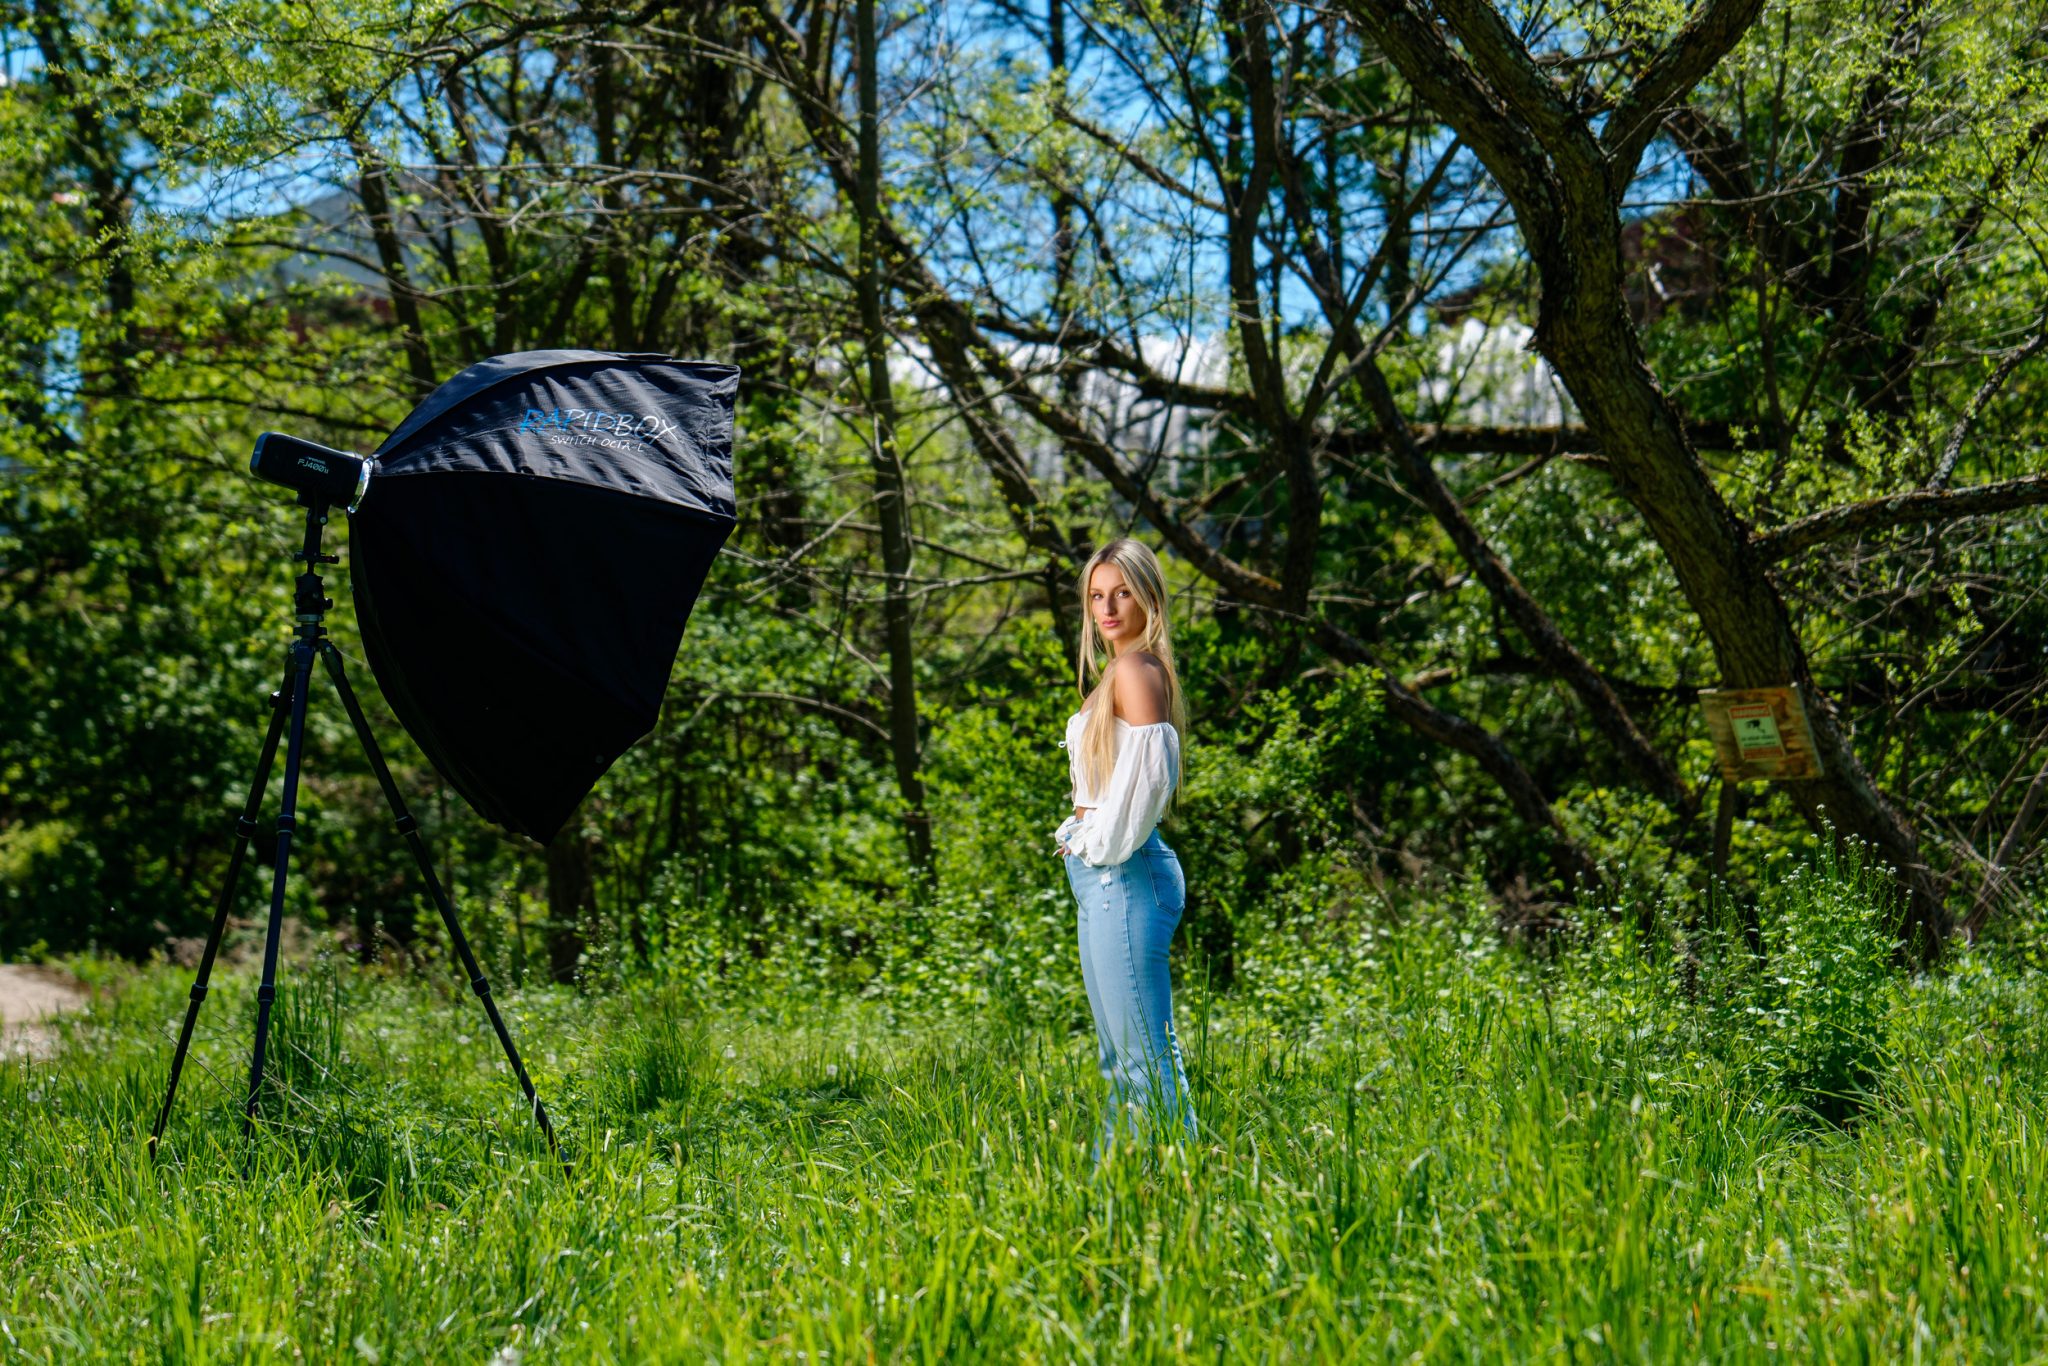
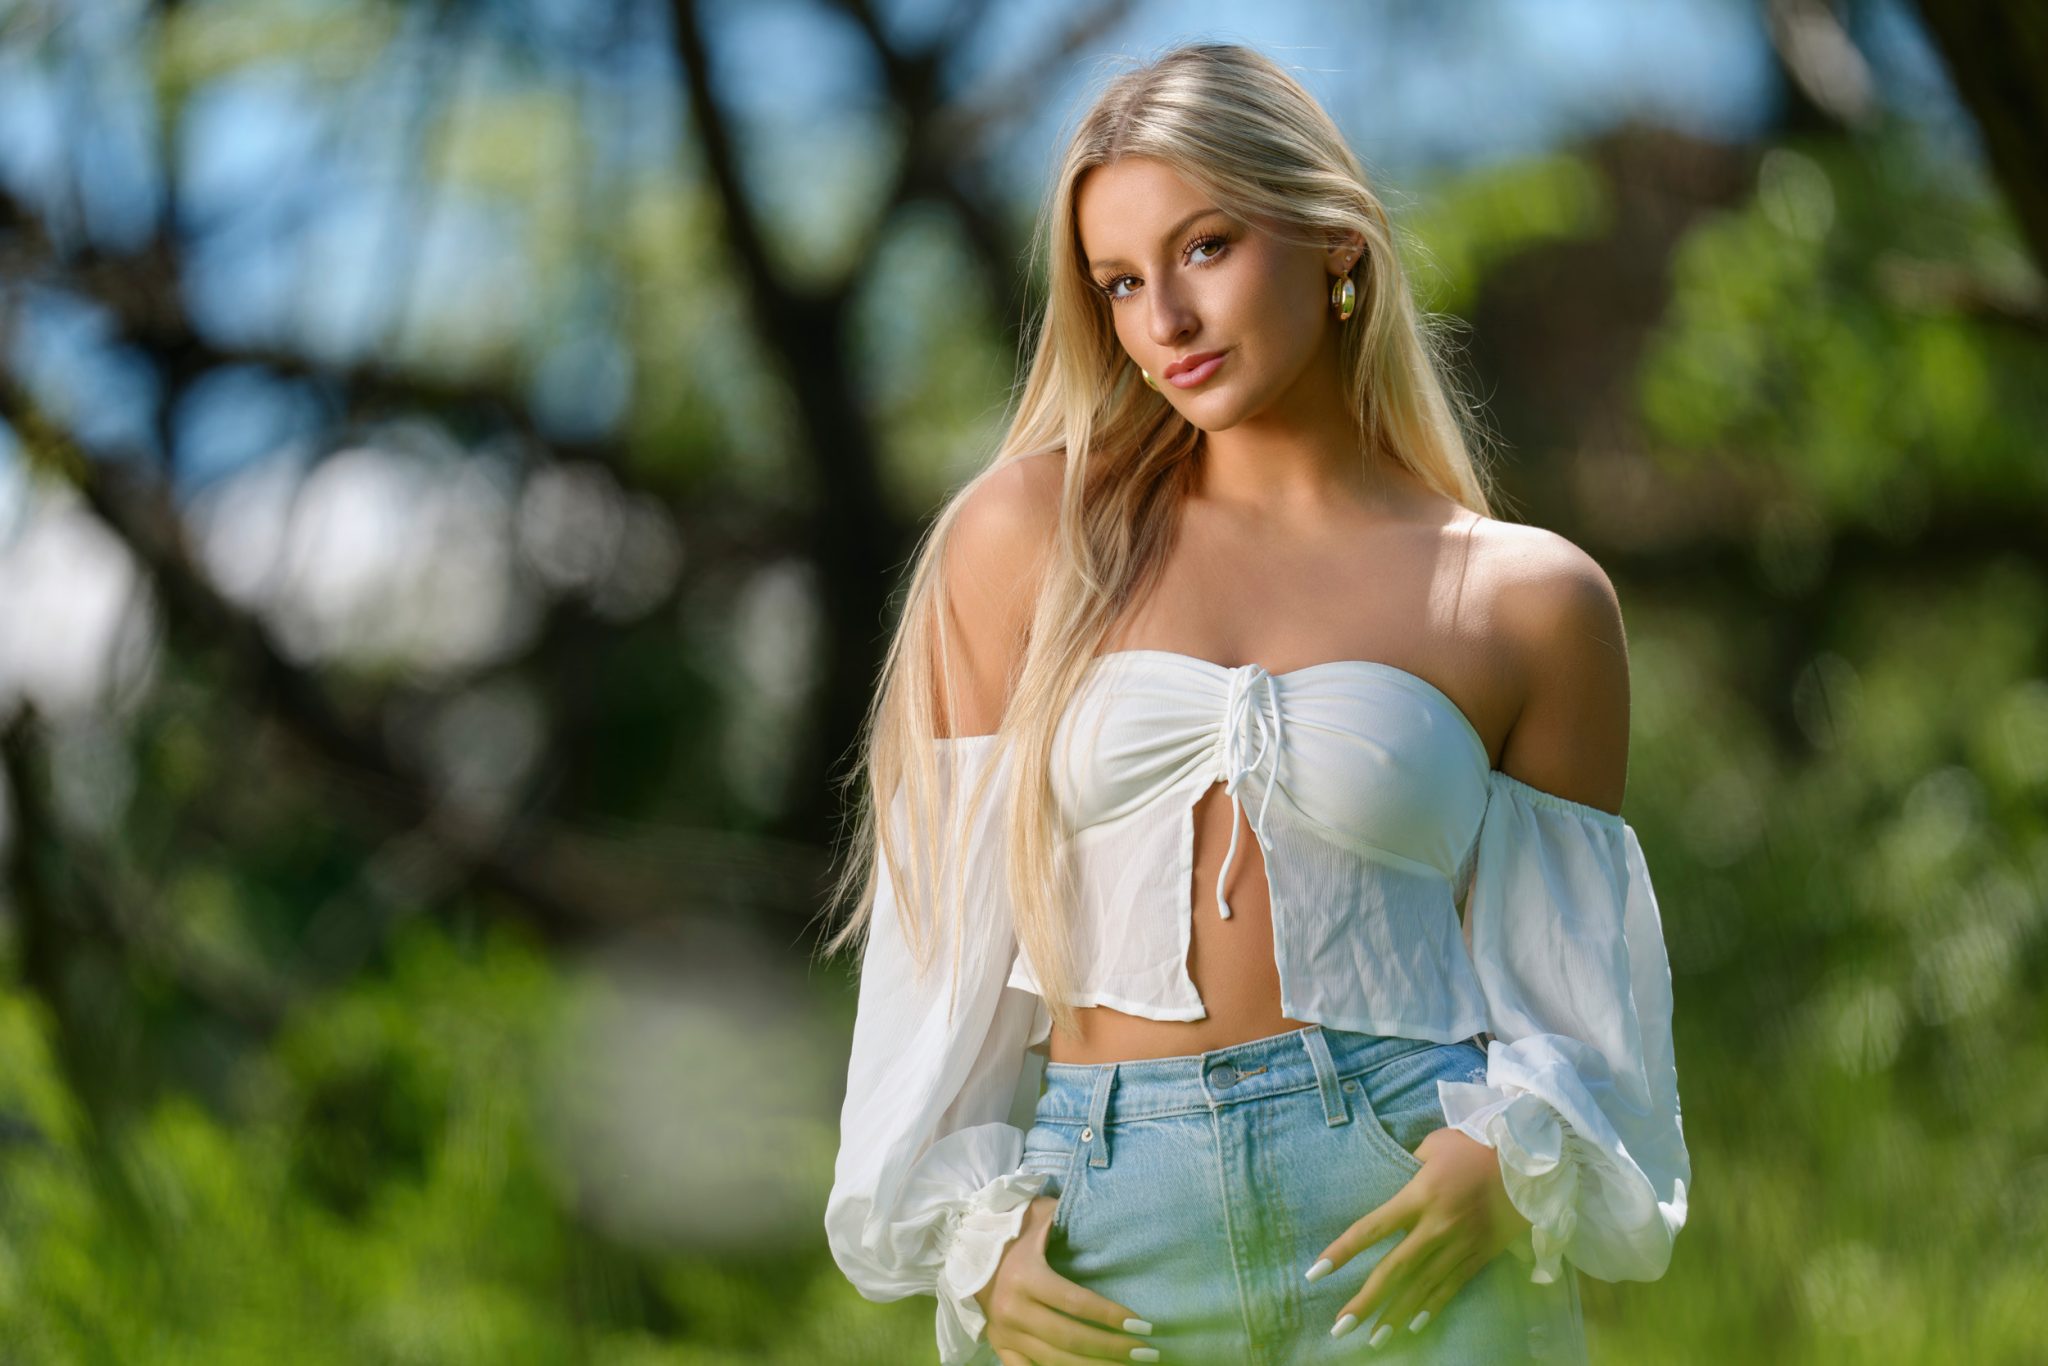
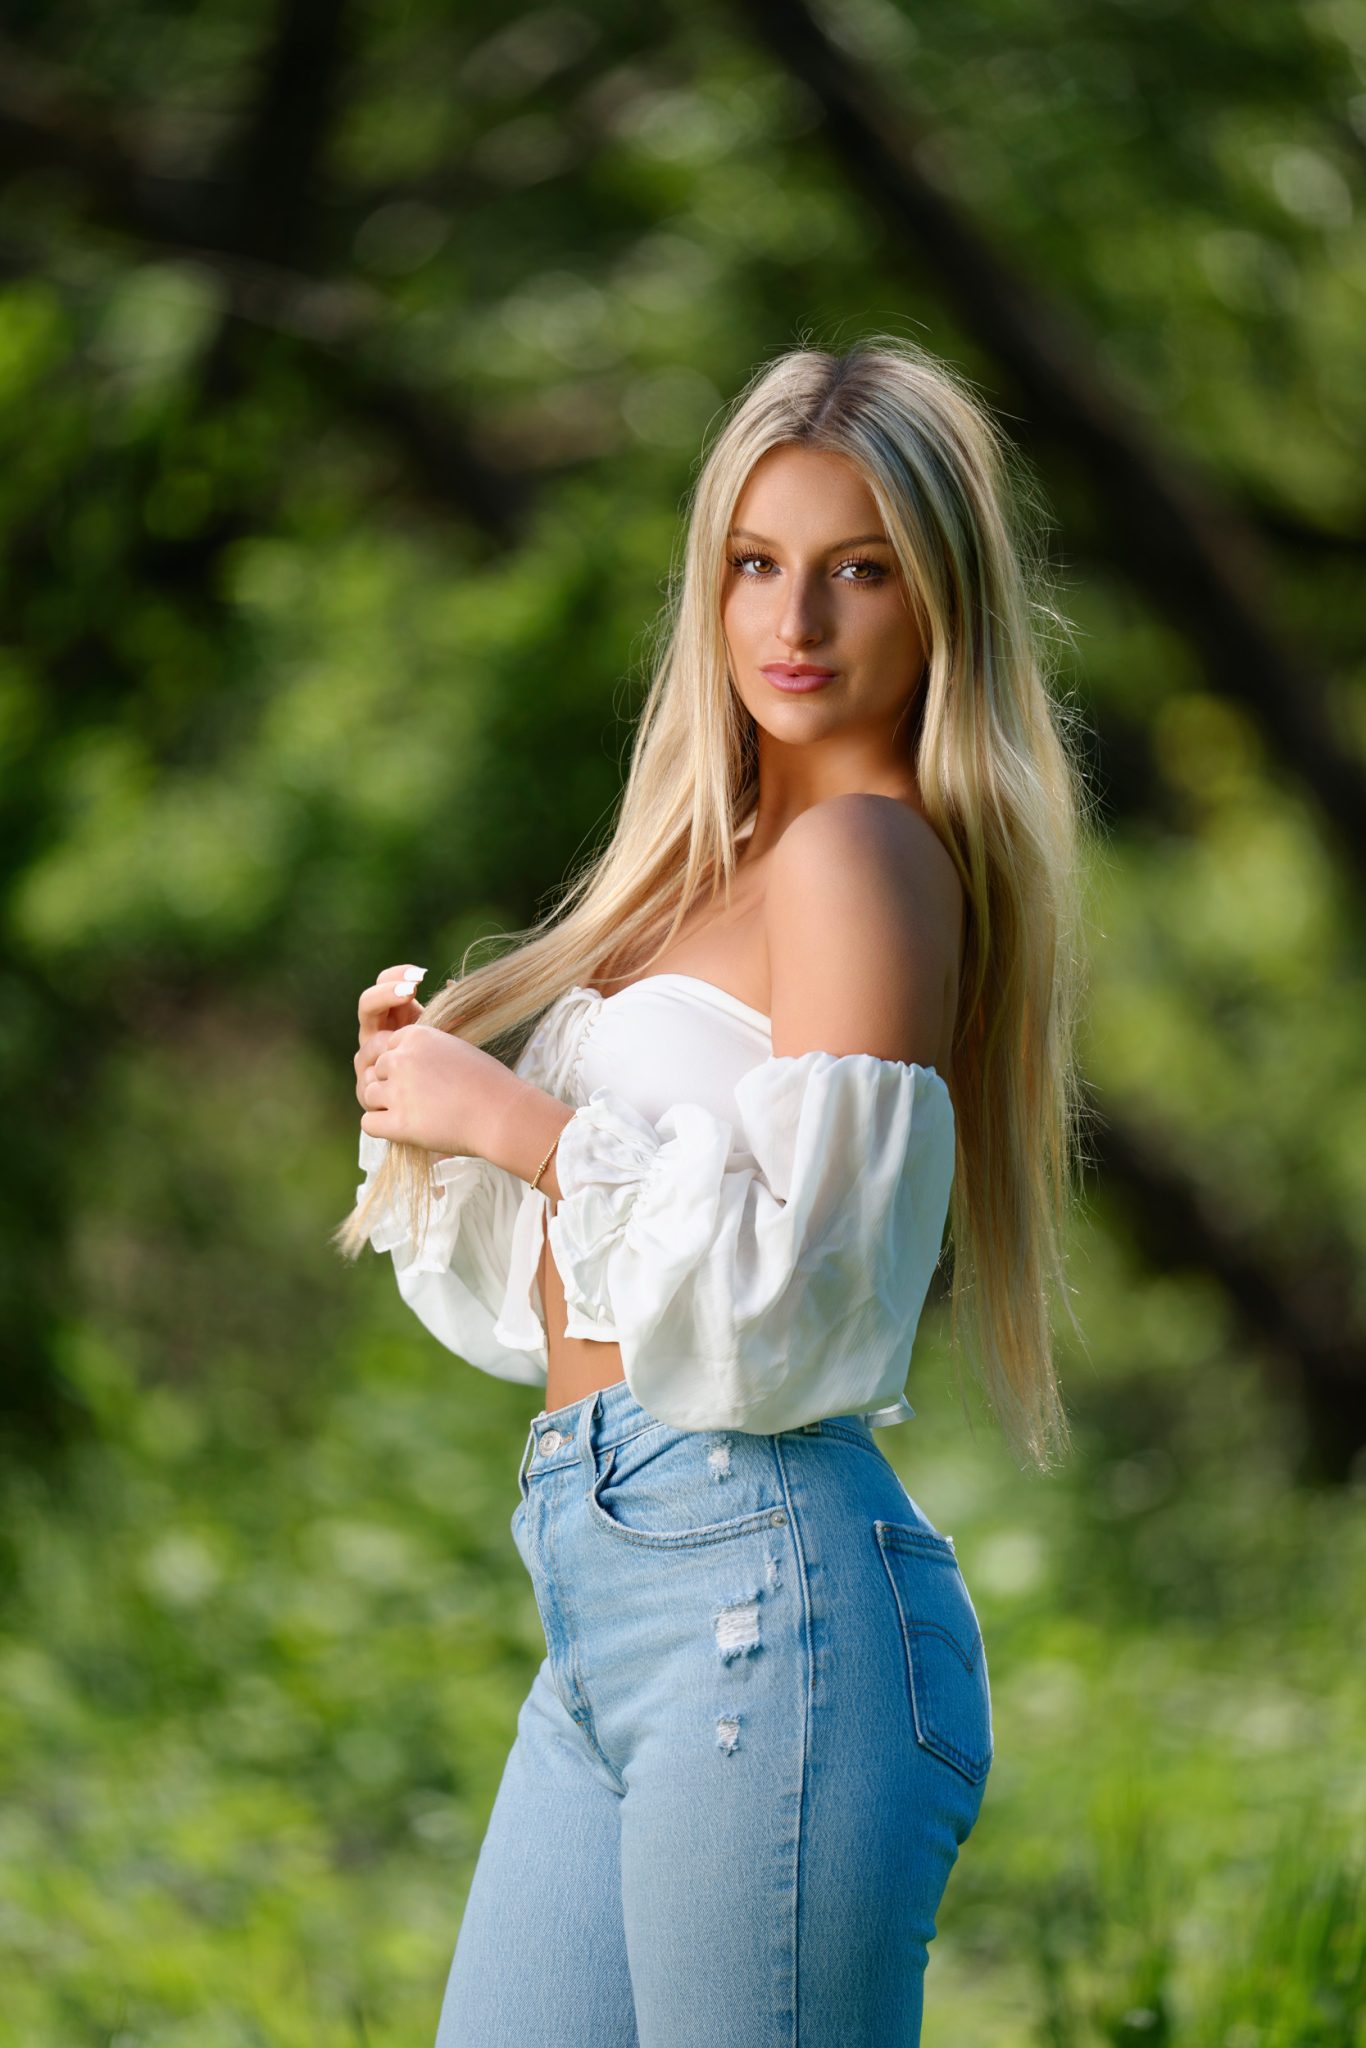
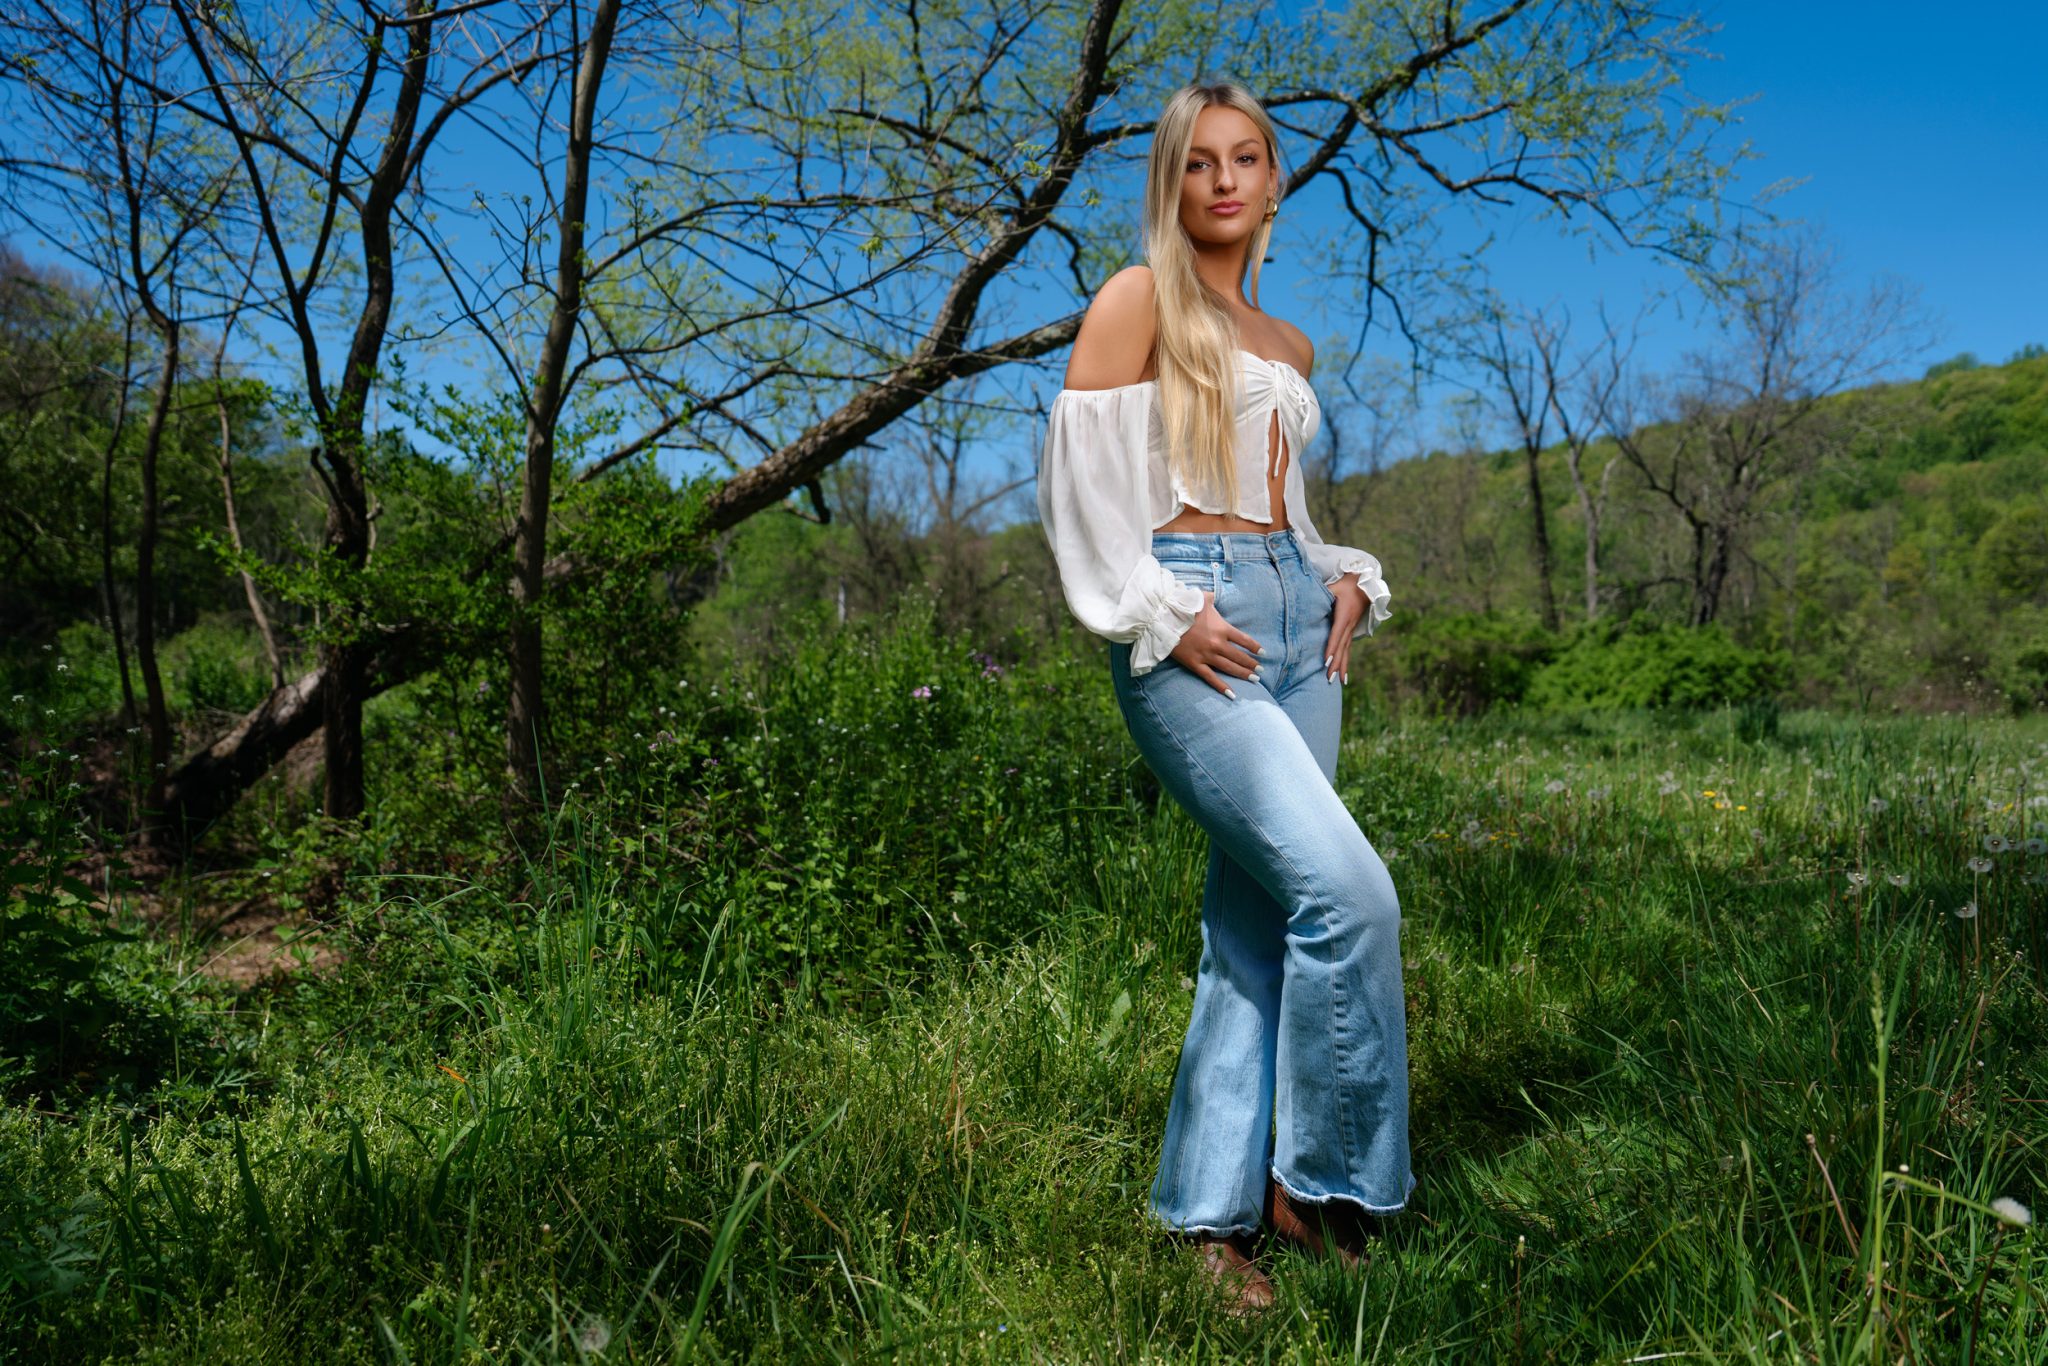
By 11:30 AM, the harsh midday sun was creating unflattering, dappled shadows across the field. JC brought in a Westcott FJ400 II strobe to add controlled light on Liv. Because the ground was uneven, he mounted the light to a sturdy camera tripod using a Westcott M6 Plate for extra stability against the wind.
JC started with a 45-Degree Deep Focus Reflector to cut through the bright sunlight. He set his camera to ISO 100, F4, and used High-Speed Sync (HSS) with a fast 1/1000s shutter speed to darken the bright sky and grass.
For a softer look, he switched to the Rapid Box Switch Octa-L. JC also demonstrated lens choice impact by switching to a 300mm F2.8 lens, which compressed the background trees into a smooth, blurred backdrop that made Liv pop off the page.
Look 4: High-Speed Sync Magic Down in the River
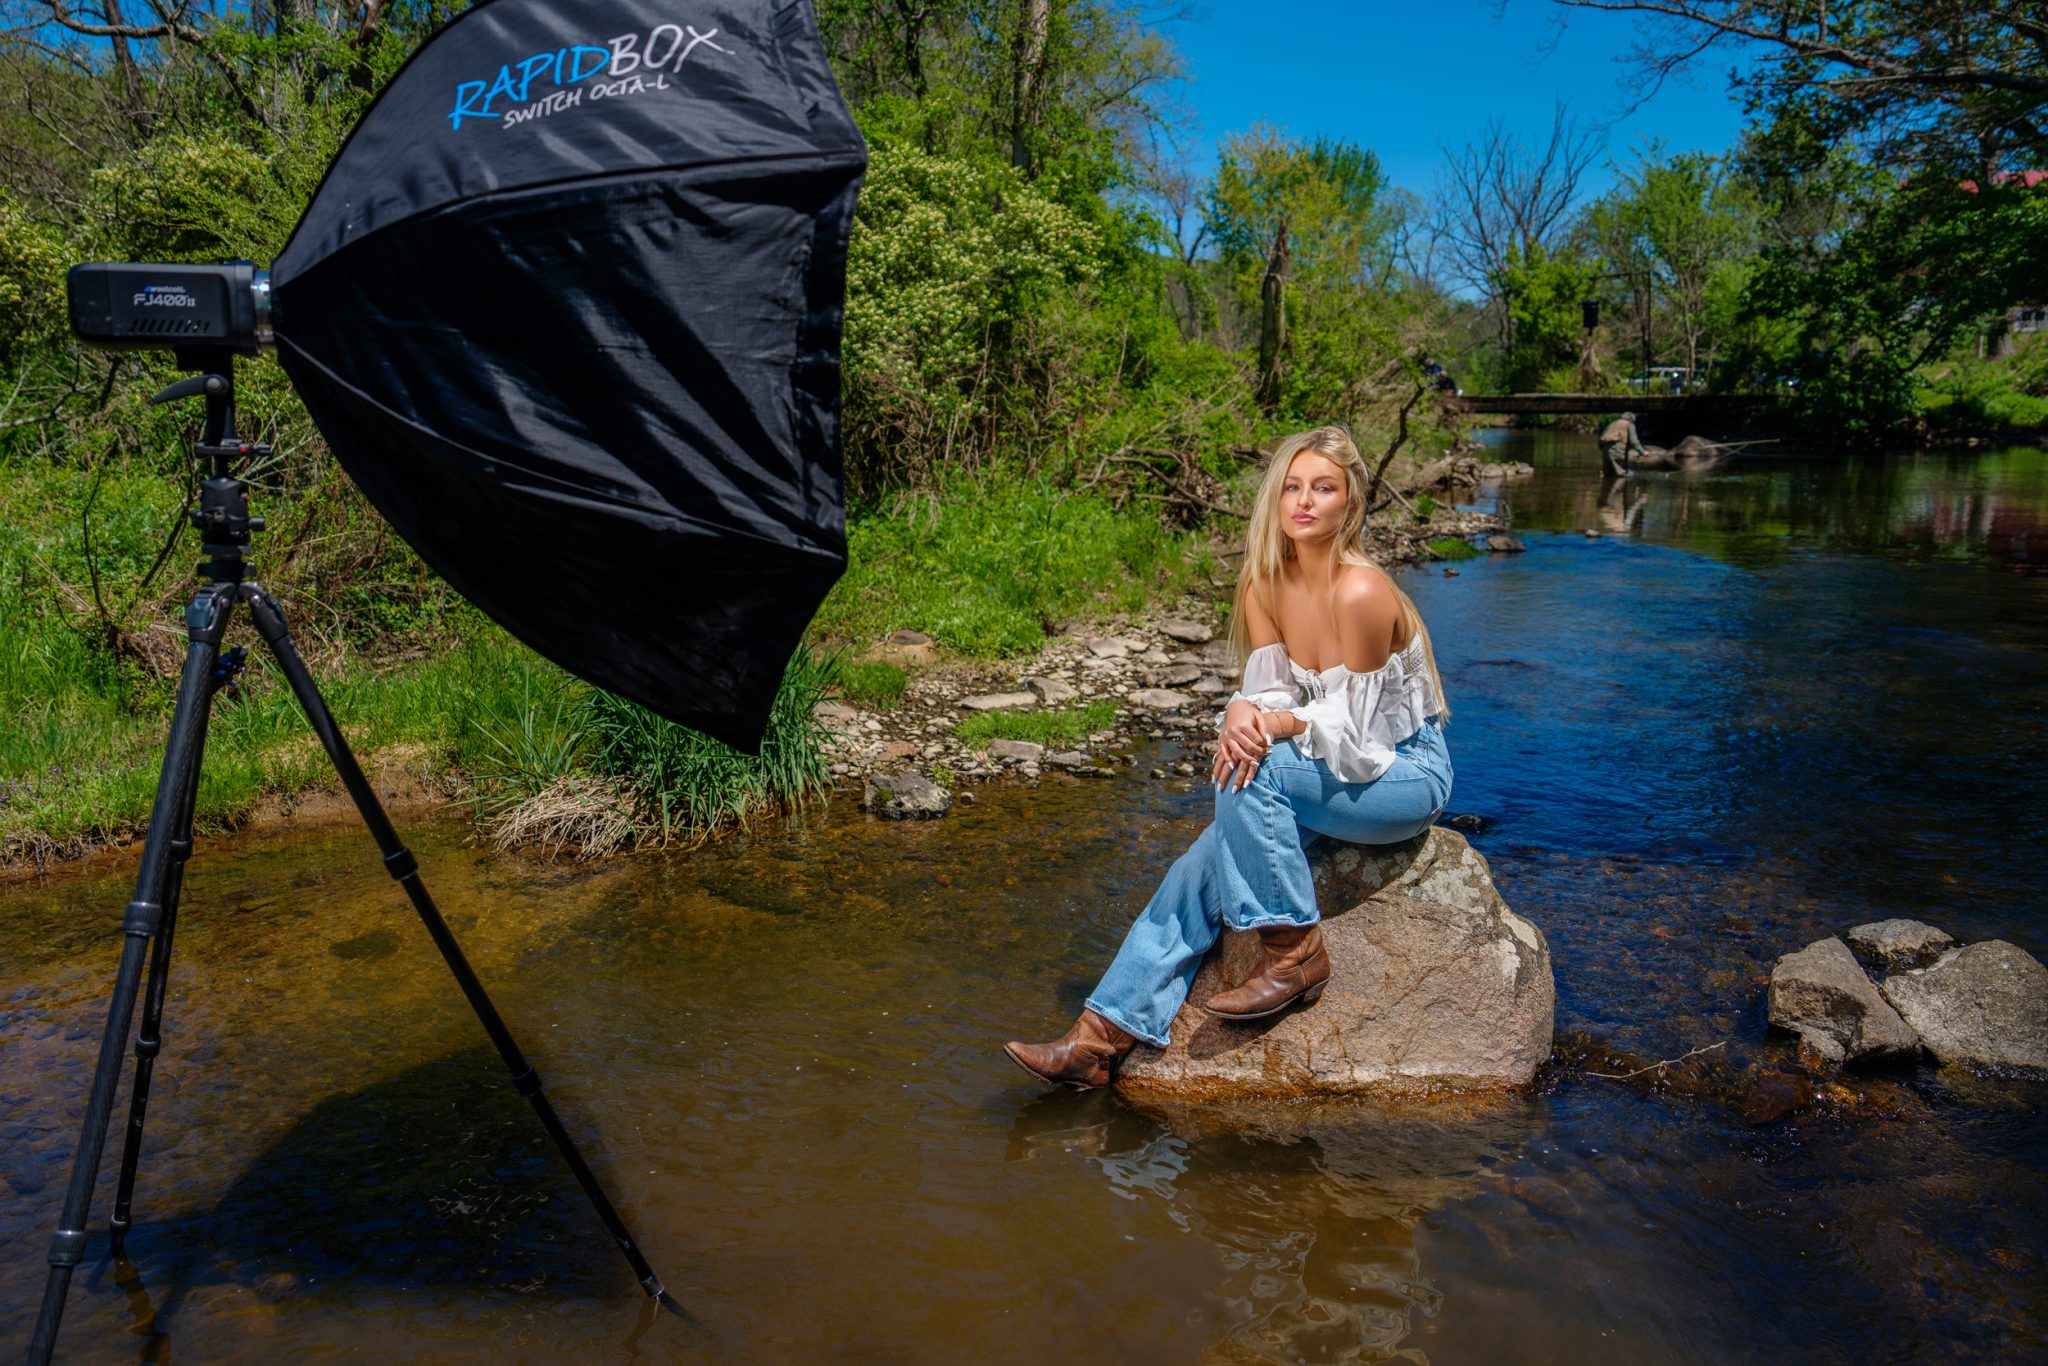
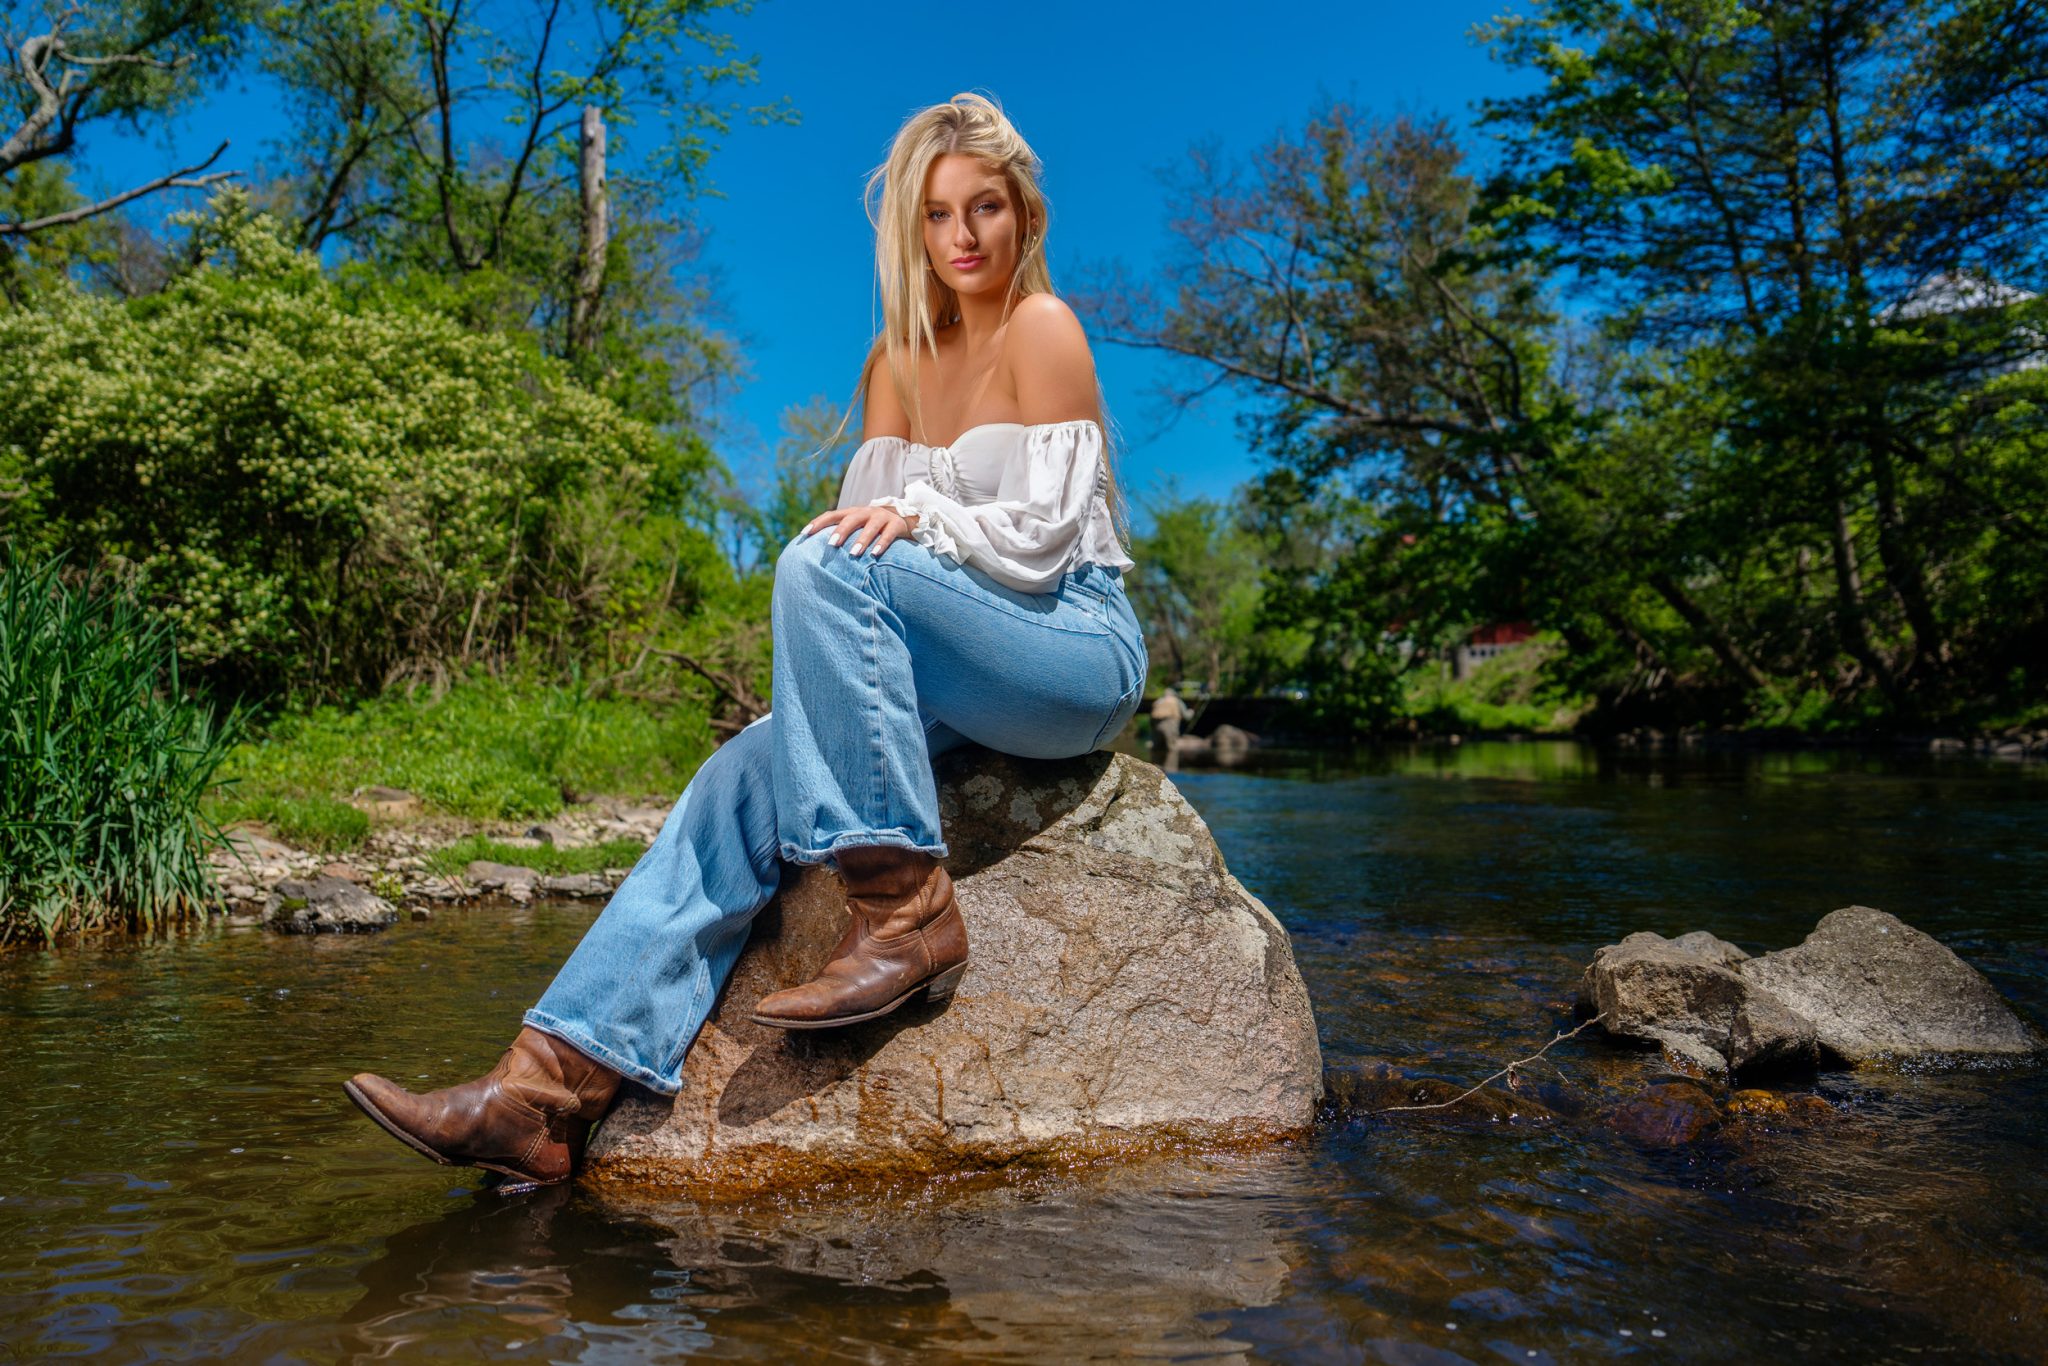
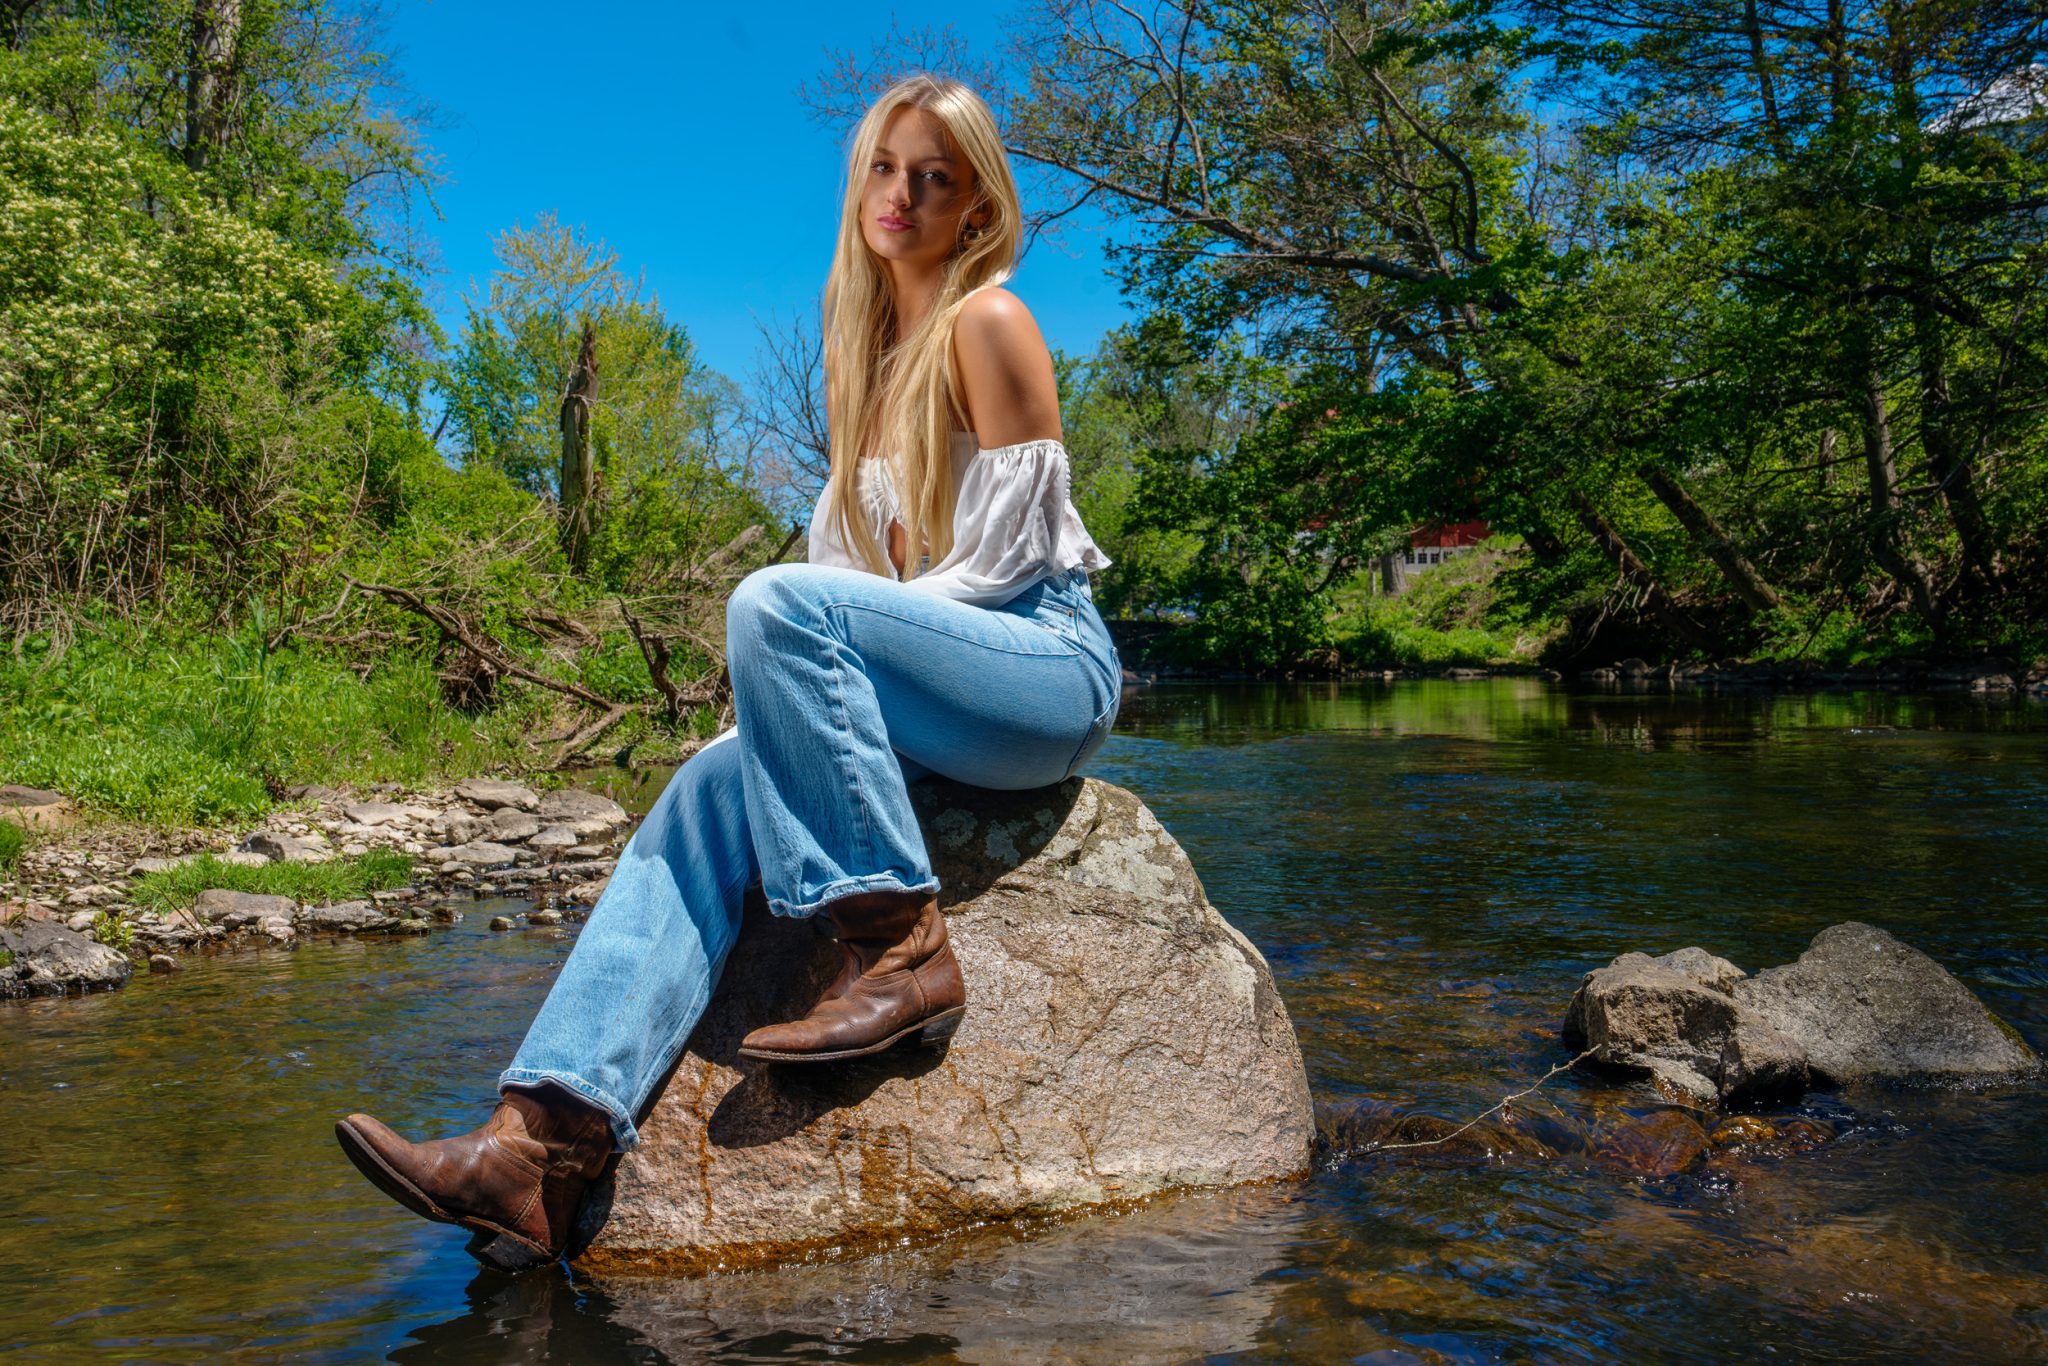
For a creative twist, Liv stepped directly into the stream. JC set up his FJ400 II and softbox in the water, relying again on his tripod setup to securely position the light.
Positioning Liv with the sun behind her created a beautiful natural hair light around her head and shoulders, but left her face completely in shadow. To capture the full scene, JC initially set his camera to F11 at 1/80s. While the sky and river looked great, Liv’s face needed flash to fill in the dark shadows.
JC then opened his aperture to F2.8 at 1/1600s in HSS to blur the background water and bridge. The FJ400 II illuminated Liv smoothly, completely isolating her from the background and turning a tricky lighting situation into a high-end fashion shot.
Look 5: Crushing Hard Shadows with High-Power Outdoor Flash
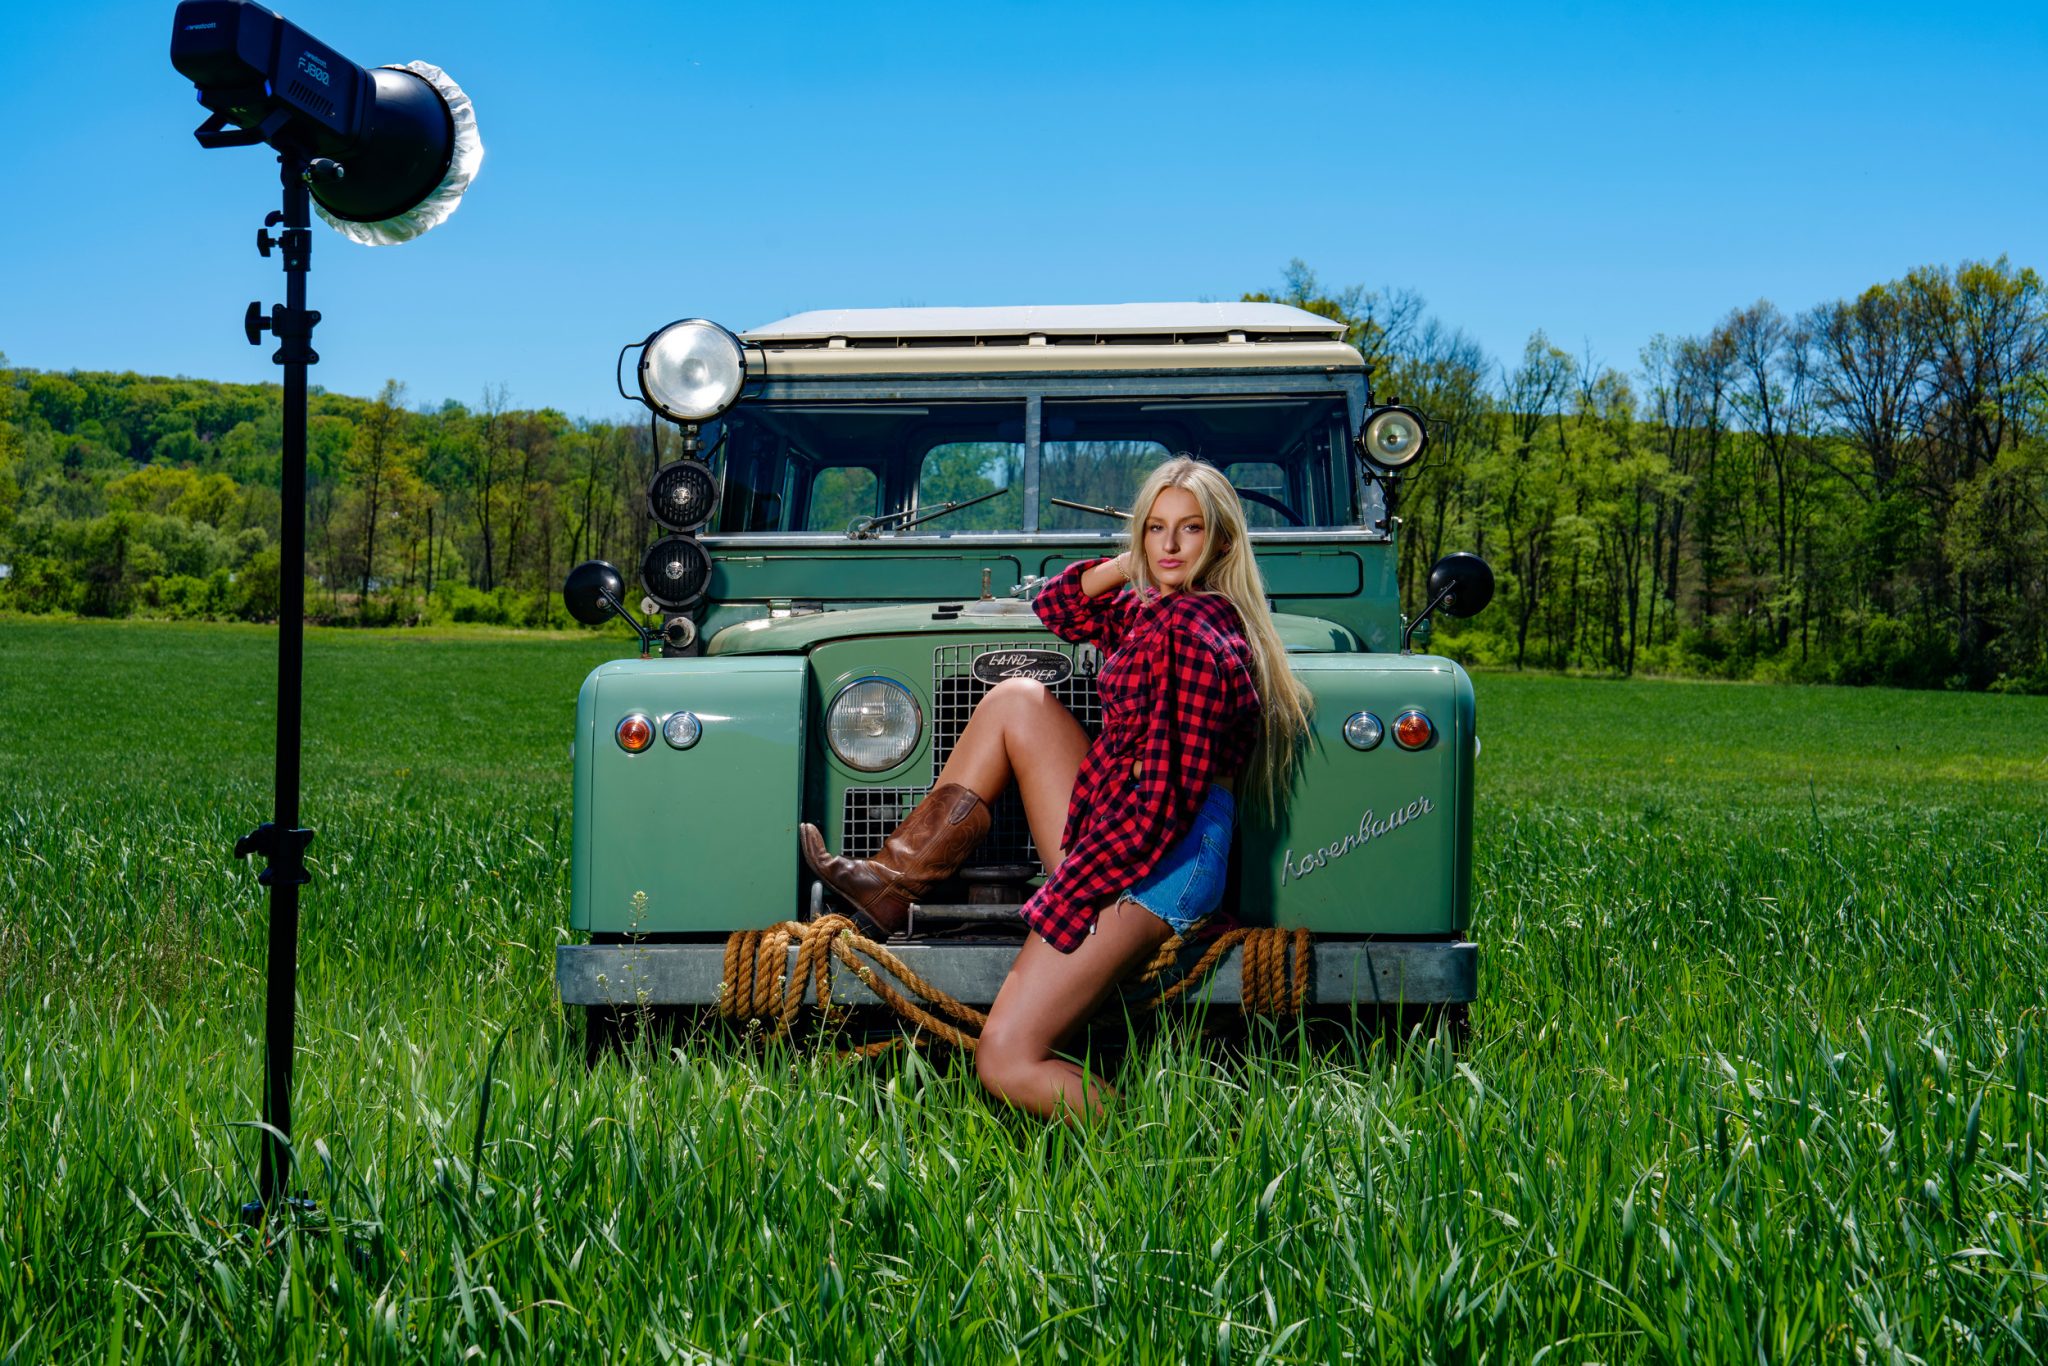
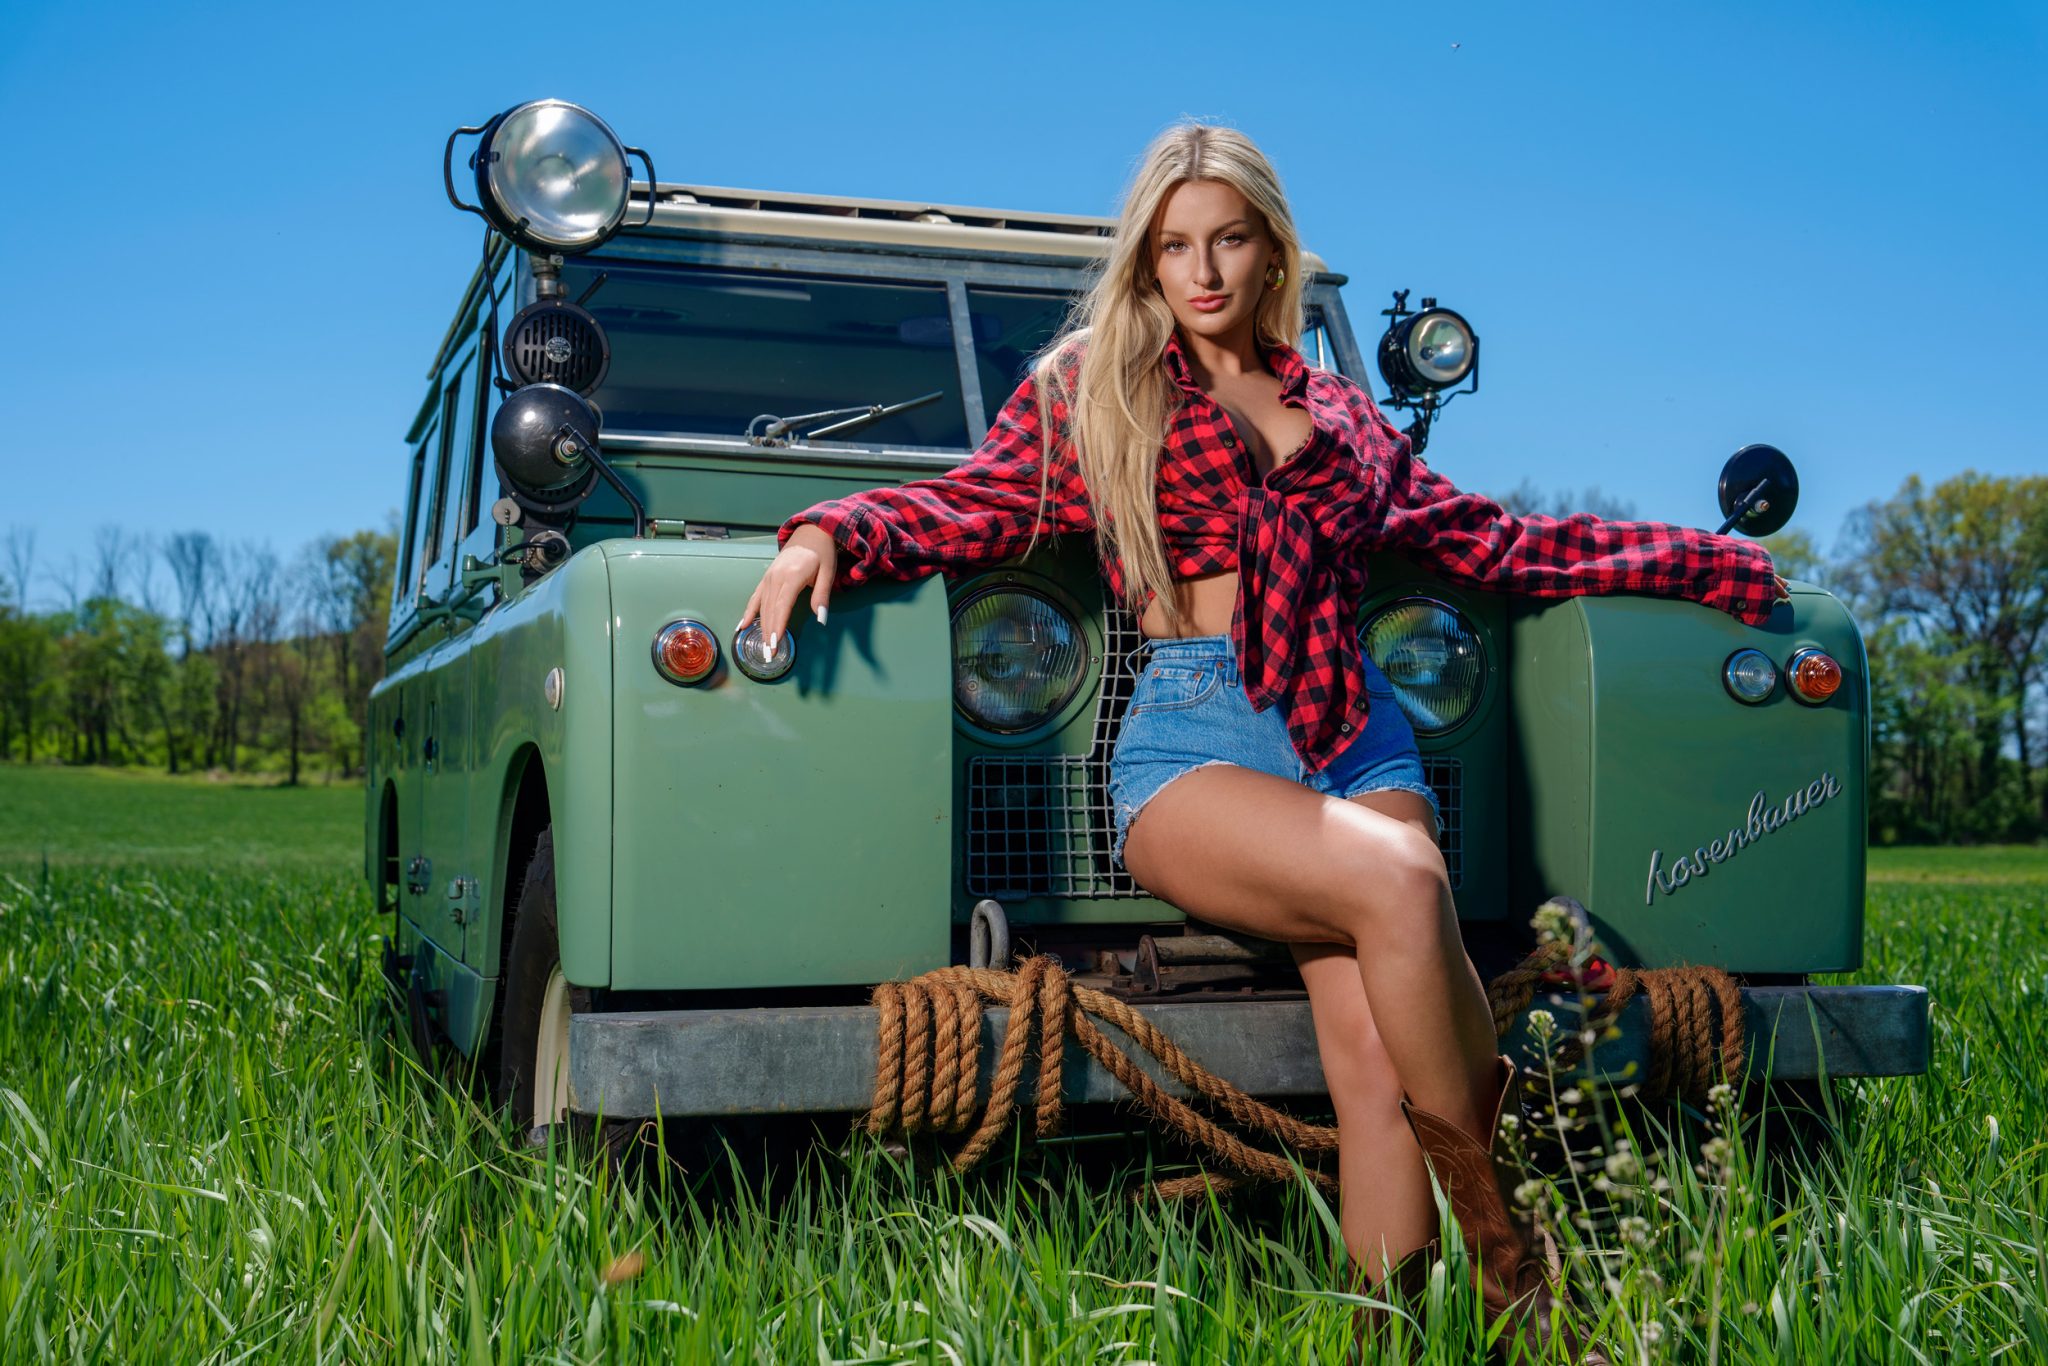
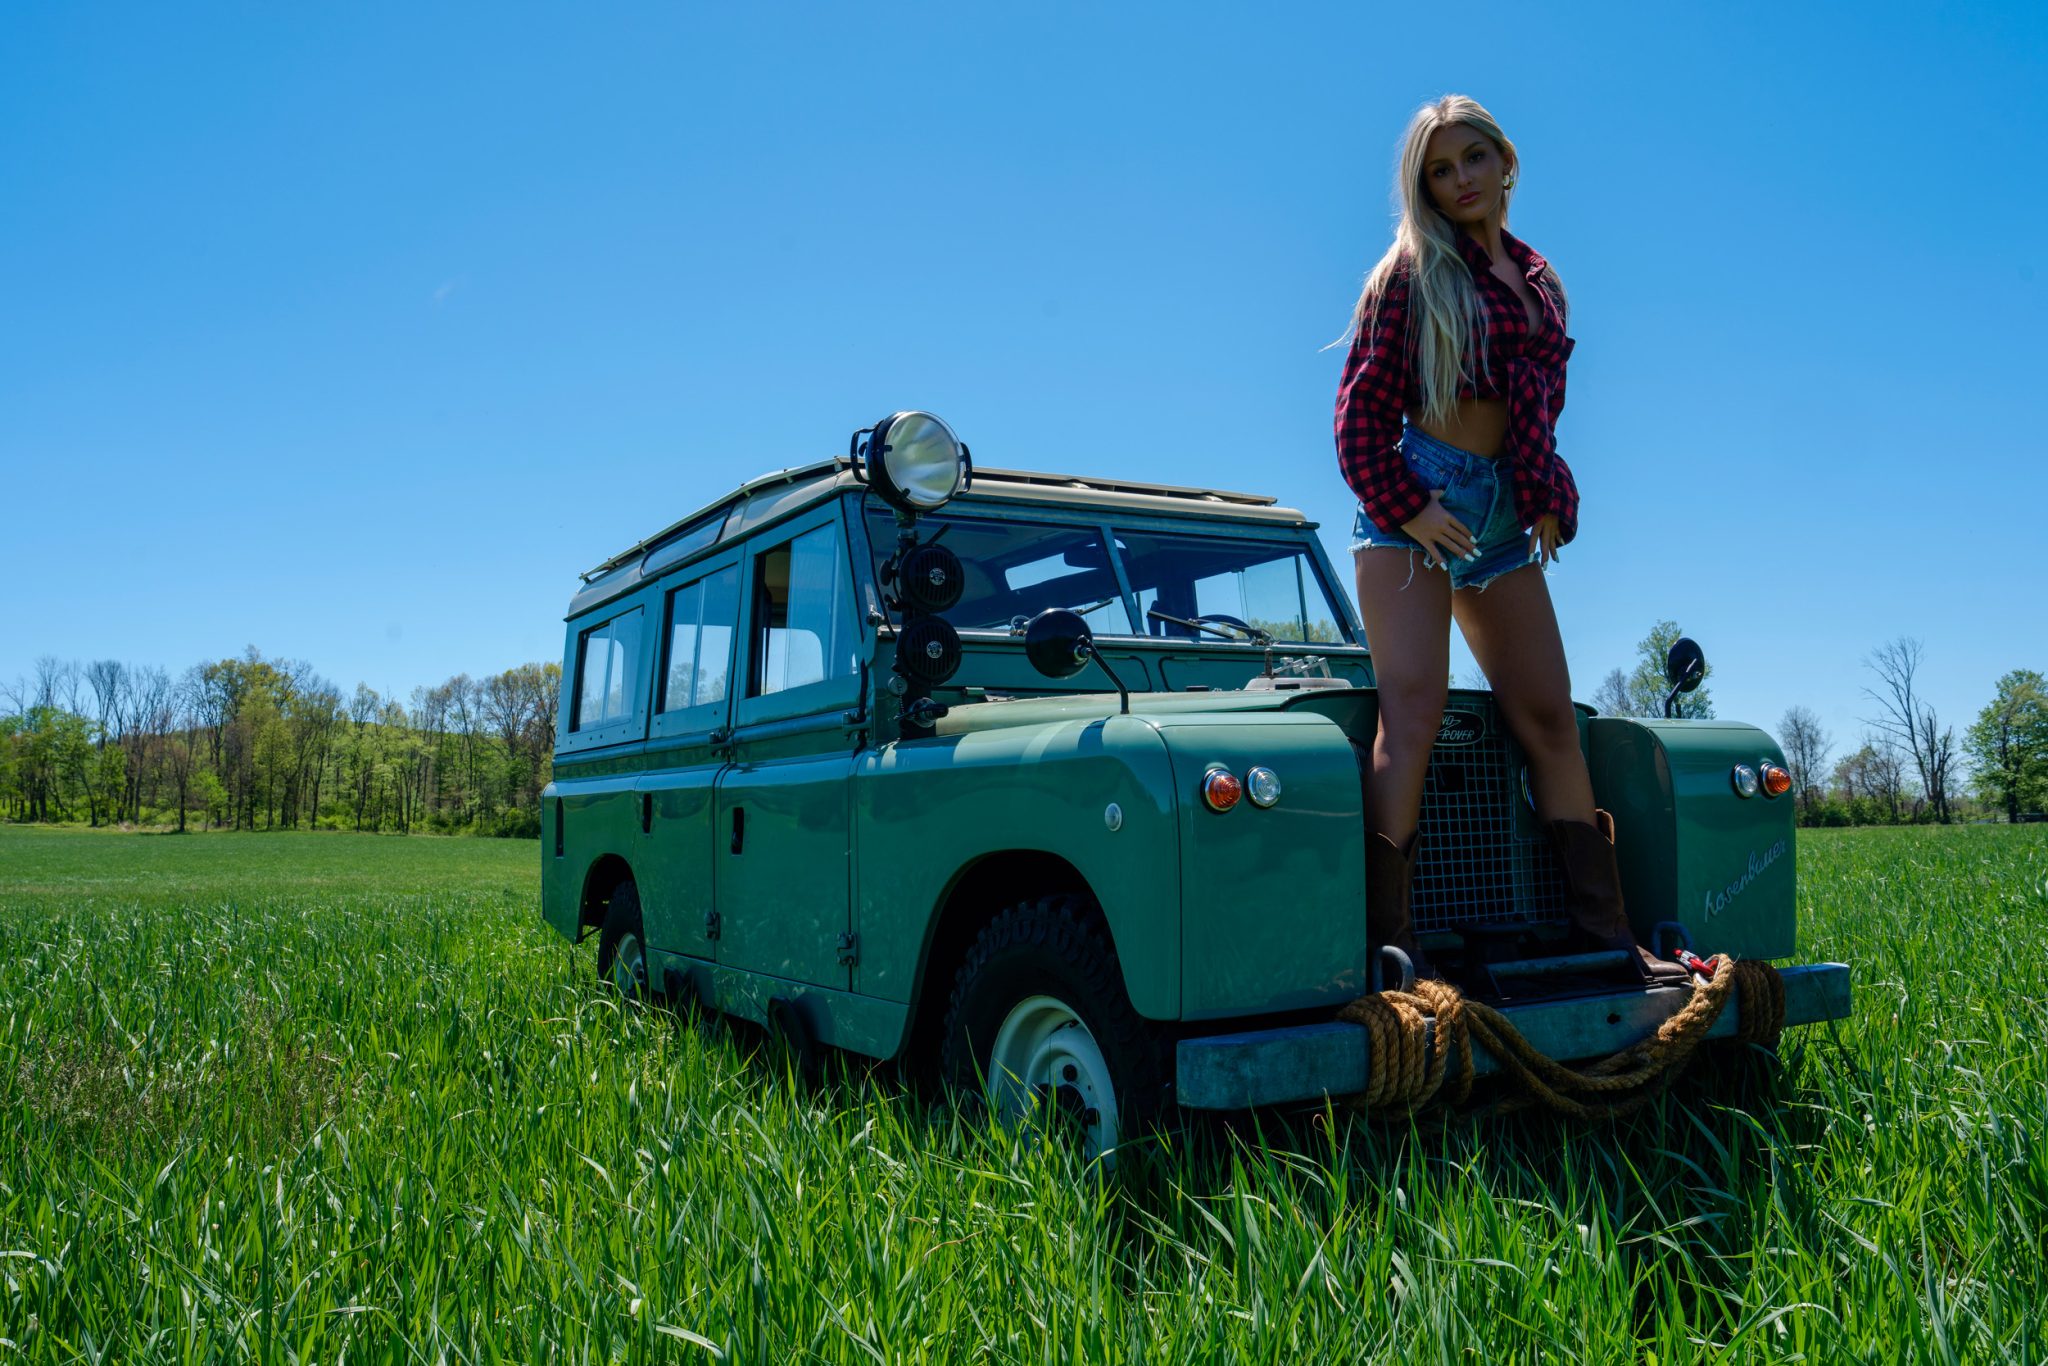
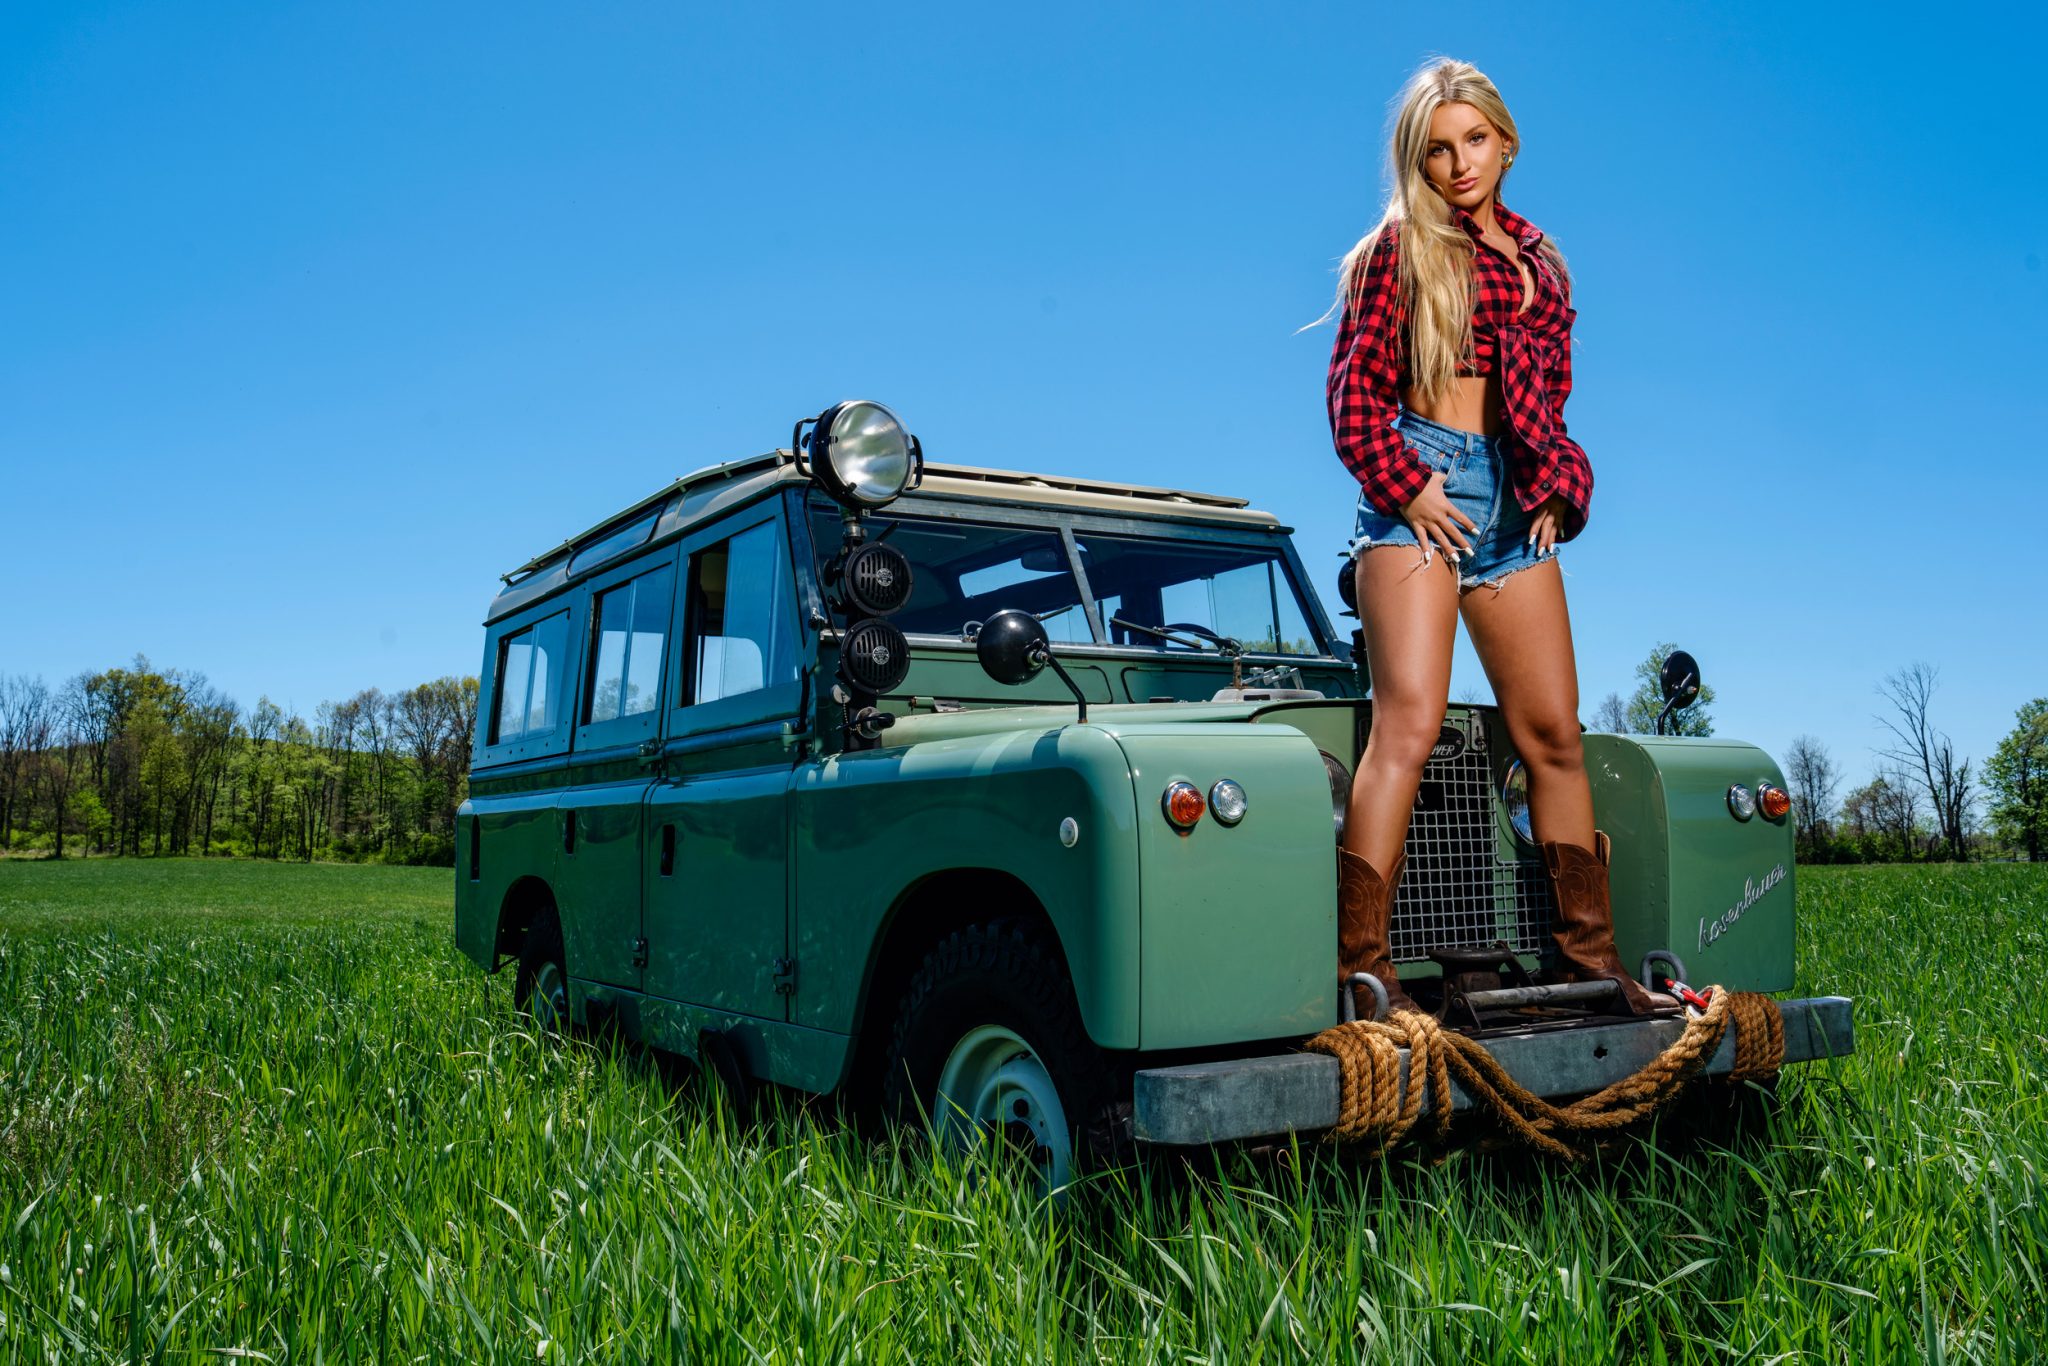
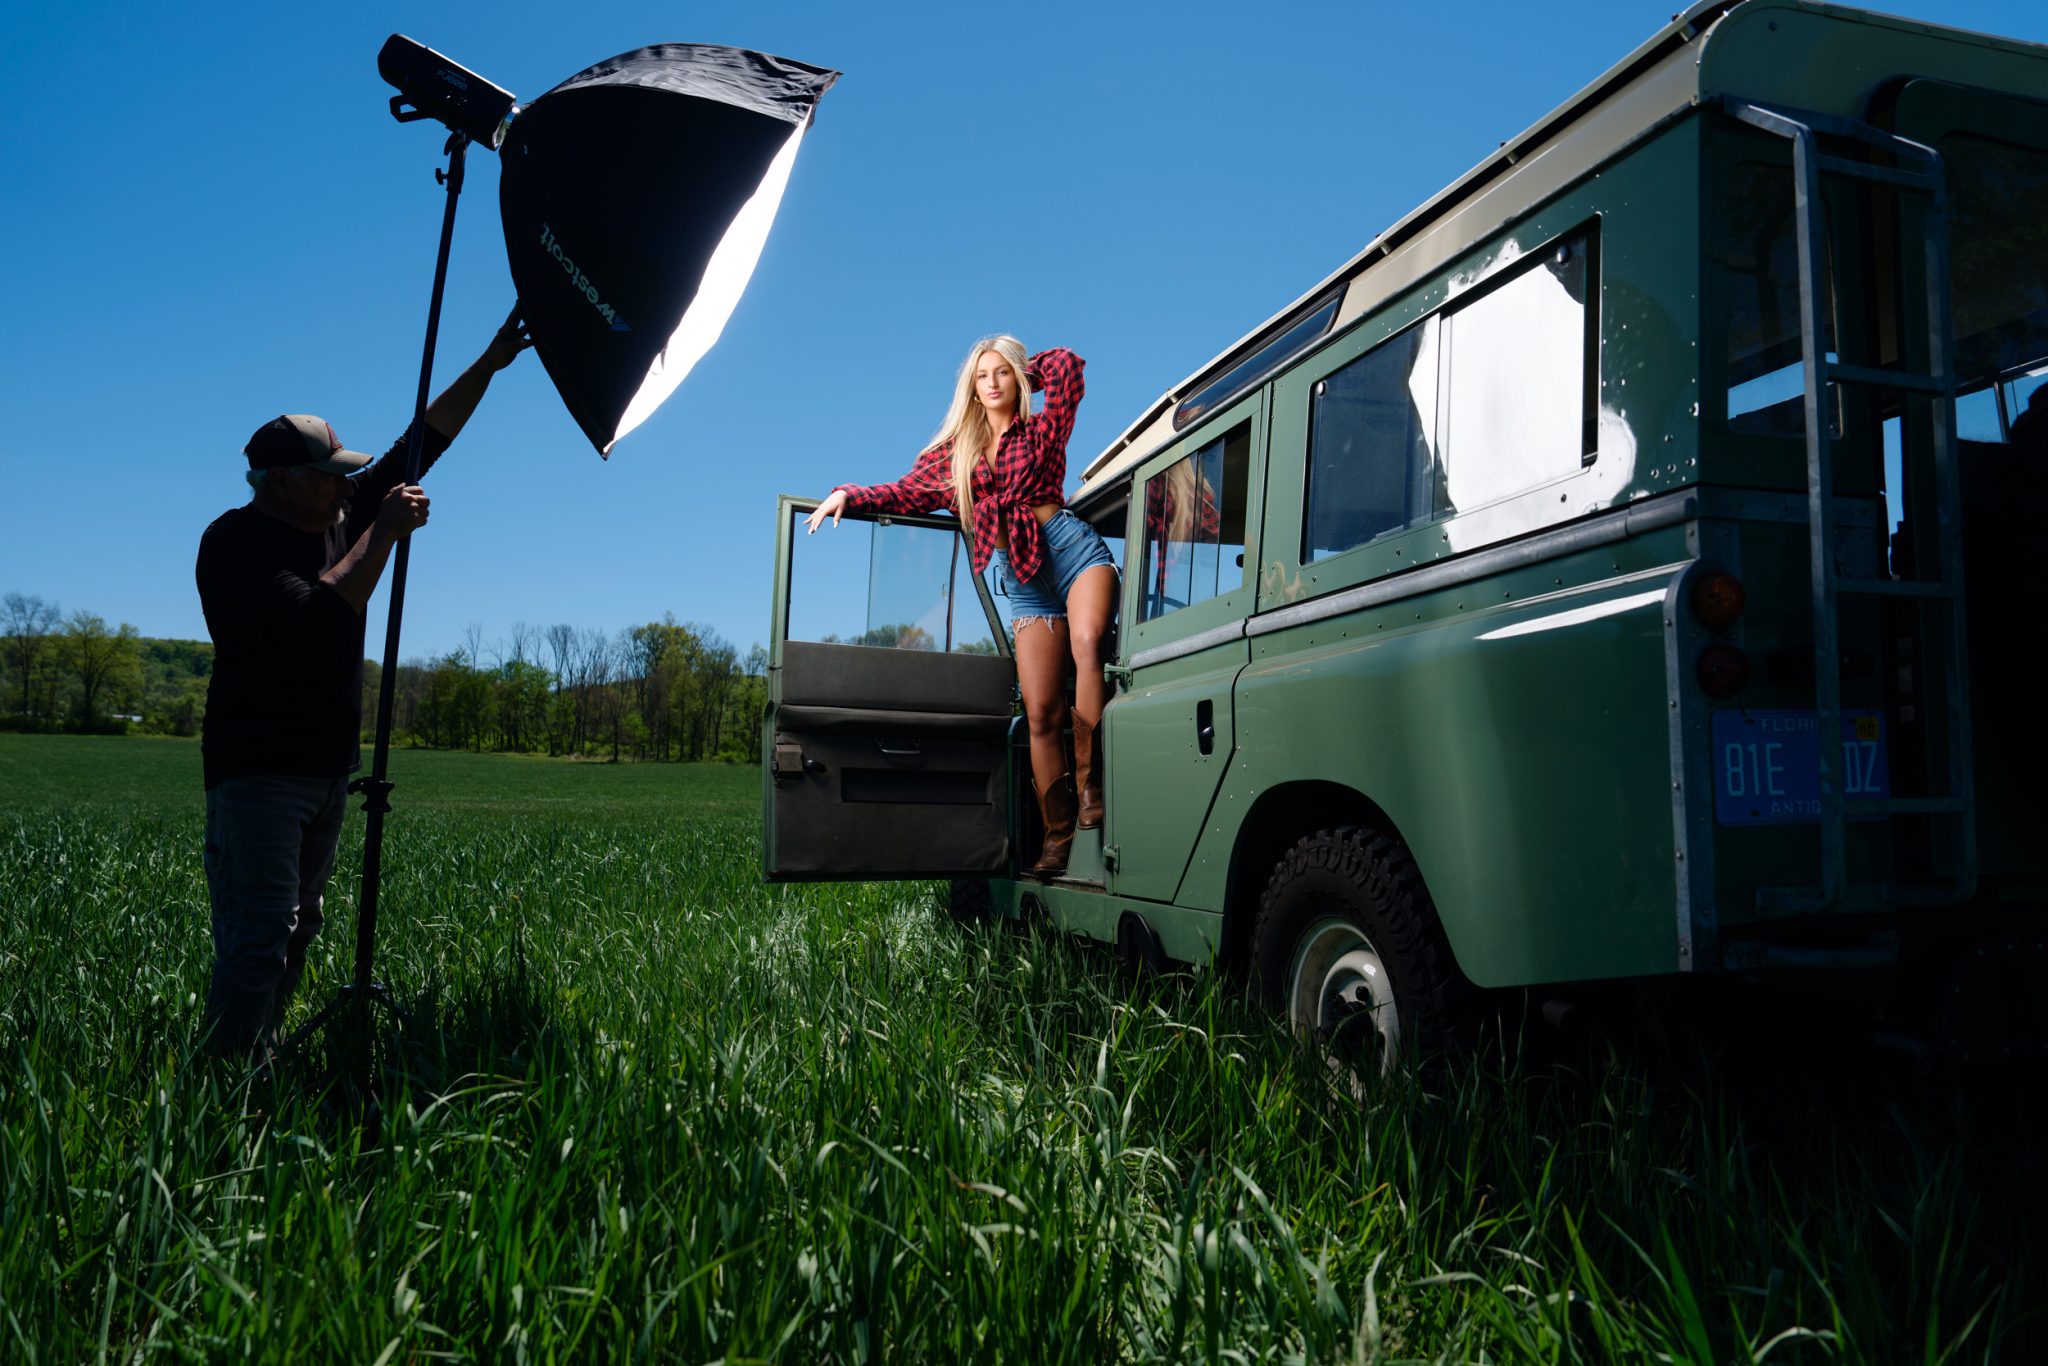
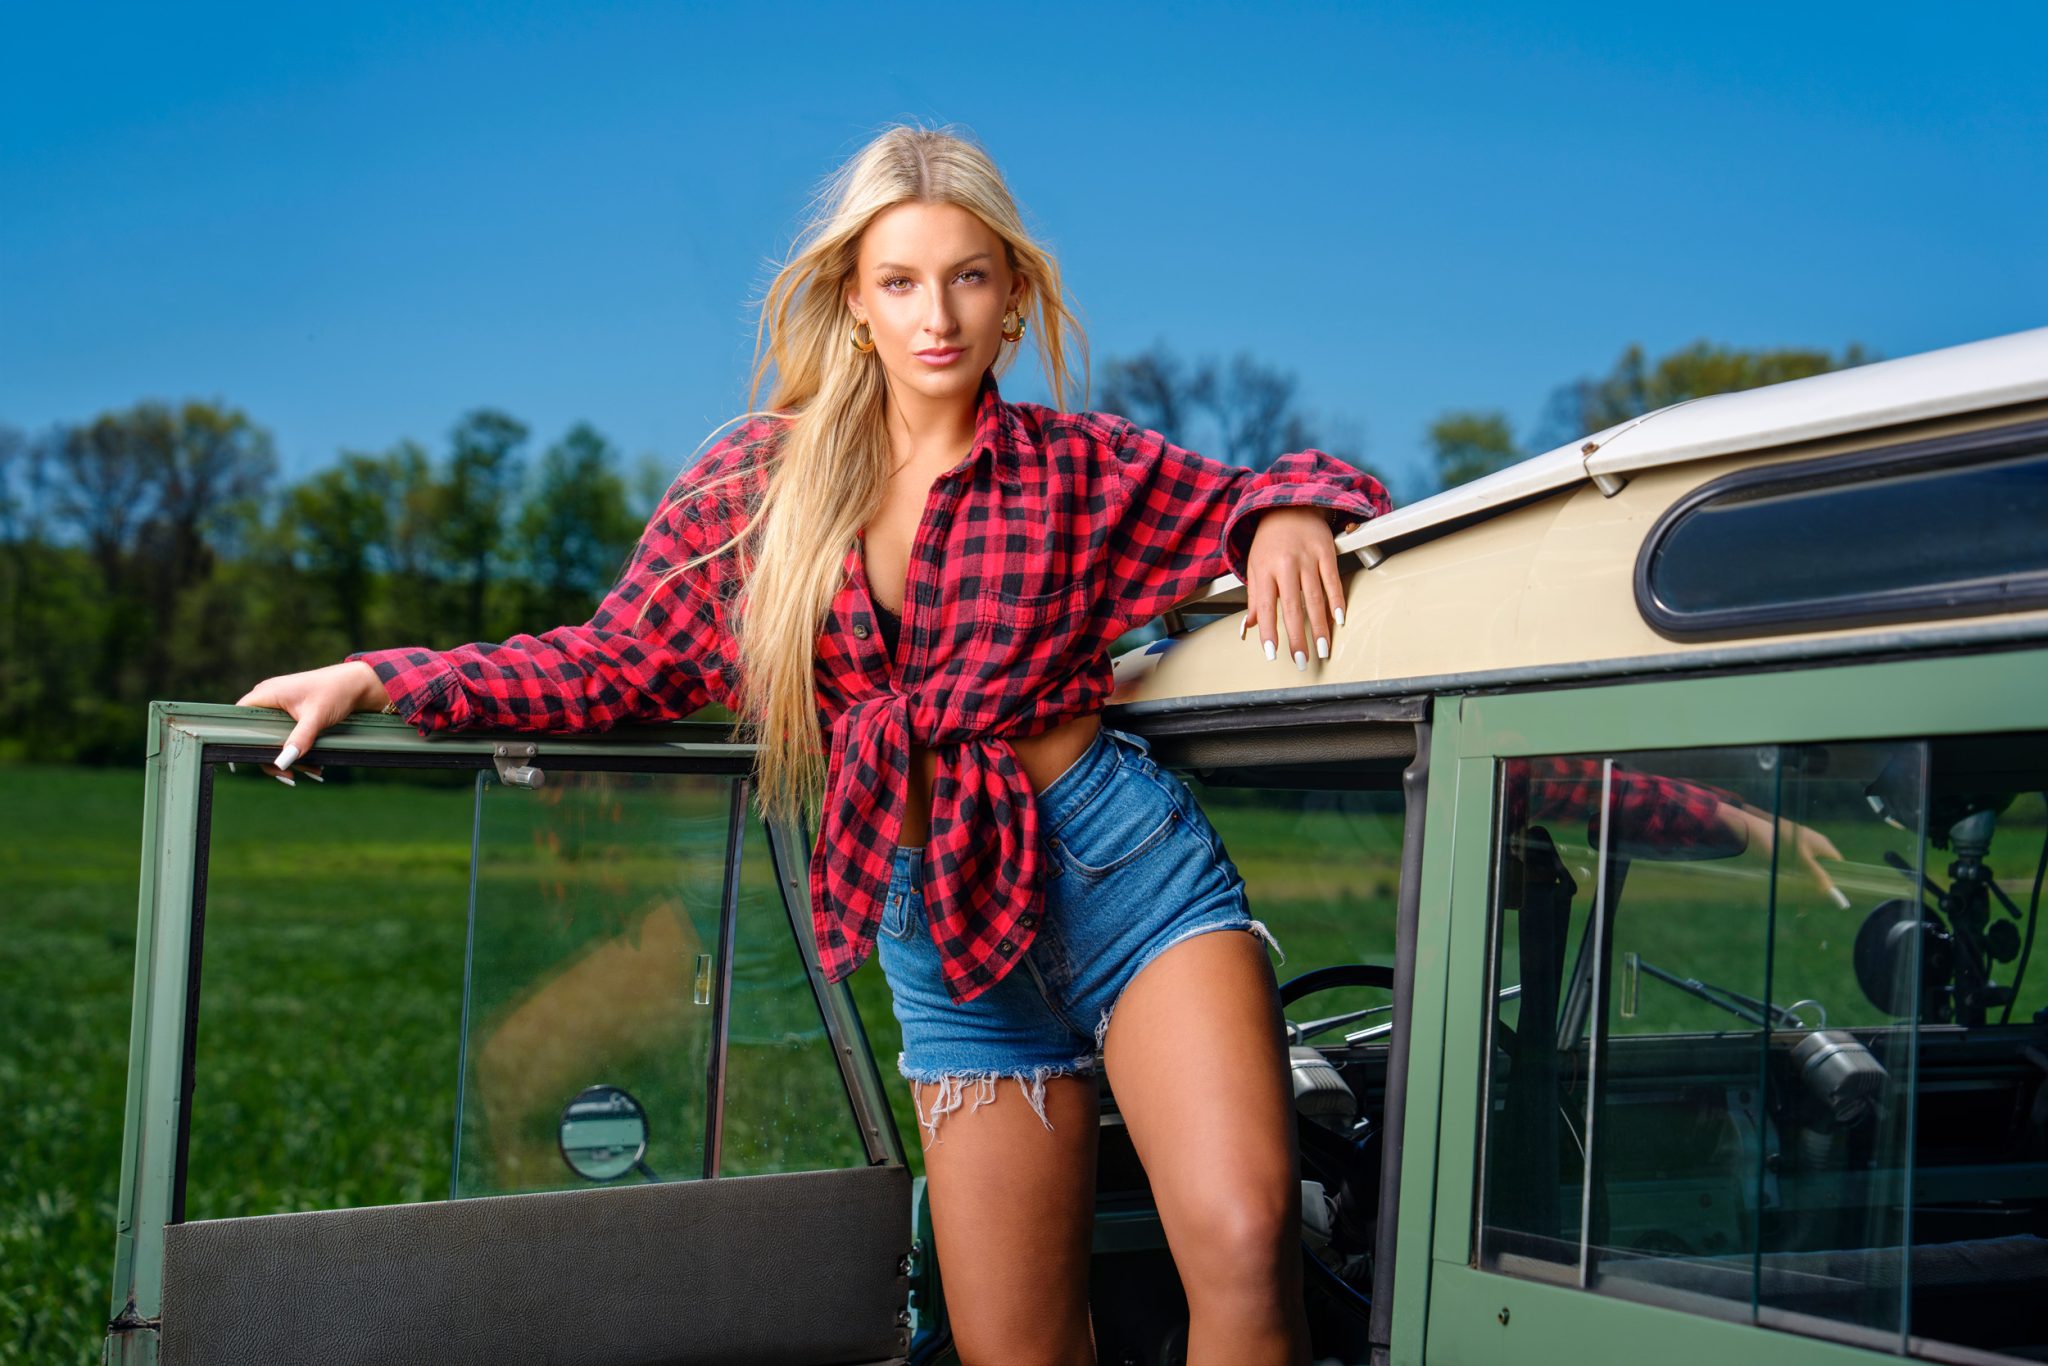
For the final look at 1:00 PM, JC shot in full overhead sunlight with a Land Rover. To overpower the midday sun, he brought out the Westcott FJ800 strobe.
JC positioned the vehicle so the sun remained behind Liv. This kept her from squinting into the harsh light while giving her hair a rim-lit glow. Using a 24-70mm lens set to F4 and a fast 1/2000s shutter speed, JC underexposed the sky and background by two stops to get dramatic, deep blue sky tones.
Using the Rapid Box Switch Octa-L placed close to Liv, the FJ800 added soft light to her face and the vehicle’s interior. By adjusting his flash power instead of changing his camera settings, JC maintained his dramatic background while keeping Liv well exposed.
Build Confidence One Photo at a Time
You don’t need to memorize every setting to get started with flash. Choose your camera settings, get the background where you want it, then add flash and adjust its power for your subject.
For your first practice session, keep it simple with one subject, one flash, and one location. Take a photo without flash, then add it and compare. If your subject looks too dark, increase the flash power. If they look too bright, lower it.
The first frame doesn’t have to be perfect. The goal is to know what to try next, and build confidence with every adjustment.
Want Tips for Picking the Right Modifier?
Check out How to Choose the Best Light Modifiers for Portrait Photography, where photographers Mark and Steve from Panoptic Photography walk you through the simple questions they ask before choosing a modifier for any shoot.


You must be logged in to post a comment.